Laserbot
Laser engraving at events: a guest takes a photo, AI turns it into a sketch, and the operator sends the finished design to a LaserPecker engraver.
1. What is Laserbot
Laserbot is a Windows application that controls LaserPecker engravers and turns guest photos into finished items right during the event. A typical flow:
- At the tablet by the stand, the guest picks a design, takes a selfie and, optionally, enters a name, email or text for an inscription.
- The job enters the queue. The software crops the photo, processes it with AI in the selected style and applies an engraving effect.
- The operator places the blank, checks the area with the laser highlight and confirms engraving — from the computer or from their own phone.
- The guest receives a receipt with the job number and collects the item using this number.
What you need
- A Windows 10/11 computer with internet access (for the license and AI processing).
- A LaserPecker engraver connected via USB. Work area markings and material presets are provided for LP4 and LP5.
- An API key for at least one AI provider (OpenAI, Gemini or Ksuse) — if you want photo stylization.
- Optional: a tablet with the Laserbot Client app for guests, the operator's phone, a receipt printer (ESC/POS, 58 or 80 mm tape), and an interatouch.app account — if guests will upload their own photos from their phones.
2. Quick start before the event
A short checklist. Details are in the corresponding sections.
- Create a session for the event: the gear icon in the Control panel → + Add session. → Sessions
- Add lasers: + Add laser in the right panel, select the COM port. Each session has its own list of lasers. → Lasers
- Check your AI keys in Prompt Builder → Configure → Check key. → Prompt Builder
- Set up templates: layers, photo processing style, material and engraving parameters. Run Test template on a real blank. → Templates
- Connect the guest app: open the Guest Station section and scan the QR code in the Laserbot Client app. The most reliable option is a dedicated network via the Windows Mobile hotspot. → Guest Station
- If needed, enable receipt printing. If guests will upload their own photos from their phones, bind an event in Sharing Portal.
- Click Start session. From this moment the software accepts guest jobs and processes photos.
3. Main window
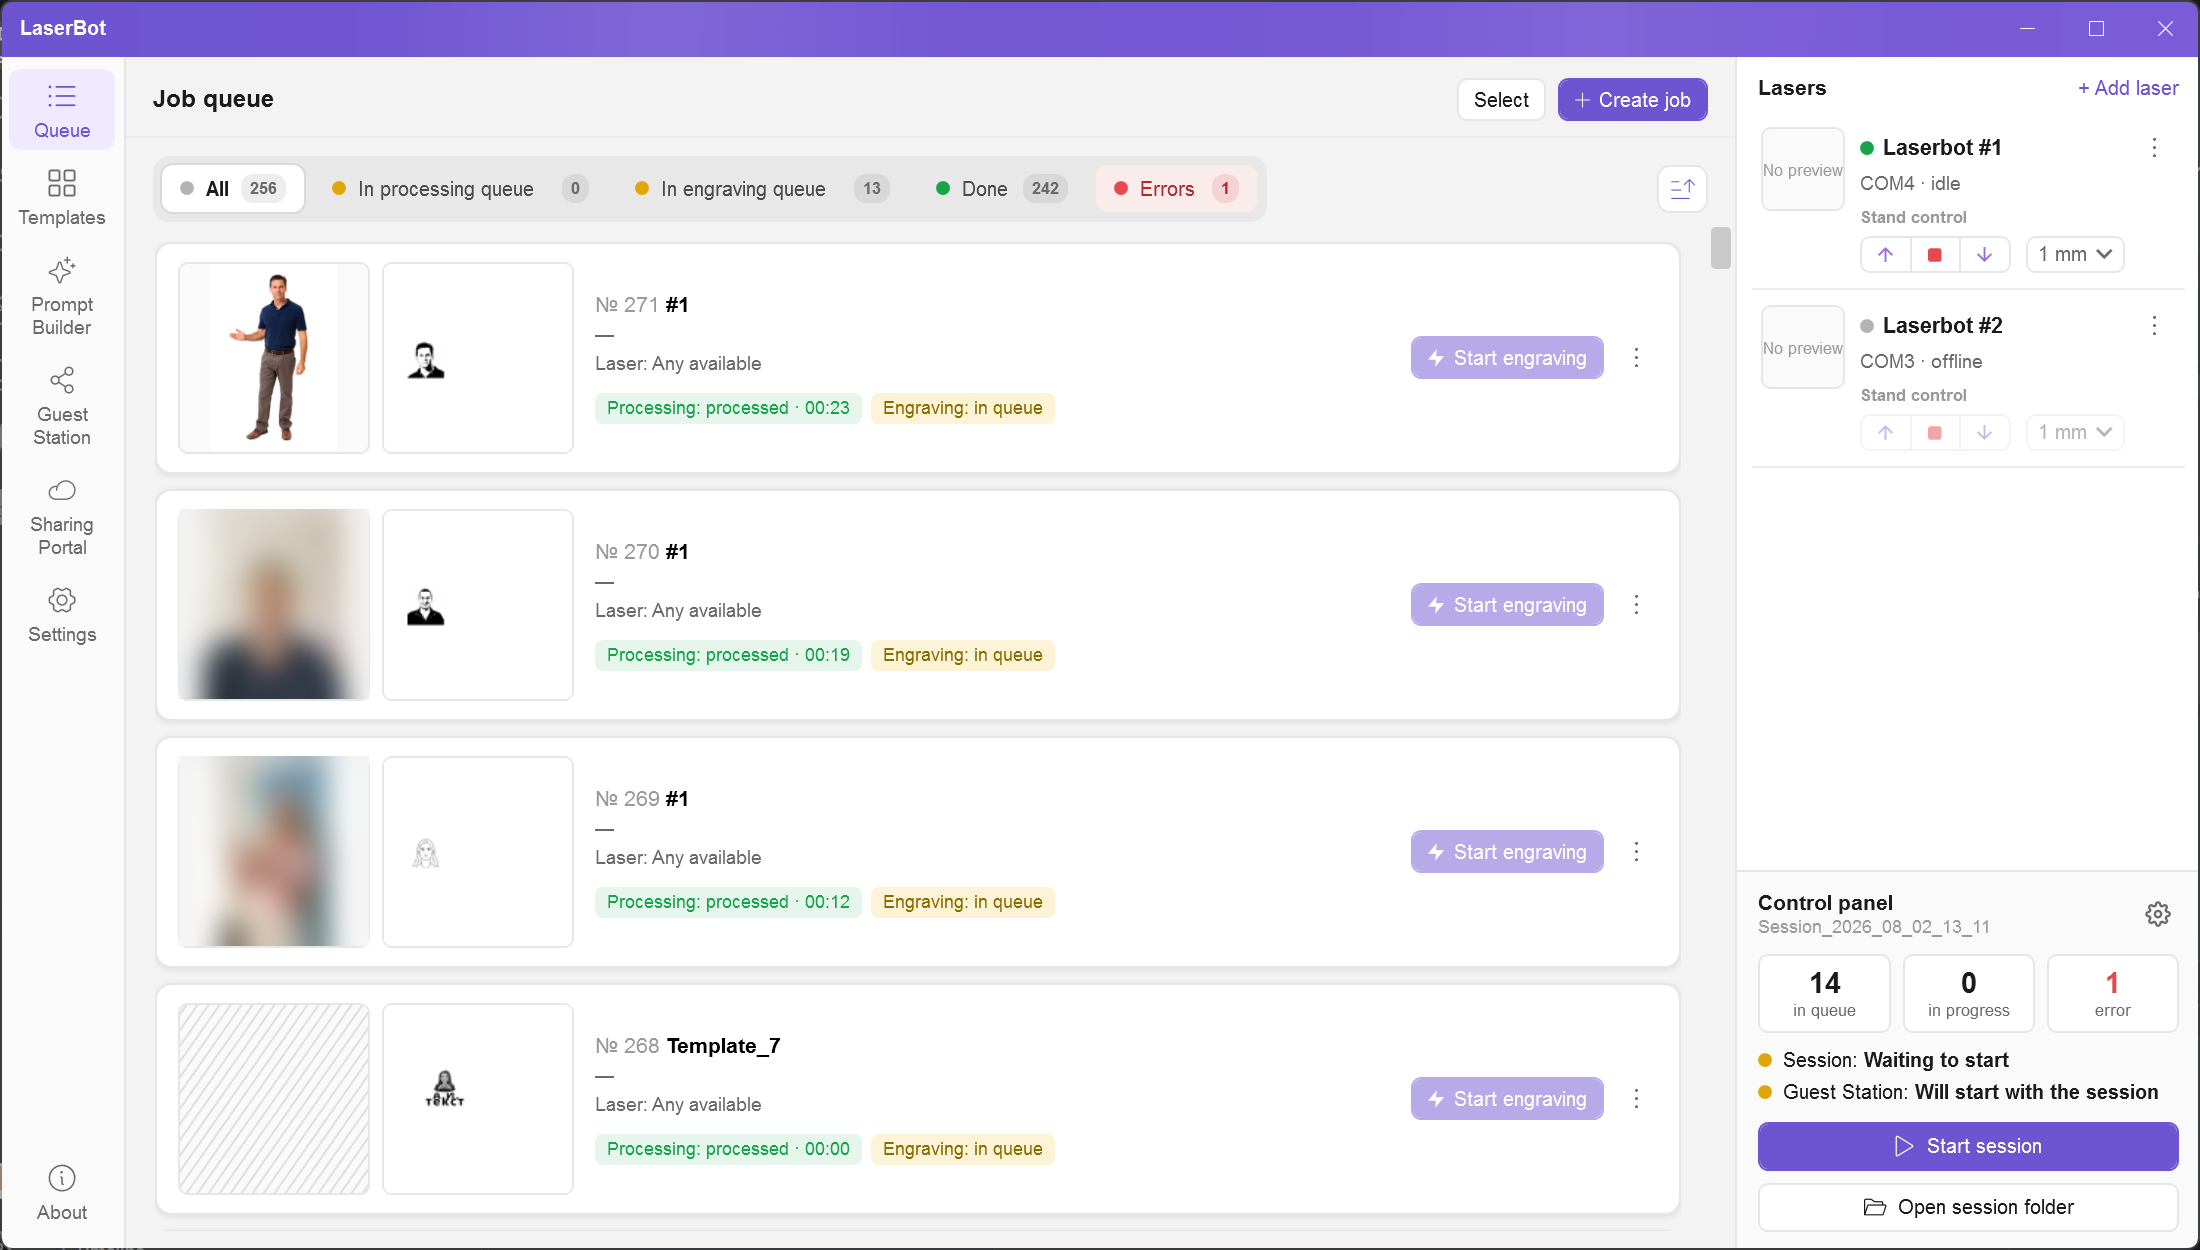
Left column — sections
| Section | Purpose |
|---|---|
| Queue | All session jobs, their statuses, starting engraving. Opens at startup. |
| Templates | Item designs: layers, photo processing, laser parameters. |
| Prompt Builder | AI provider keys and photo processing styles (prompts). |
| Guest Station | Local server for the guest app and the operator page. |
| Sharing Portal | Connecting a cloud event so guests can upload their own photos. |
| Settings | Language, stand, markings, folders, receipt printing. |
| About | Version, updates, license status. |
Right panel
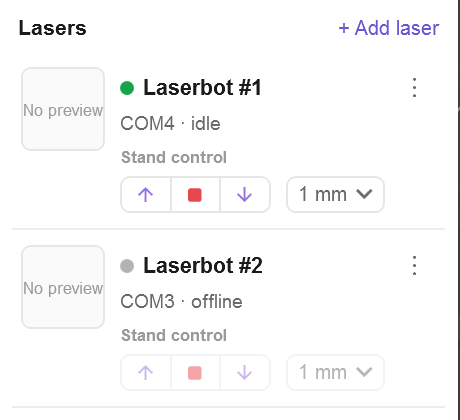
- Lasers — a card for each engraver: a status dot, port, the three-dots menu (Edit, Delete) and the Stand control block. While engraving, the card shows the job number and a thumbnail of the design.
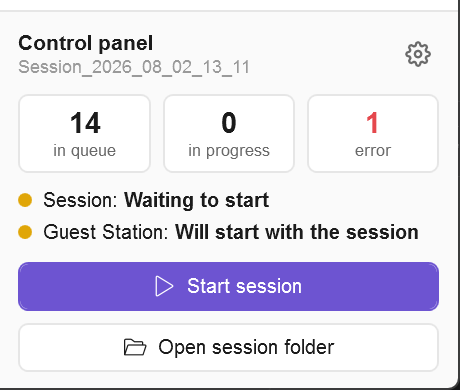
- Control panel — session name, gear icon (session manager), counters in queue / in progress / error, the Start session (Stop session) and Open session folder buttons.
Starting and stopping a session
On start, the software begins processing photos (2 jobs at a time), attaches engraving handlers to all added lasers and, if enabled, starts Guest Station.
On stop:
- running engravings are aborted and get the cancelled status;
- unfinished processing returns to the queue;
- Guest Station stops.
4. Sessions
A session is the "event folder". It stores templates, prompts, the list of lasers, the job queue, original photos and results. It is convenient to create a separate session for each event.
Shared across all sessions: AI provider keys, the Sharing Portal account, stand settings, Guest Station and receipt settings.
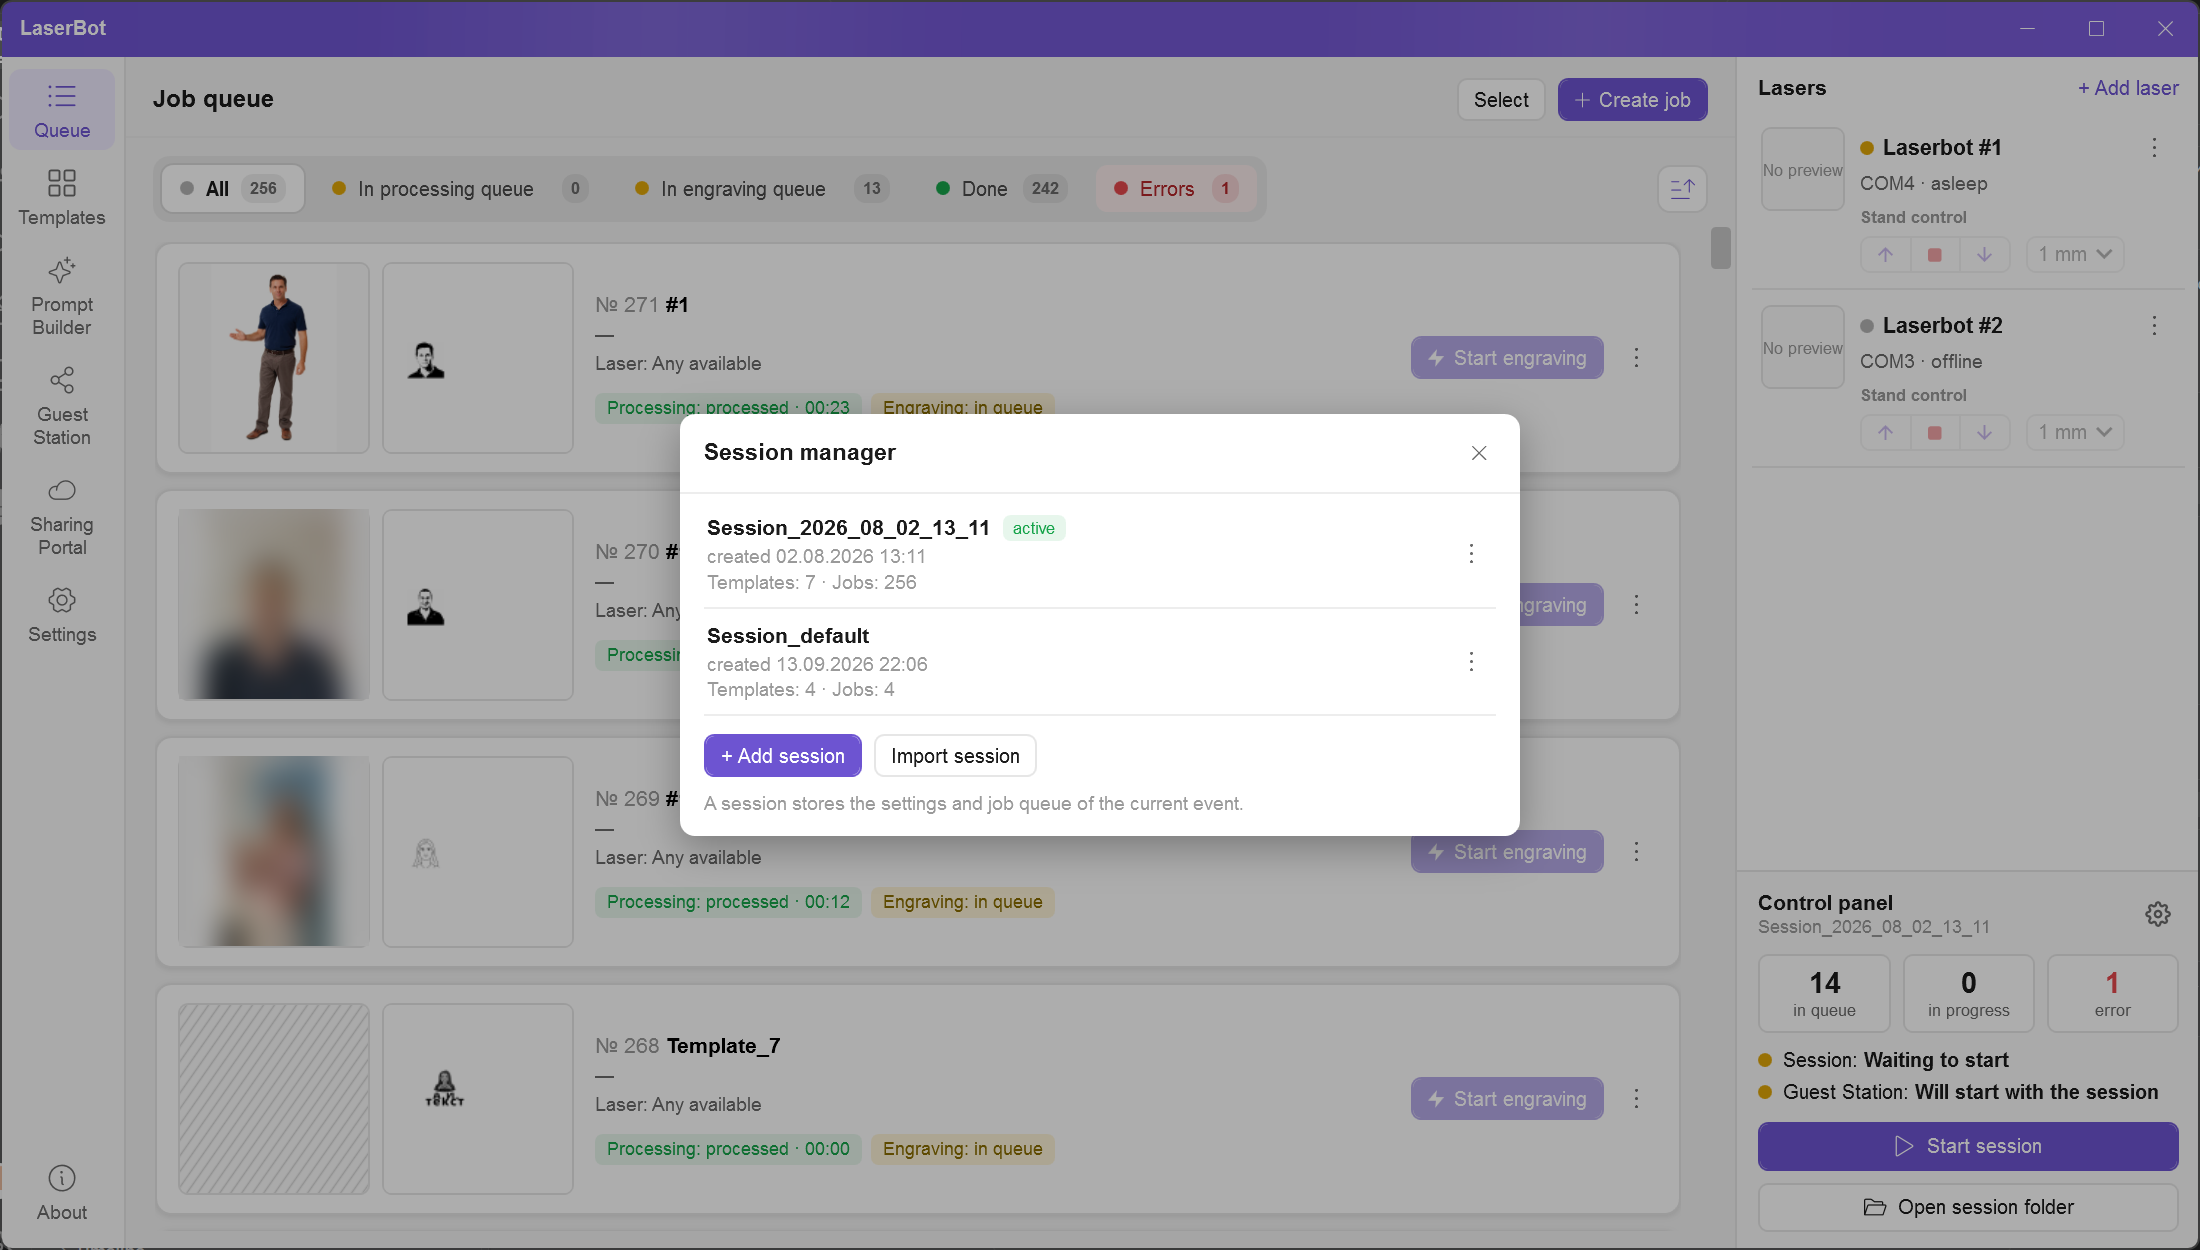
Creating a session
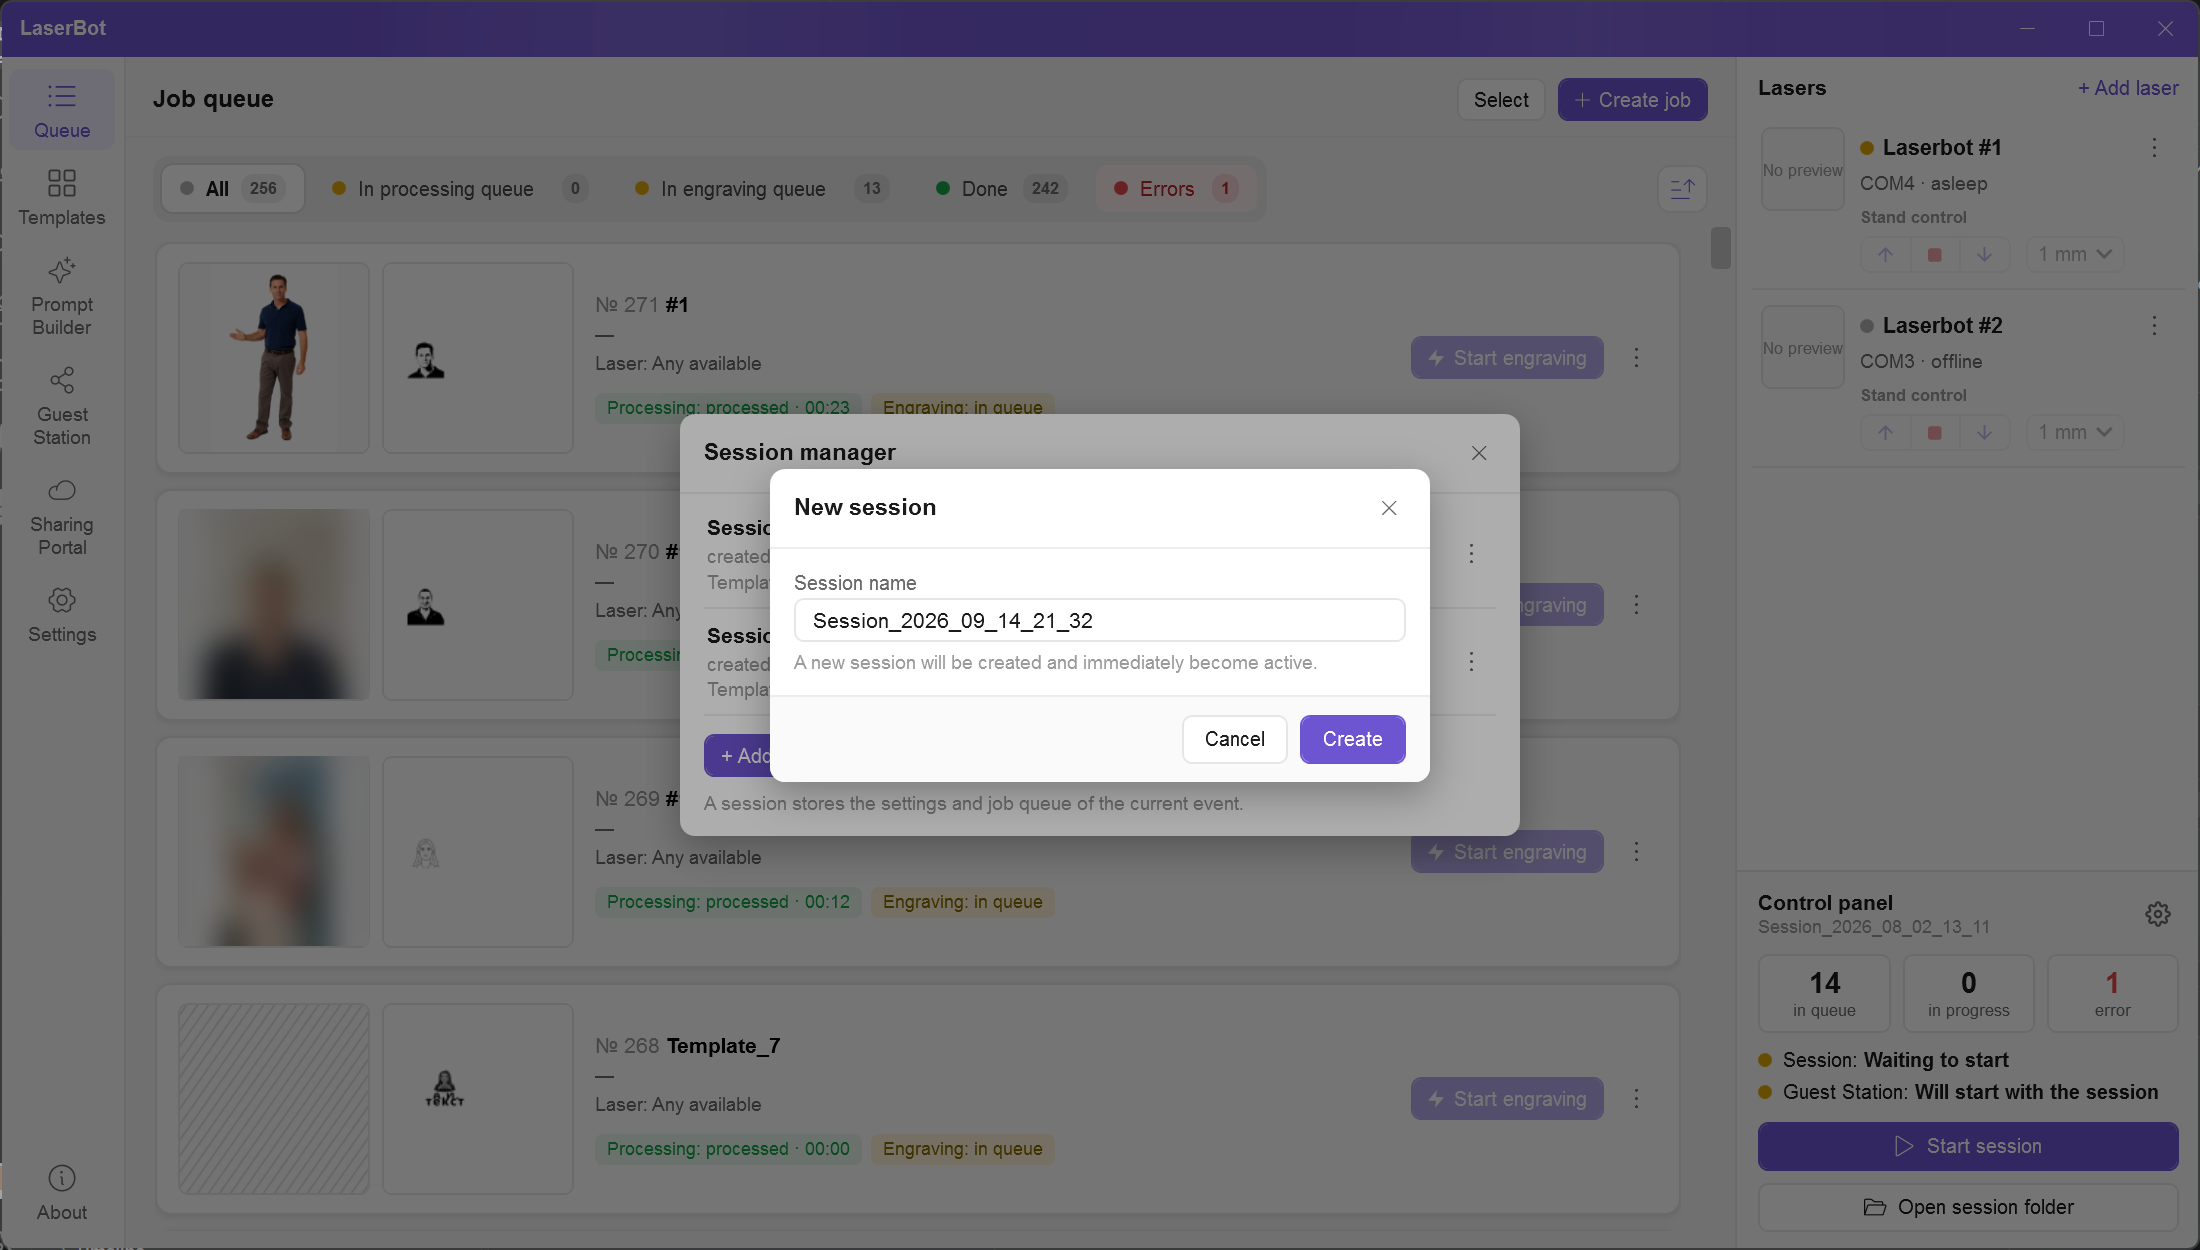
- Click + Add session.
- Enter a name or keep the suggested one (
Session_YYYY_MM_DD_HH_MM). The characters\ / : * ? " < > |and a trailing period are not allowed. - Click Create. The new session becomes active immediately.
Session actions
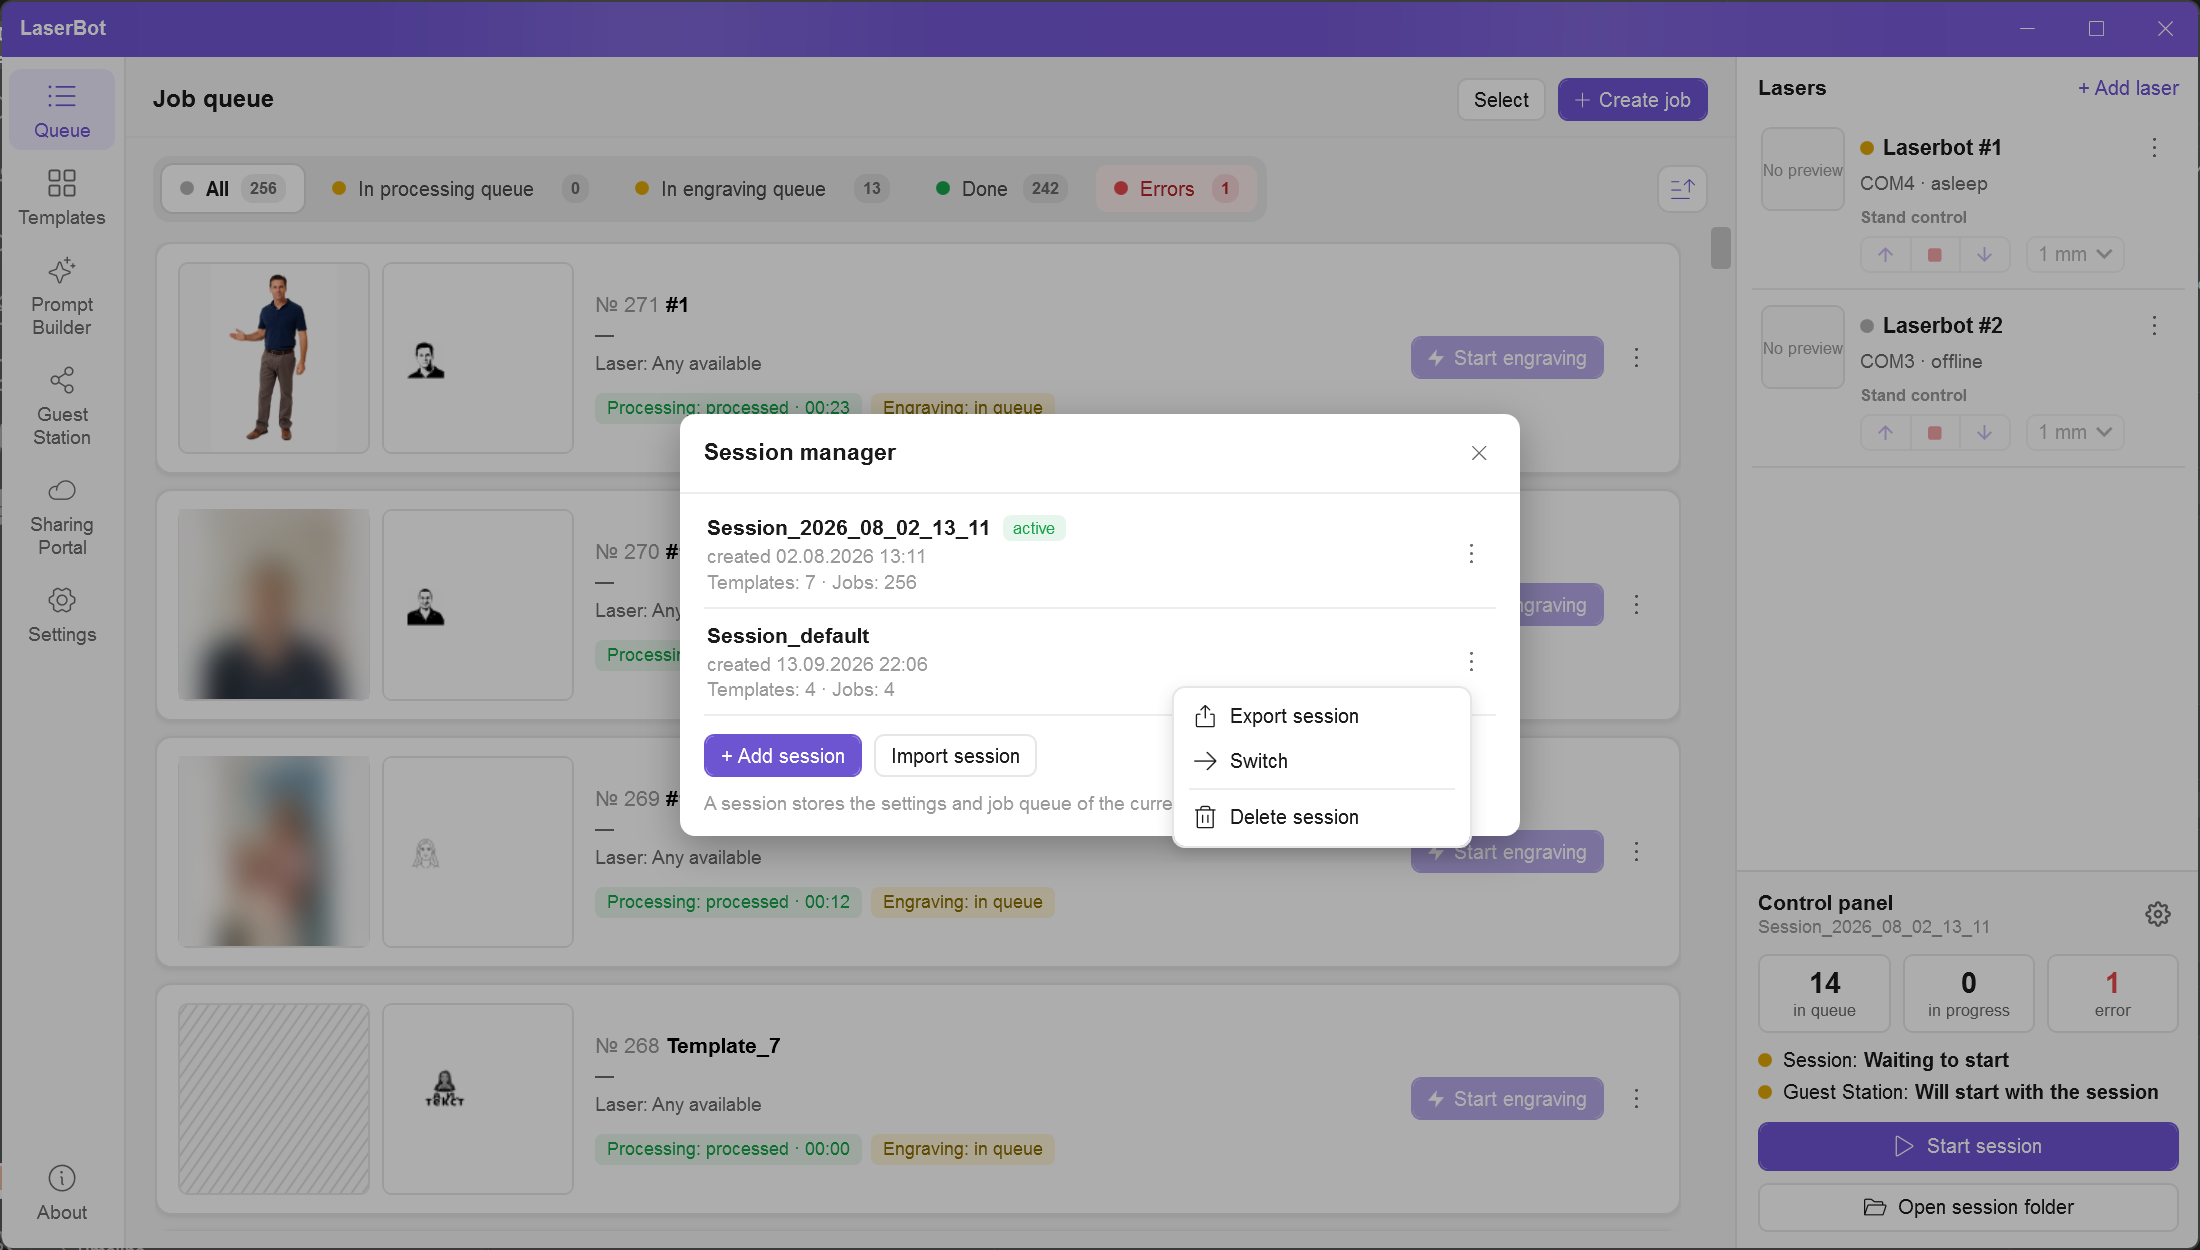
- Switch — make the session active. Changes to the current session are already saved automatically; the new one opens in the "Waiting to start" state.
- Export session — save templates, prompts and their files to a
.zip. Jobs, guest photos and lasers are not included. Useful for moving ready designs to another computer or to the next event. - Import session — create a new session from an archive. The laser of each template is reset to "Always ask". The imported session does not become active — switch to it.
- Delete session — deletes the session folder permanently, including the queue, original photos and results. The active session cannot be deleted.
5. Lasers and stand
Connecting a laser
- Connect the LaserPecker via USB and turn it on.
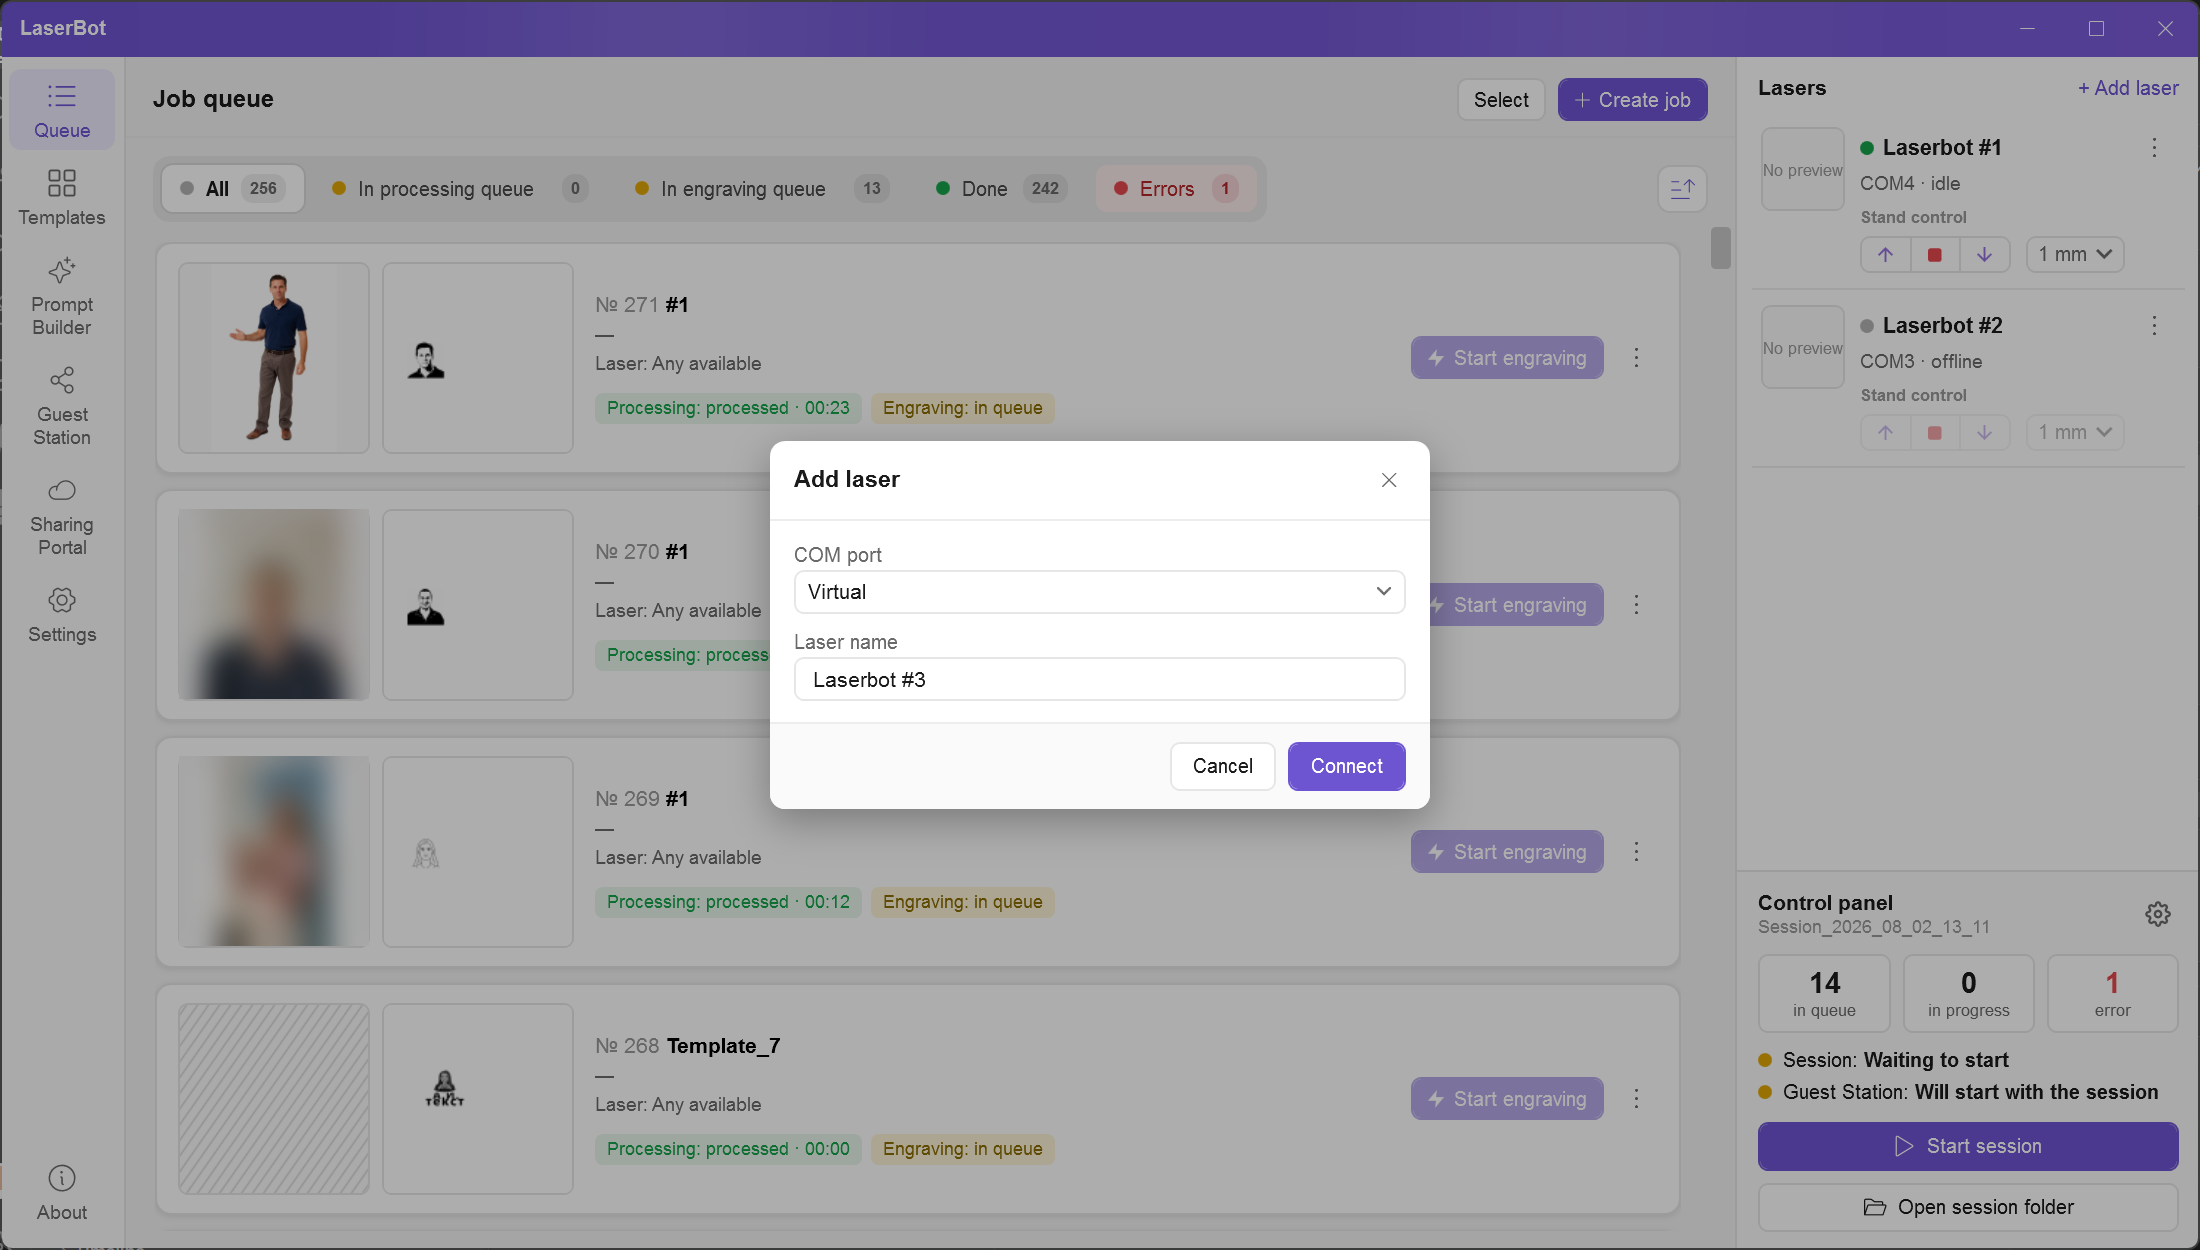
- Click + Add laser in the right panel.
- Select the COM port and change the name if you like.
- Click Connect. The model (LP4, LP5, etc.) is detected automatically.
Laser statuses
| Label | Dot | Meaning |
|---|---|---|
| idle | green | The device is connected and ready. |
| busy | green | Engraving or a test is in progress. |
| asleep | yellow | The port exists but the device does not respond (e.g., in sleep mode). |
| connection error | red | Communication failure — check the cable. |
| offline | gray | Port not found: cable disconnected or device off. |
Area highlight, tests, stand control and engraving are available only in the idle state. An LP5 without its security key shows "No security key" — engraving is blocked.
Laser settings and deletion
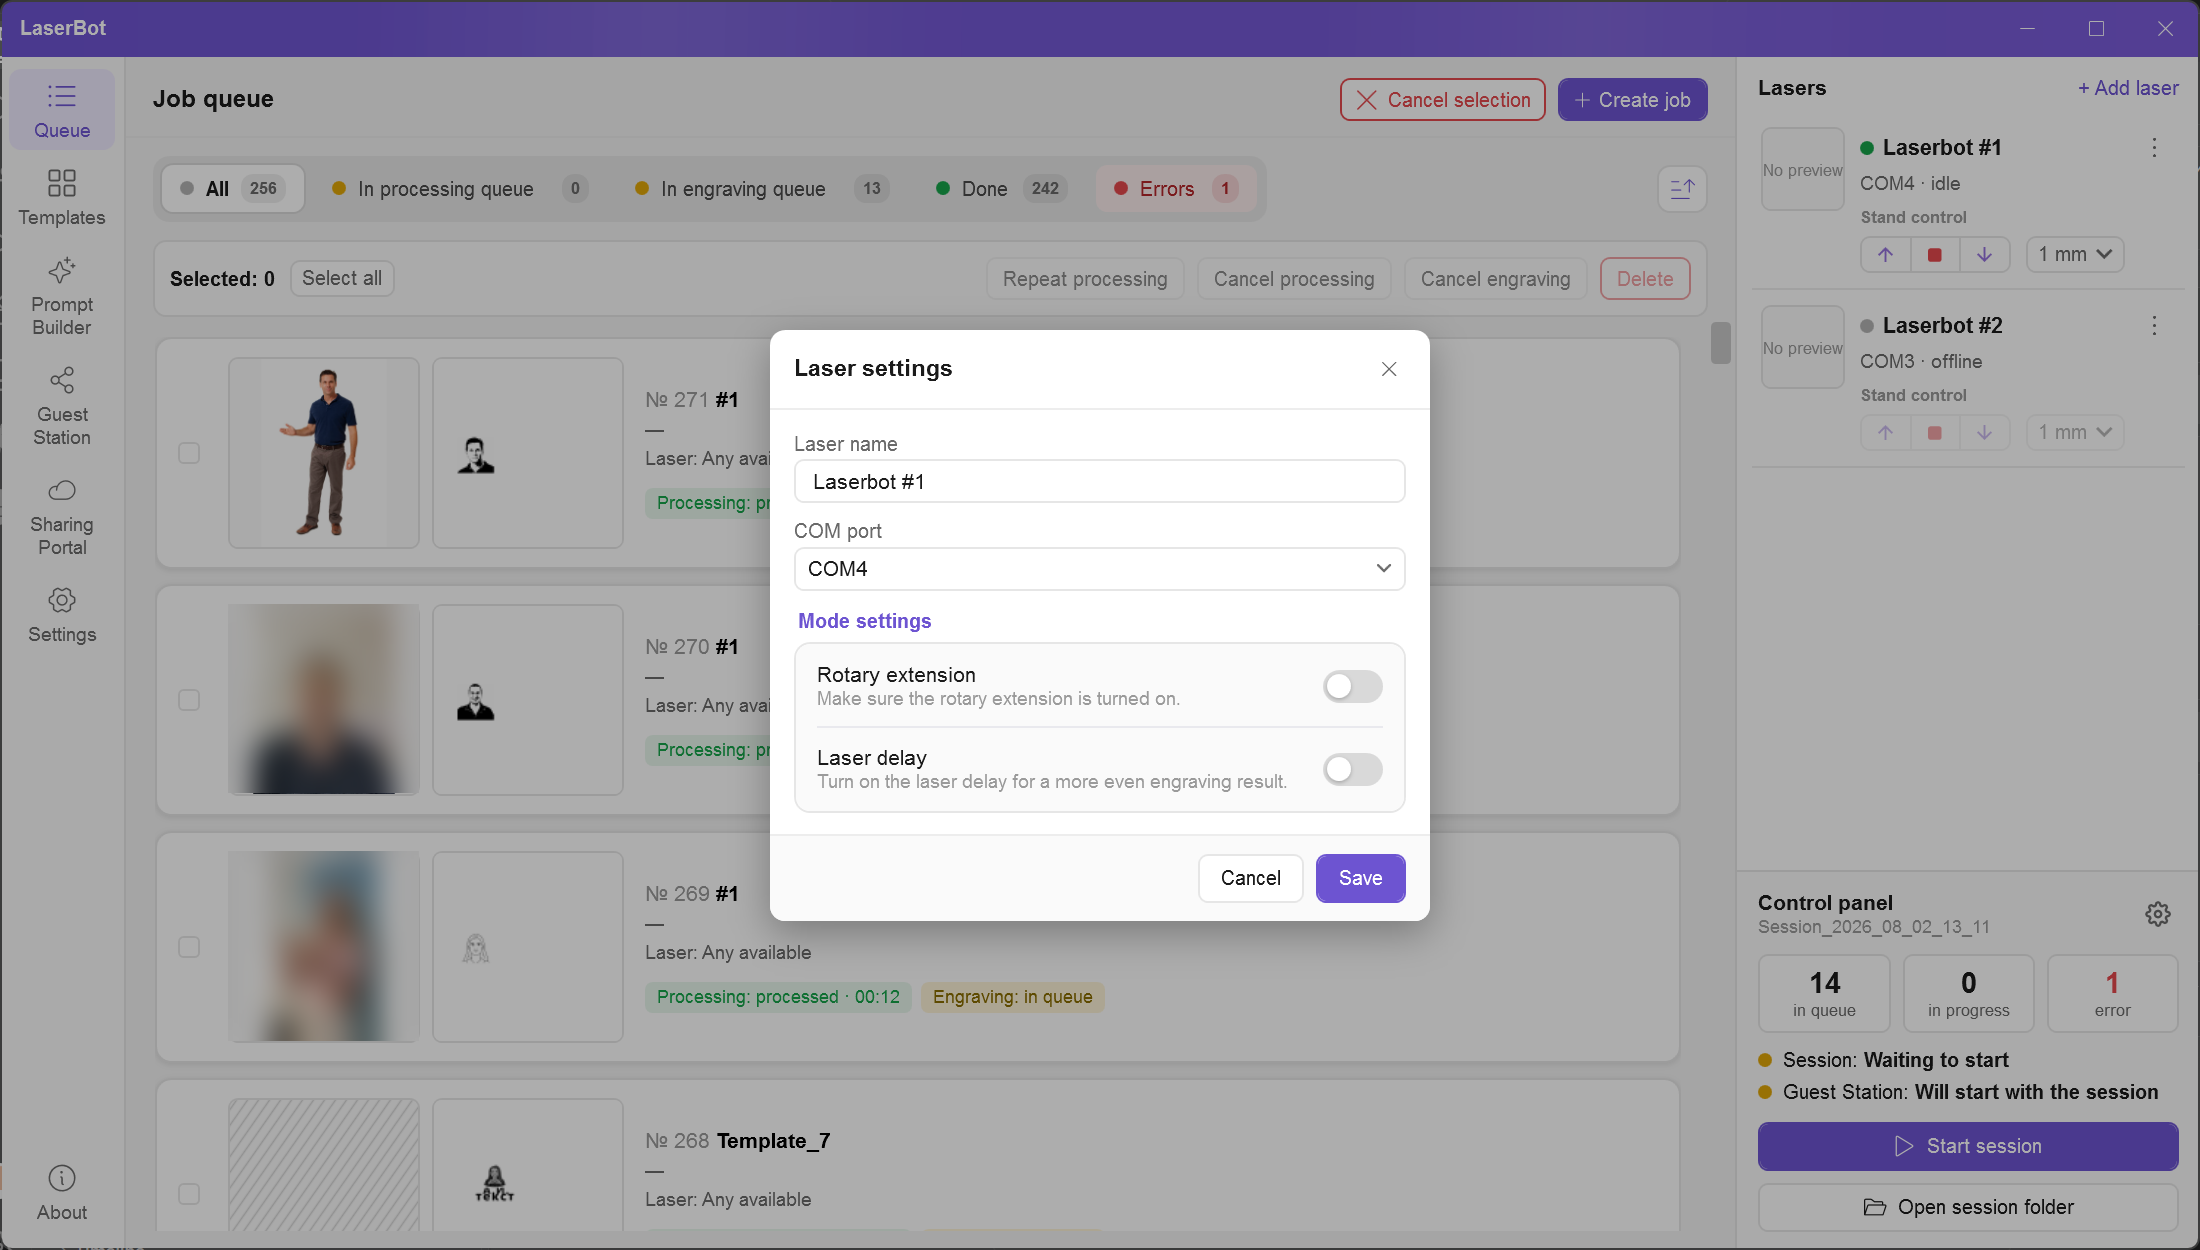
- Laser name and COM port.
- Rotary extension — turn on if you engrave cylindrical items (cups, tumblers). "Cylinder" templates are sent only to lasers with the rotary turned on, and flat templates only to lasers without it.
- Laser delay — for a more even engraving result.
Mode settings are written to the device itself, so the laser must be connected. When a laser is deleted, templates bound to it switch to "Always ask".
Stand control
In the laser card: ↑ — raise, ■ — stop, ↓ — lower. The 1 mm button sets the step per press (1–50 mm). Stand control is unavailable while the rotary extension is connected.
Automatic lifting after engraving and lowering before it are configured in Settings → Lasers.
6. Templates
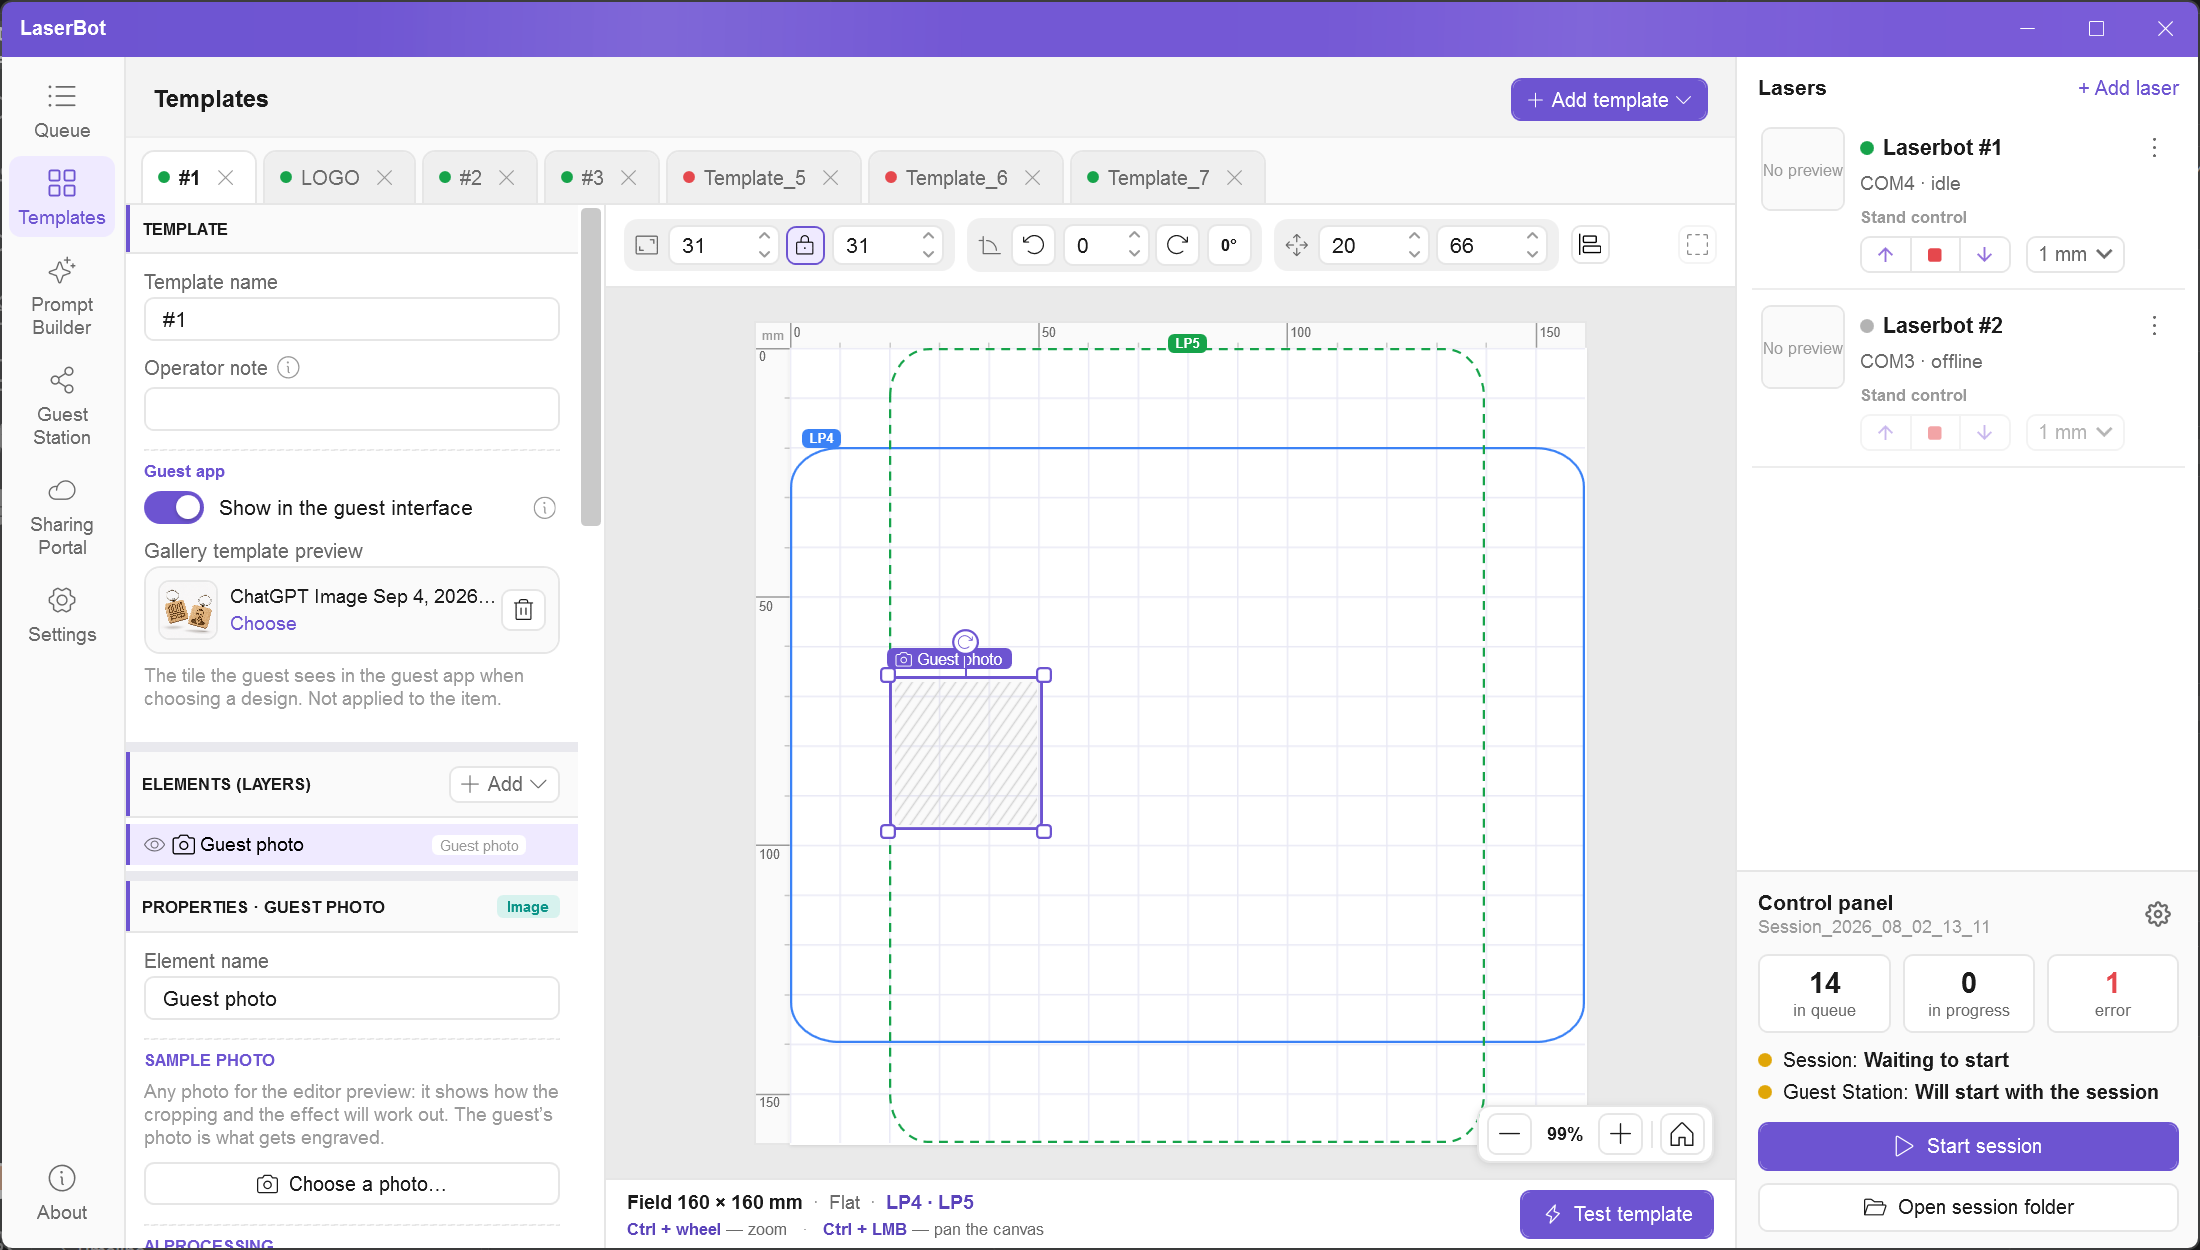
A template is the item design: which layers to engrave, how to process the guest photo, which material and parameters to use. A session can hold up to 10 templates.
Creating, copying, deleting
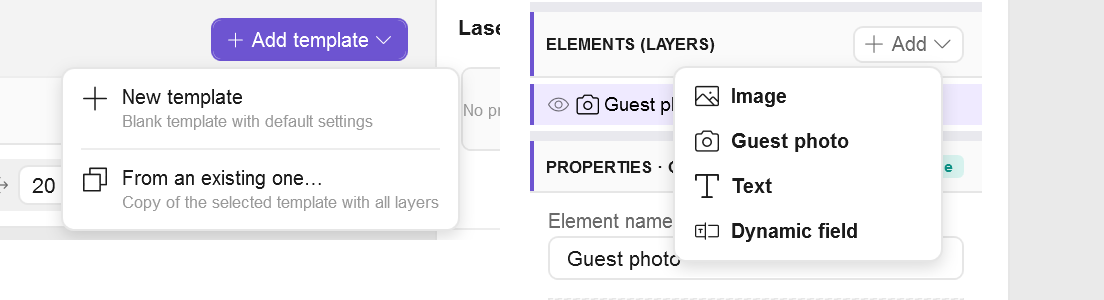
- New template — a blank template with default settings.
- From an existing one… — a copy with all layers, material and parameters.
- The cross on a tab deletes the template (with confirmation, cannot be undone). The only template cannot be deleted.
- Tabs can be dragged to change their order.
TEMPLATE block
- Template name.
- Operator note — an internal note, visible only to the operator next to the template name in the queue (e.g., "Check the engraving area!").
- Show in the guest interface — whether the template is available to guests in the guest app.
- Gallery template preview — the tile the guest sees when choosing a design. It is not engraved, but it is printed on the receipt.
Layers (elements)
| Type | Purpose |
|---|---|
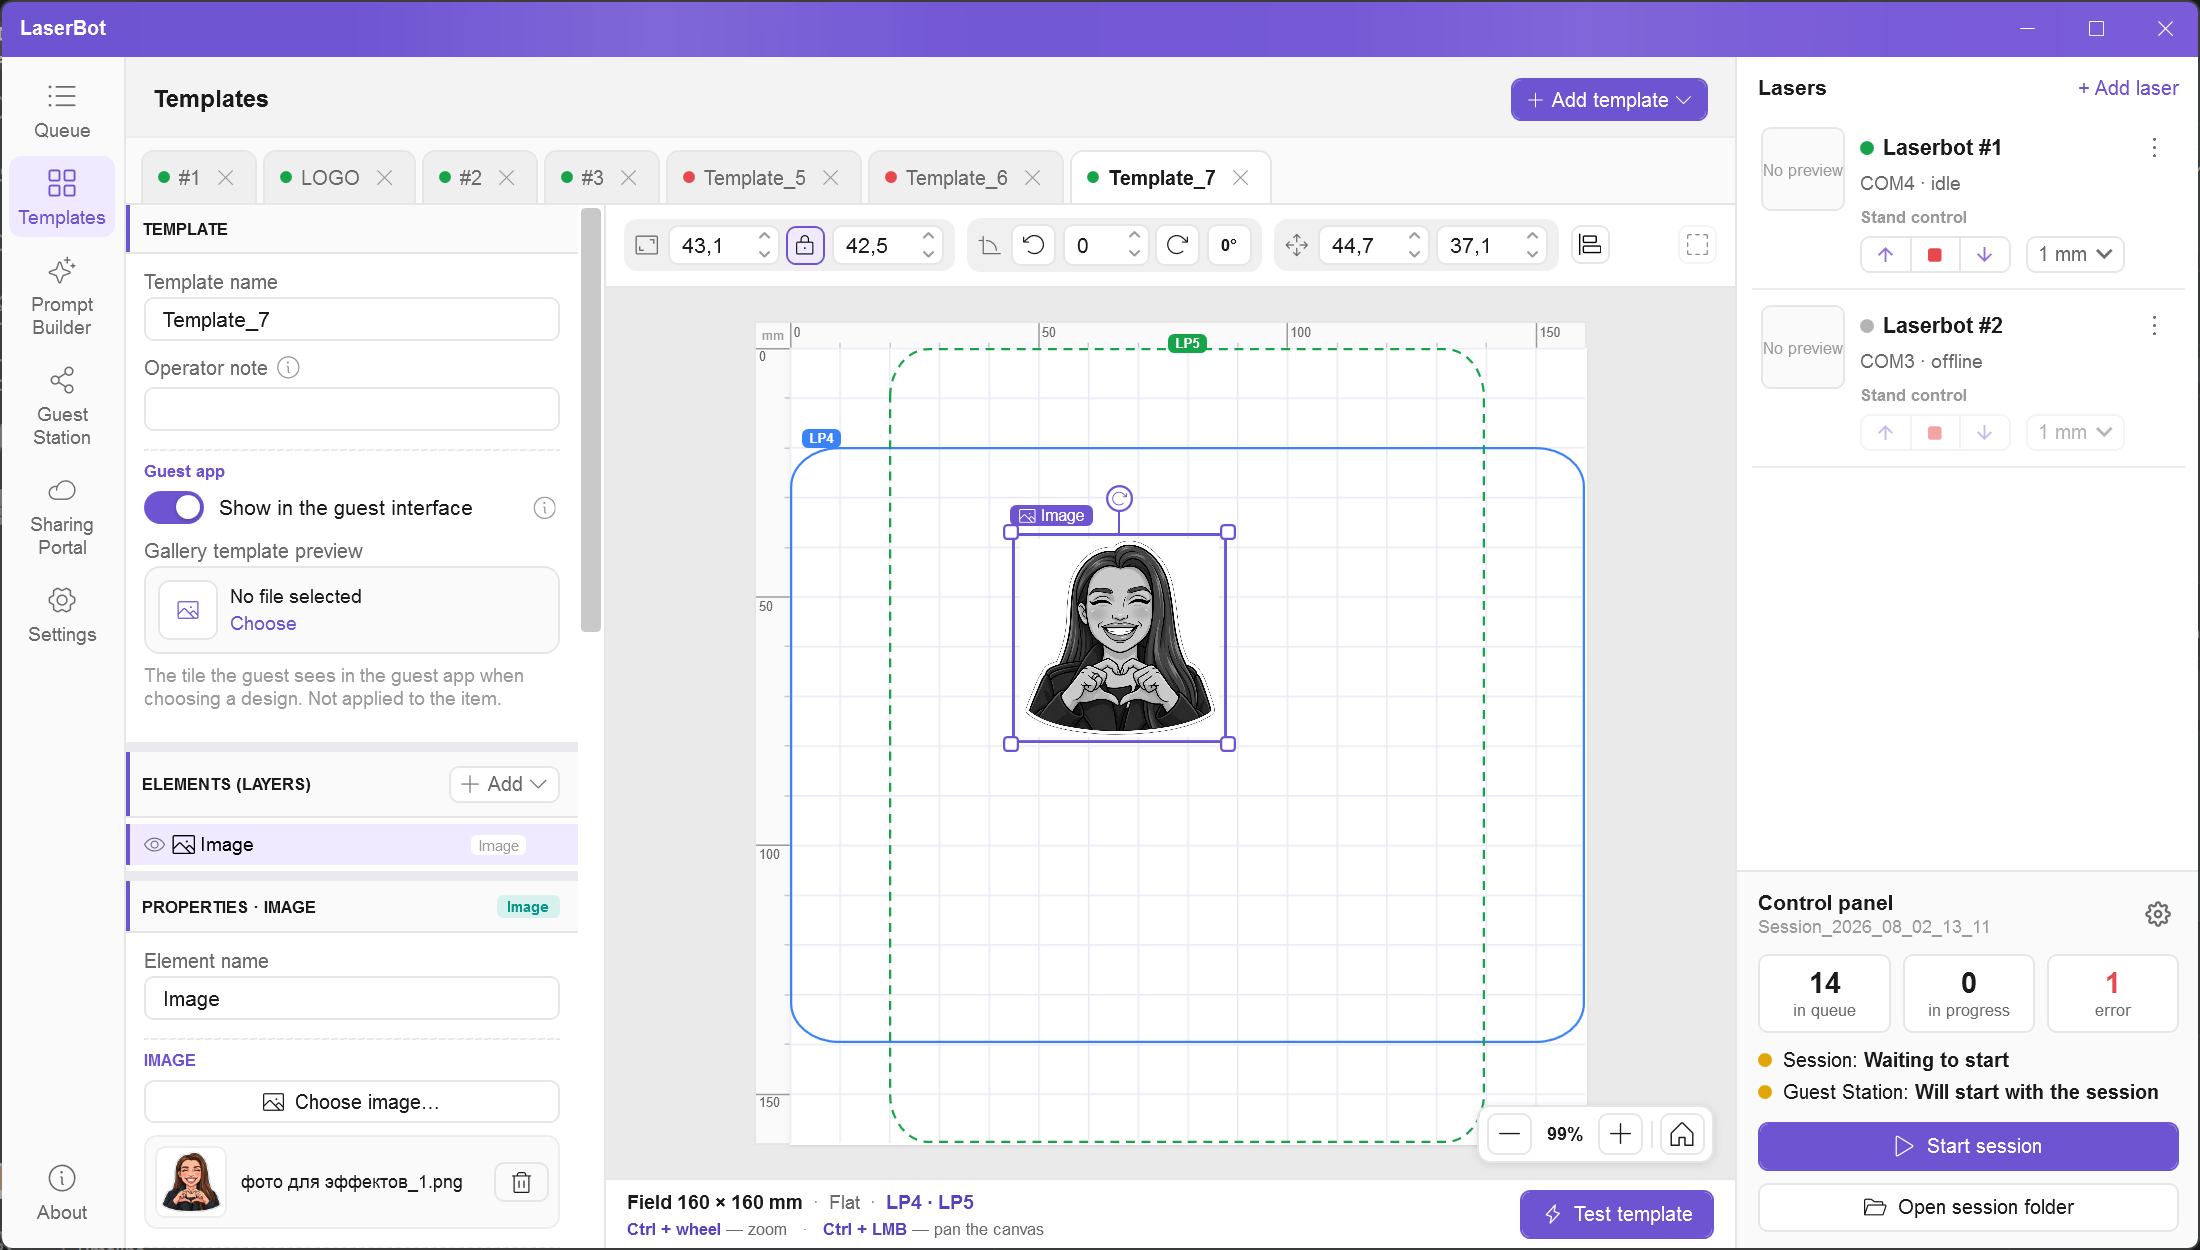
| Image | A logo or picture from a file (PNG, JPG, BMP, WEBP). Fits entirely inside its frame. |
| Guest photo | The placeholder for the guest's photo. Only one such layer per template. |
| Text | A fixed inscription: font, size (dynamic or static), spacing, weight, alignment, arc. |
| Dynamic field | Text entered by the guest (name, date, etc.): hint, required flag, max characters. |
Each layer has size (mm), rotation and position. The toolbar above the canvas helps align a layer to the field edge or center.
- The eye icon hides a layer — hidden layers are not engraved.
- Ctrl + wheel — zoom, Ctrl + LMB — pan the canvas or select a group of layers.
- Ctrl+Z / Ctrl+Y — undo and redo.
Setting up the Guest photo layer
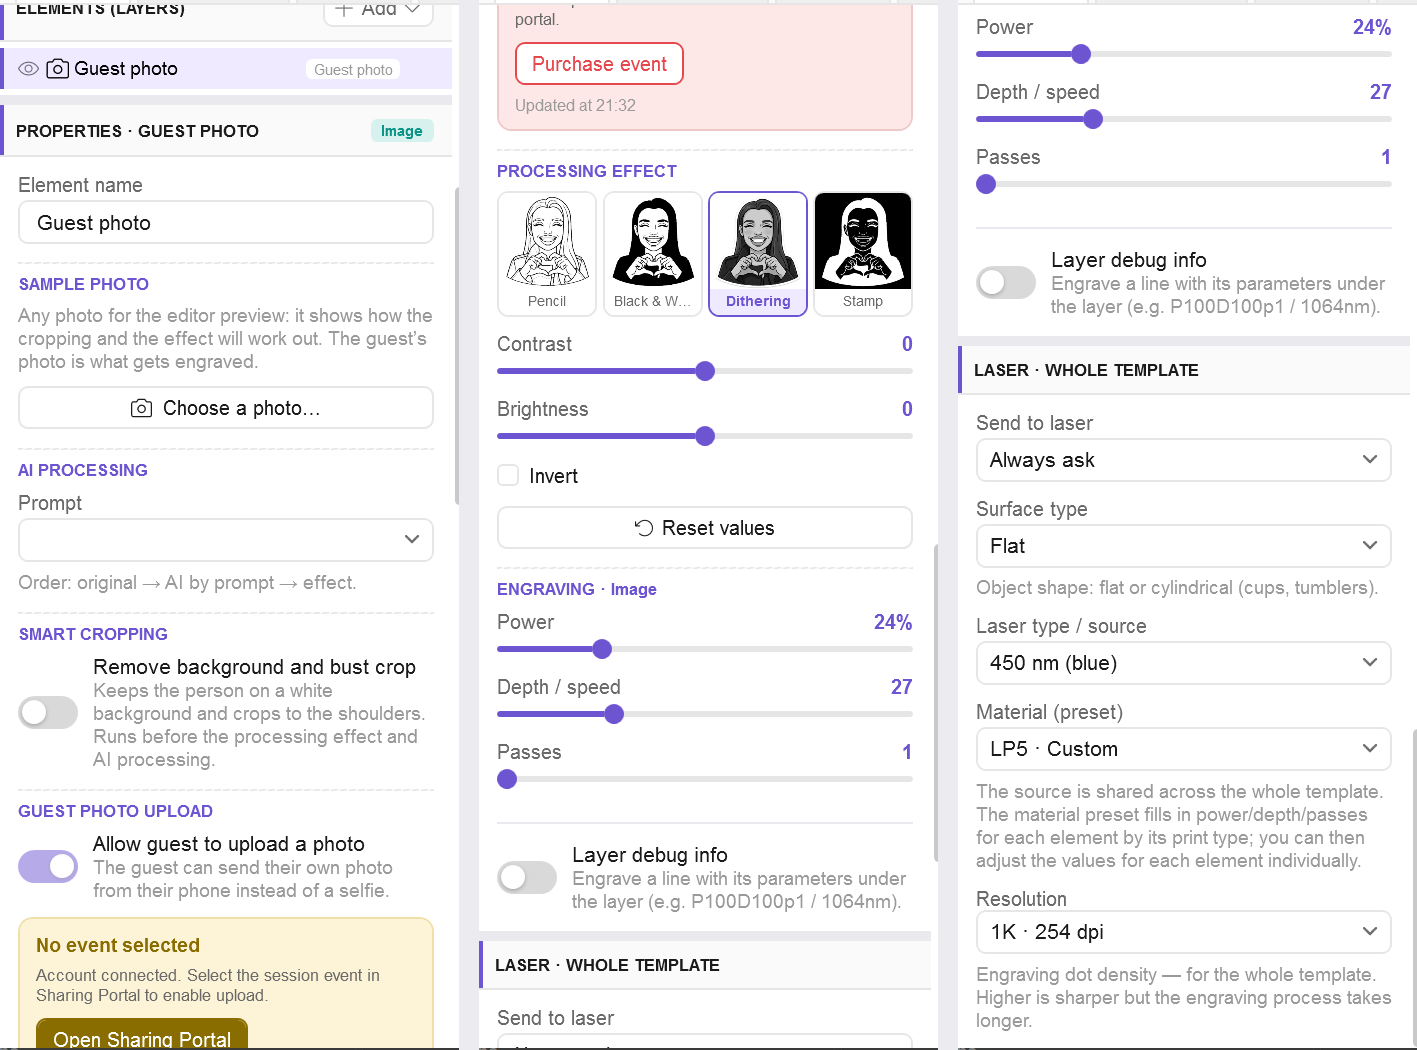
The photo is processed as a chain: original → smart cropping → AI by prompt → effect.
- SAMPLE PHOTO — any photo for the editor preview. The guest's photo is what gets engraved.
- AI PROCESSING → Prompt — a style from Prompt Builder or "Original" (no AI). AI does not run in the editor: the preview shows cropping and the effect.
- SMART CROPPING — Remove background and bust crop: the person stays on a white background. You can choose the Crop level (Shoulders / Chest / Waist), Edge feather, Margin size and Aspect ratio (As is / Square).
- GUEST PHOTO UPLOAD — Allow guest to upload a photo: the guest can send their own photo from their phone instead of a selfie. Requires a connected Sharing Portal with an active event.
- PROCESSING EFFECT — how the image is turned into dots/lines for the laser (see the table below).
Effects
| Effect | Parameters | Result |
|---|---|---|
| Pencil | Threshold | Pencil drawing made of lines |
| Black & White | Threshold, Invert | Black-and-white raster |
| Dithering (default) | Contrast, Brightness, Invert | Halftones as dots — best for photos |
| Stamp | Threshold | Inverted "stamp" |
Layer engraving parameters
- Power (0–100), Depth / speed (0–100), Passes (1–20).
- Frequency, kHz — only for LP5 with the 1064 nm IR source.
- Layer debug info — engraves a line with the layer's parameters under it. Useful when tuning settings on a test blank.
LASER · WHOLE TEMPLATE
- Send to laser: "Always ask", "Any available" or a specific laser.
- Surface type: "Flat" or "Cylinder" (for cylindrical items; requires the rotary extension, the laser model and the item's diameter/circumference).
- Laser type / source: 450 nm (blue) or 1064 nm (IR).
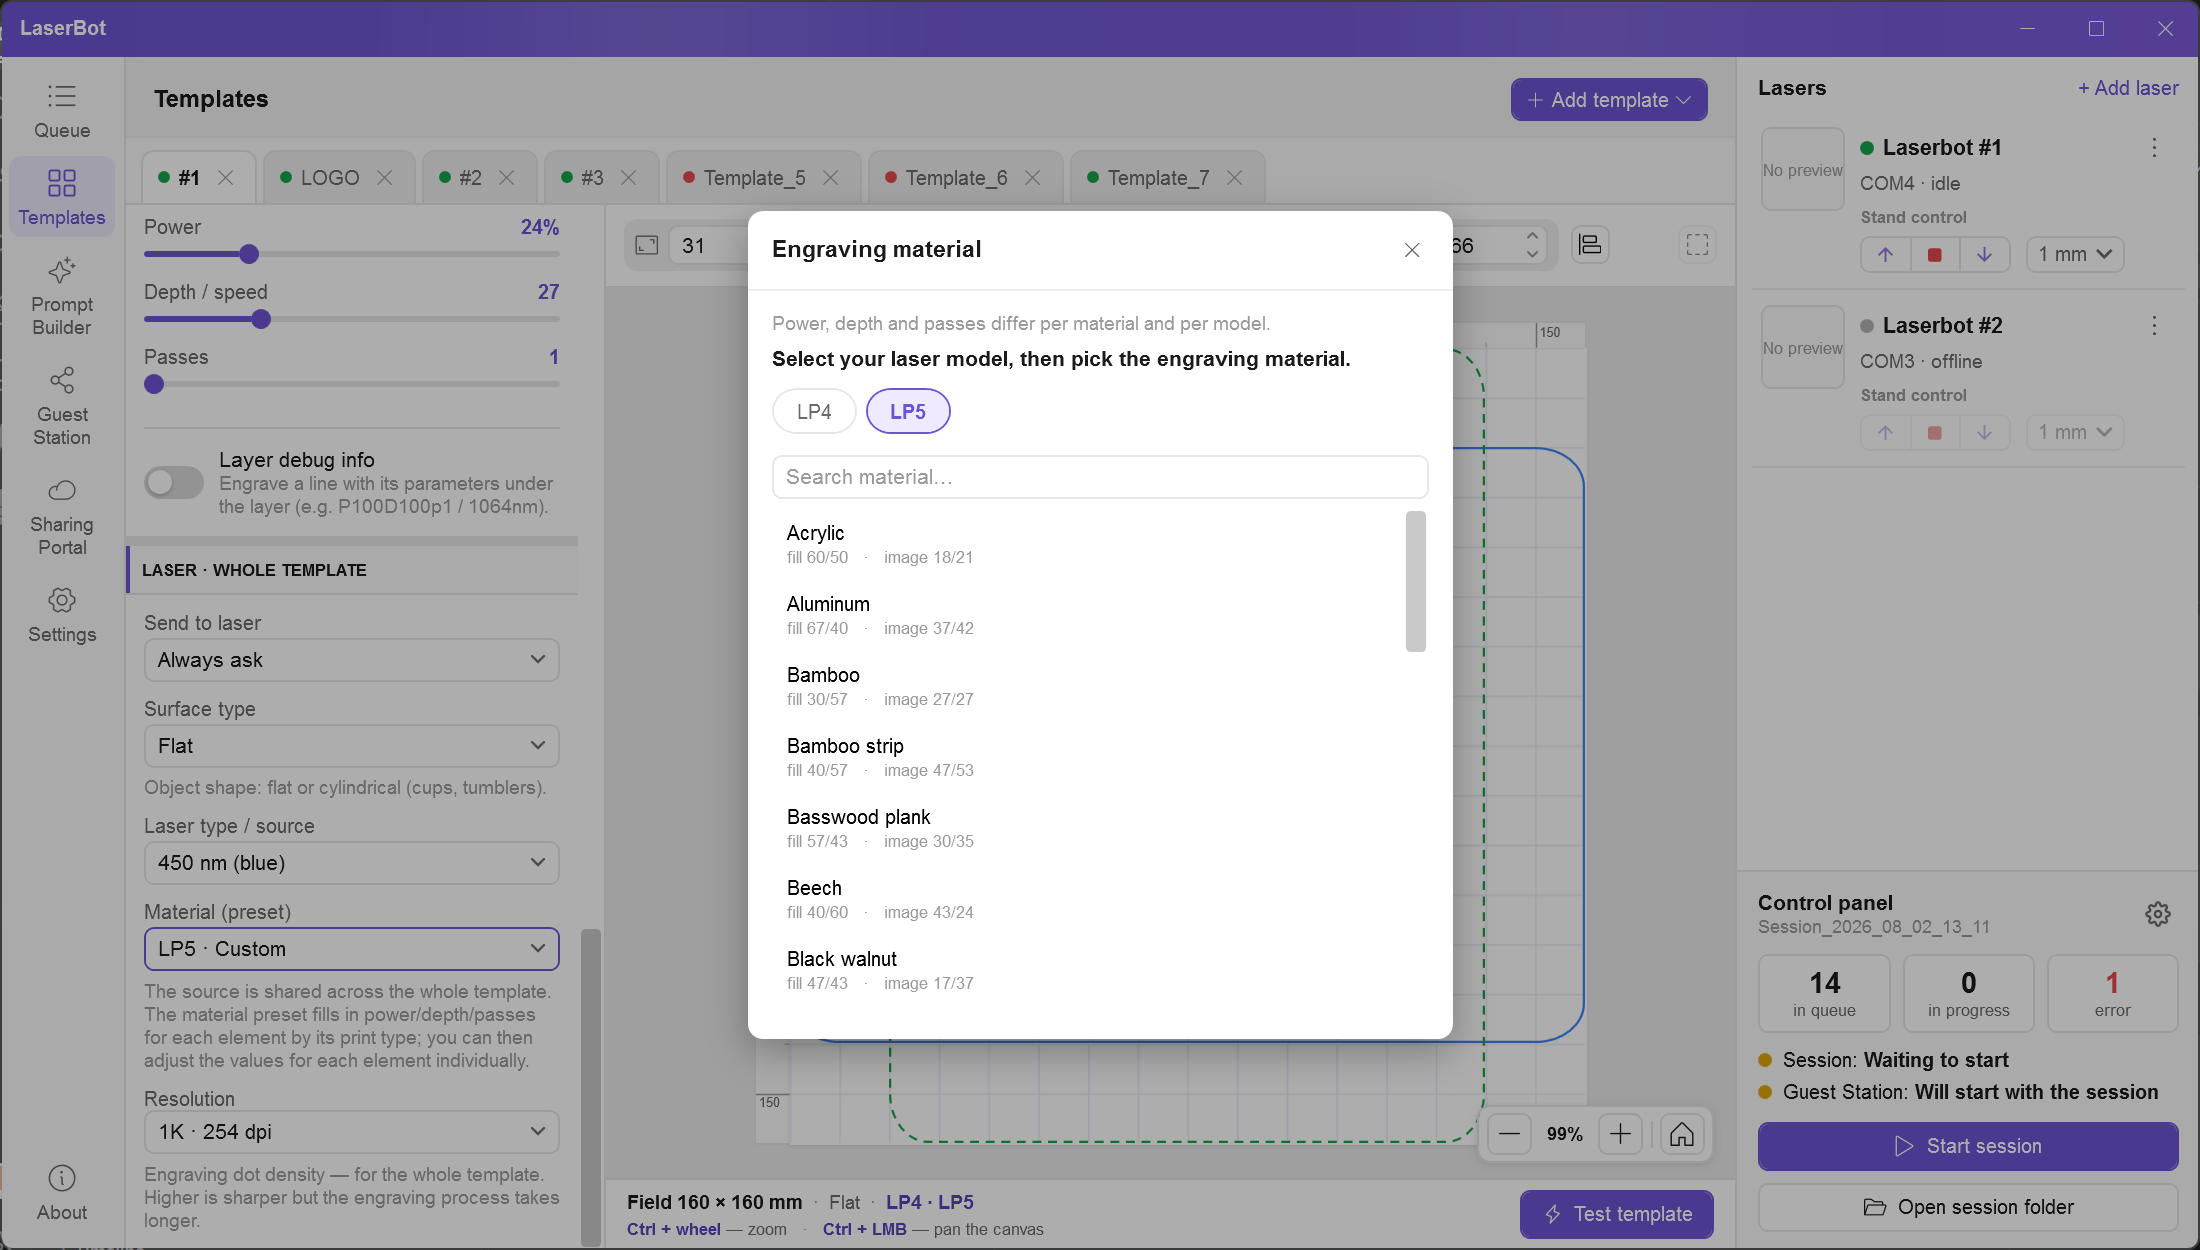
- Material (preset) — fills in power, depth and passes for all layers.
- Resolution — dot density. Higher is sharper but takes longer.
Test template
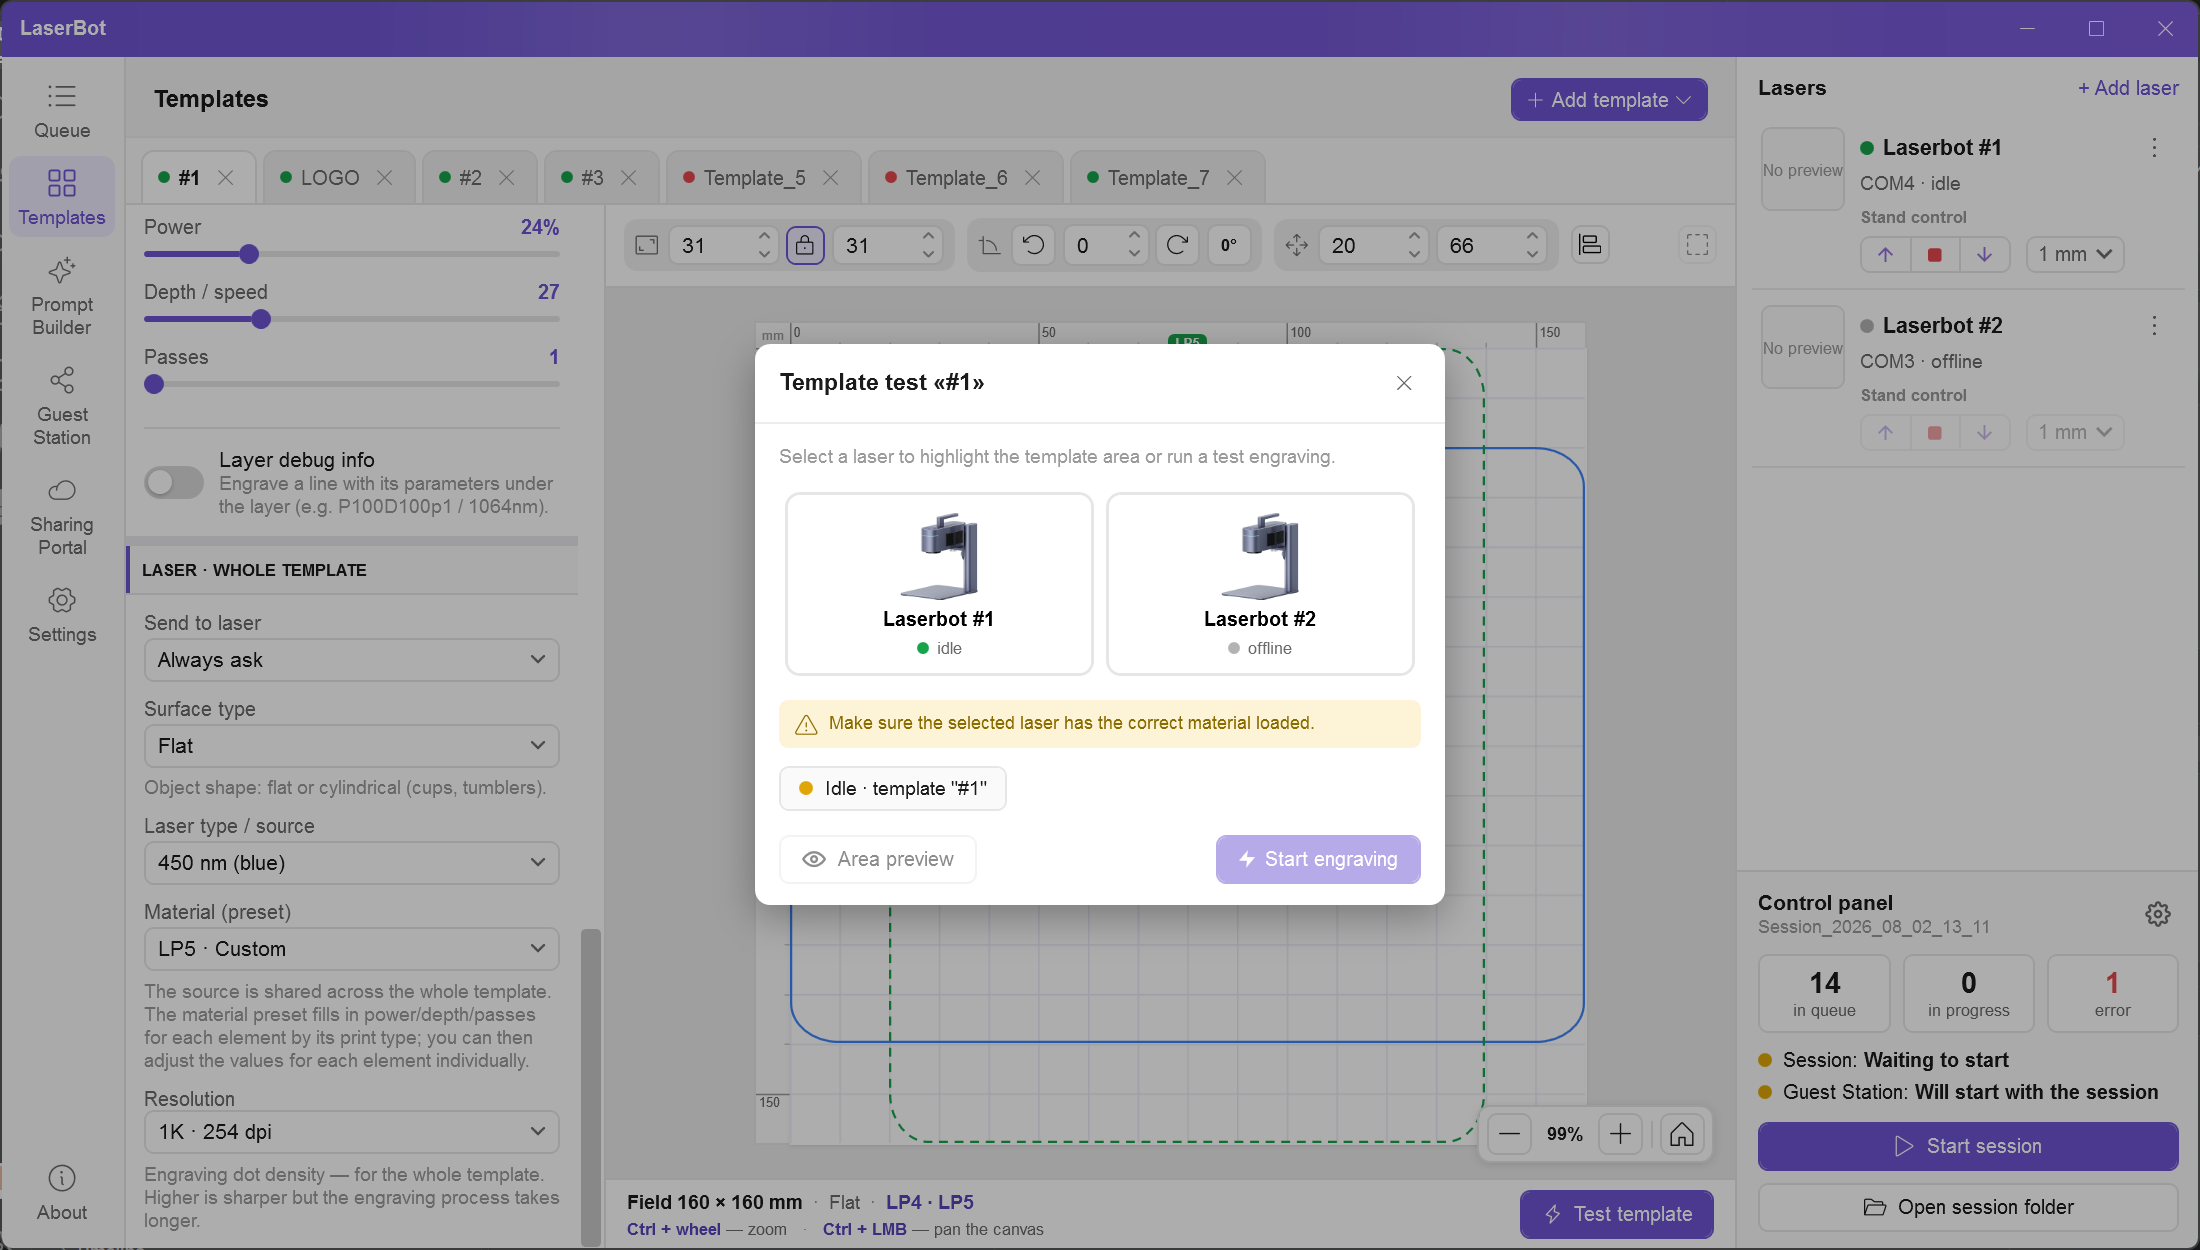
- Select an idle laser and make sure the right blank is loaded.
- Area preview — the laser highlights the outline of the layers. A bar appears at the top with Highlight brightness and an Exit button. Clicking a layer highlights only that layer; when you move a layer, the highlight follows. For cylinders there is Scroll.
- Start engraving — test engraving of all visible layers. To stop — Abort job.
7. Prompt Builder — AI photo processing
AI Providers
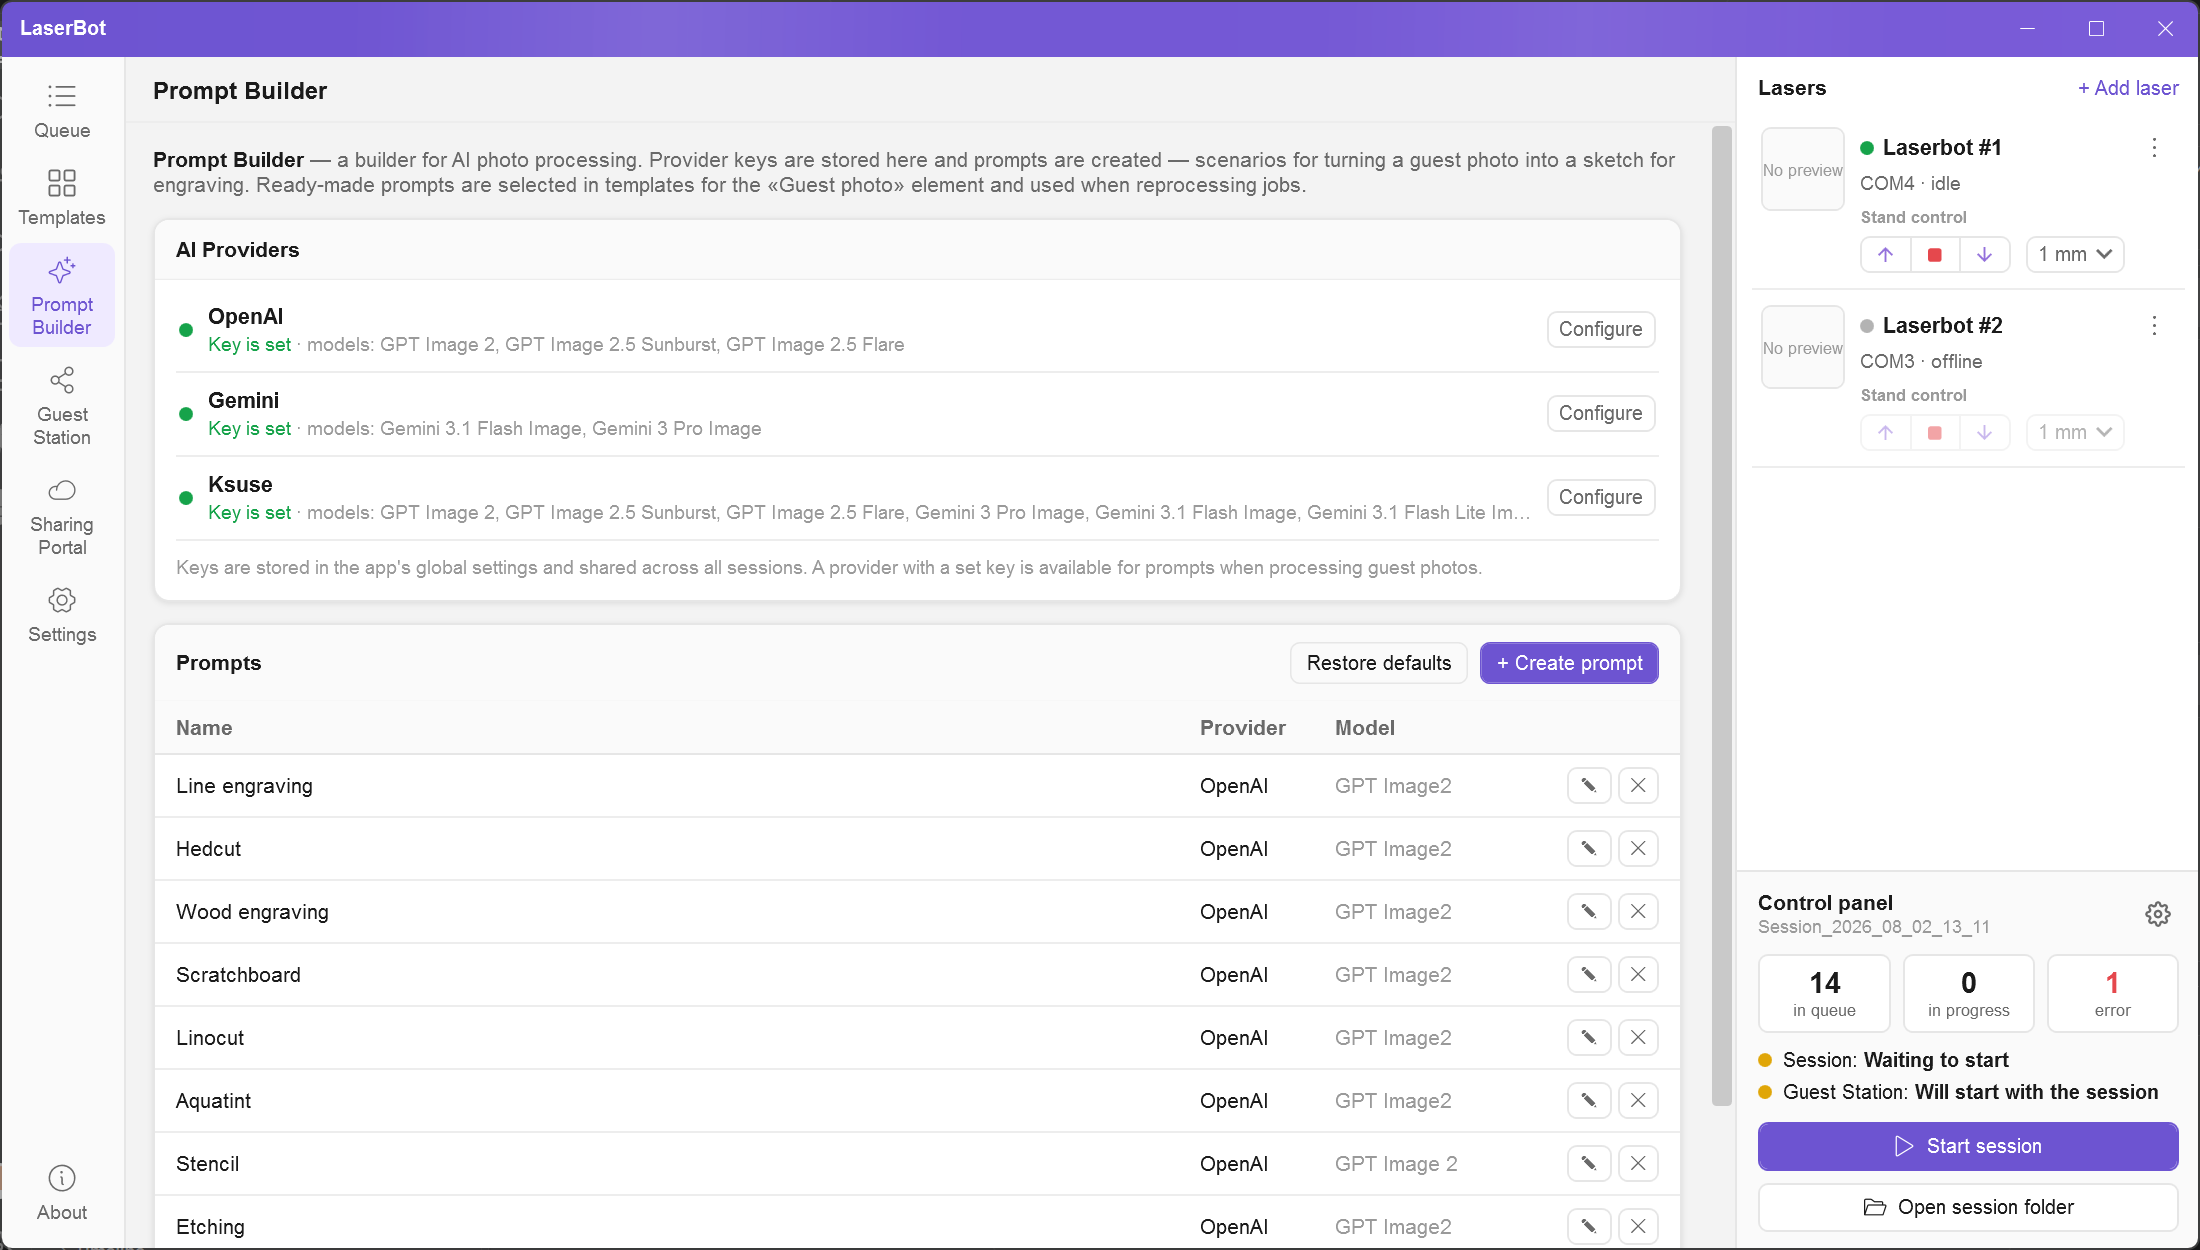
| Provider | Models |
|---|---|
| OpenAI | GPT Image 2, GPT Image 2.5 Sunburst, GPT Image 2.5 Flare |
| Gemini | Gemini 3.1 Flash Image, Gemini 3 Pro Image |
| Ksuse | GPT Image and Gemini models through one service, with a choice of server region |
- Click Configure next to the provider.
- Paste the API key. For Ksuse, choose the nearest Server (region).
- Click Check key. You should see "The key works — the provider responded to the request."
- Click Save.
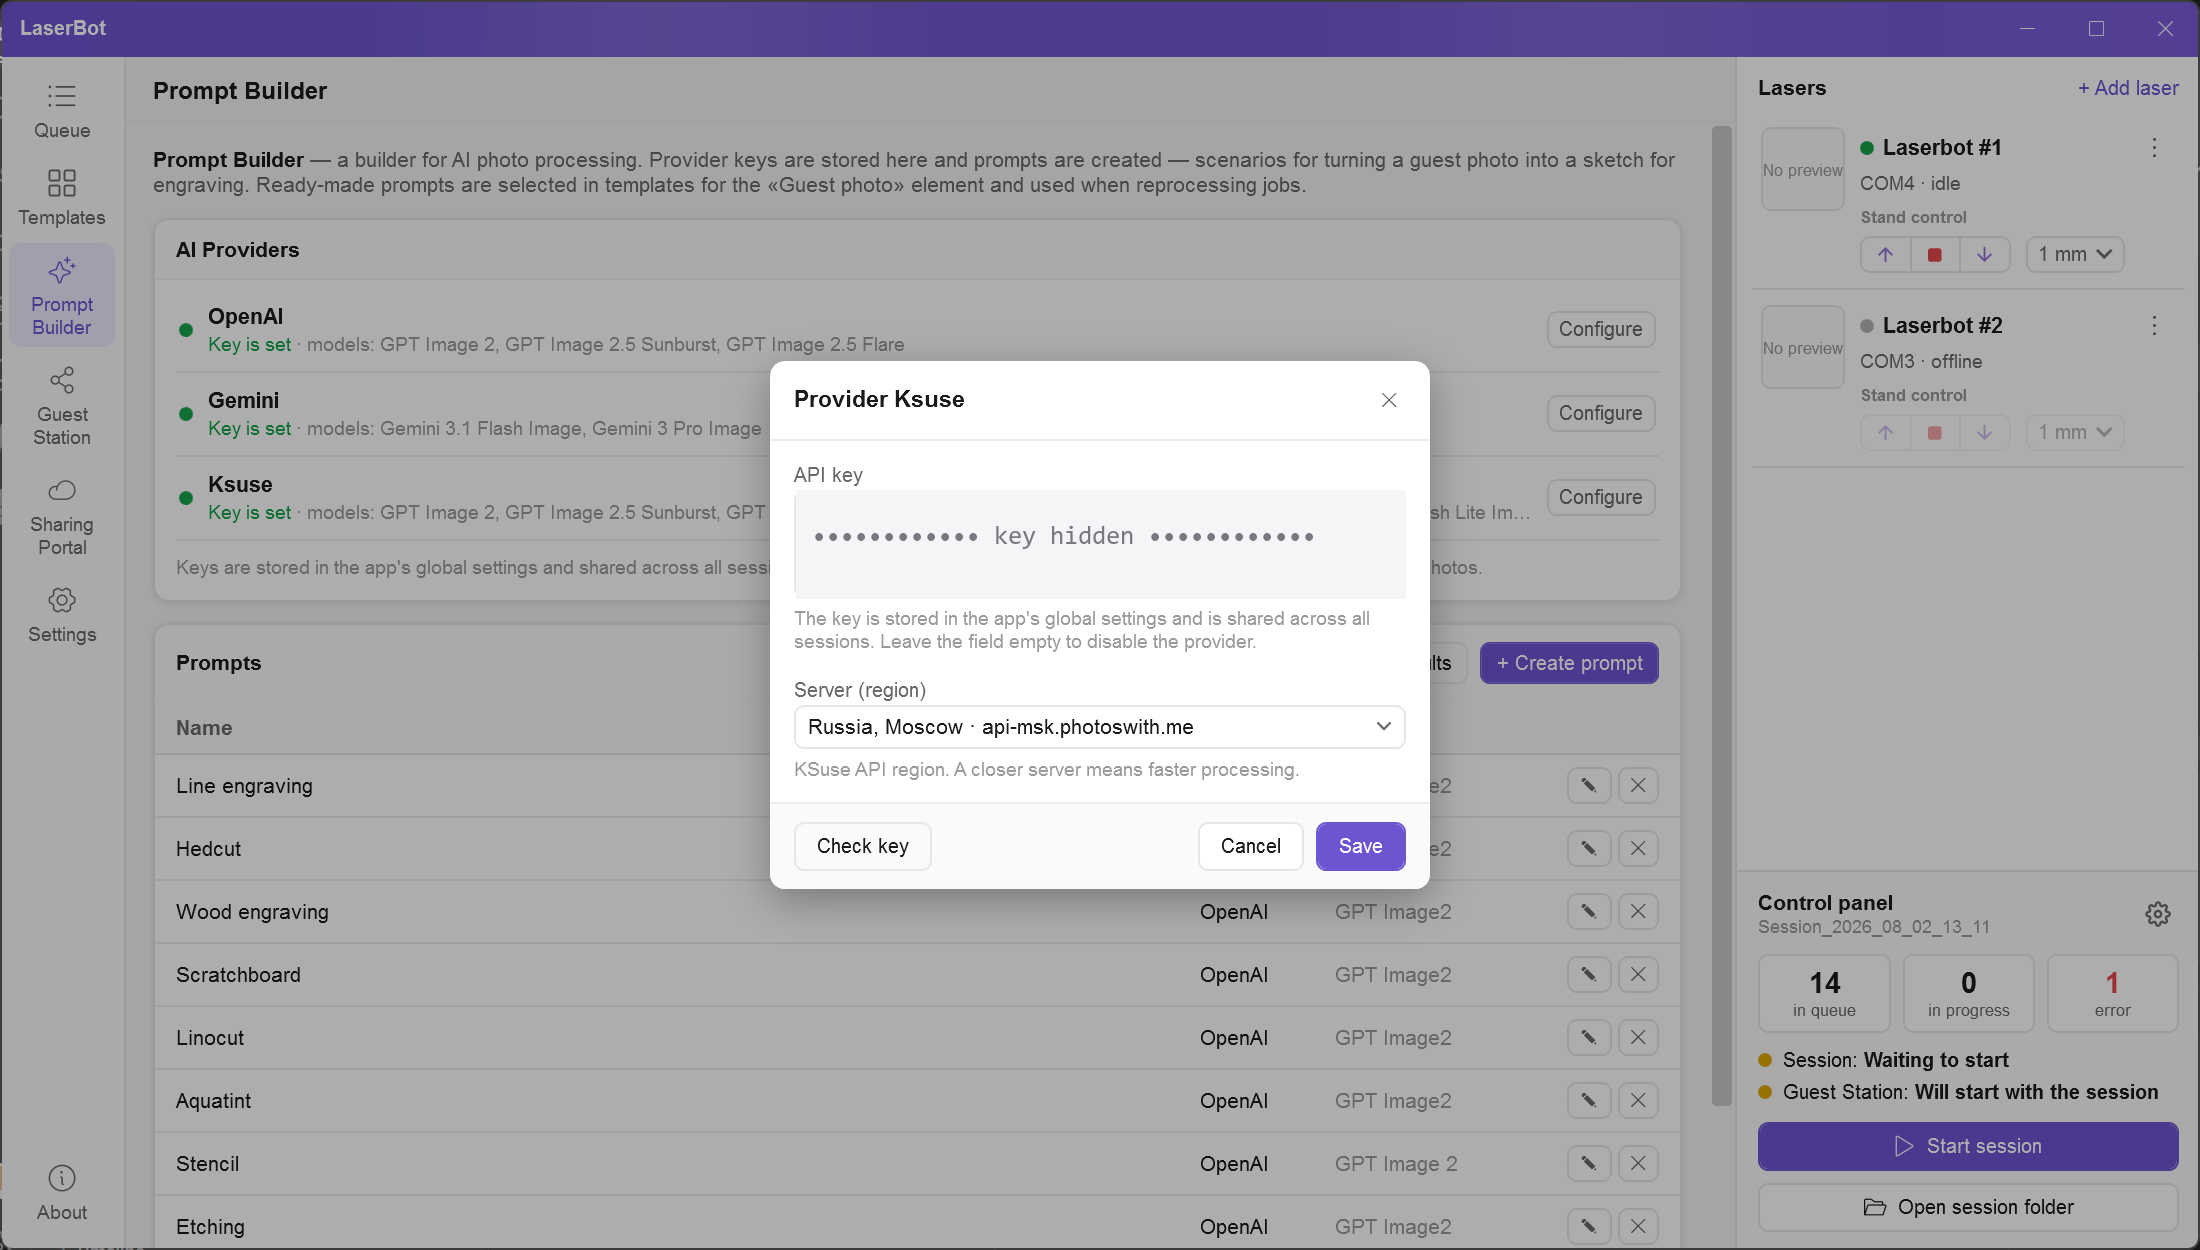
Keys are shared across all sessions. To disable a provider, clear the key field. Do not show the open key window to outsiders.
Prompts (styles)
Each new session already contains 9 ready-made styles: Line engraving, Hedcut, Wood engraving, Scratchboard, Linocut, Aquatint, Stencil, Etching, Line art. The Restore defaults button brings back deleted ones.
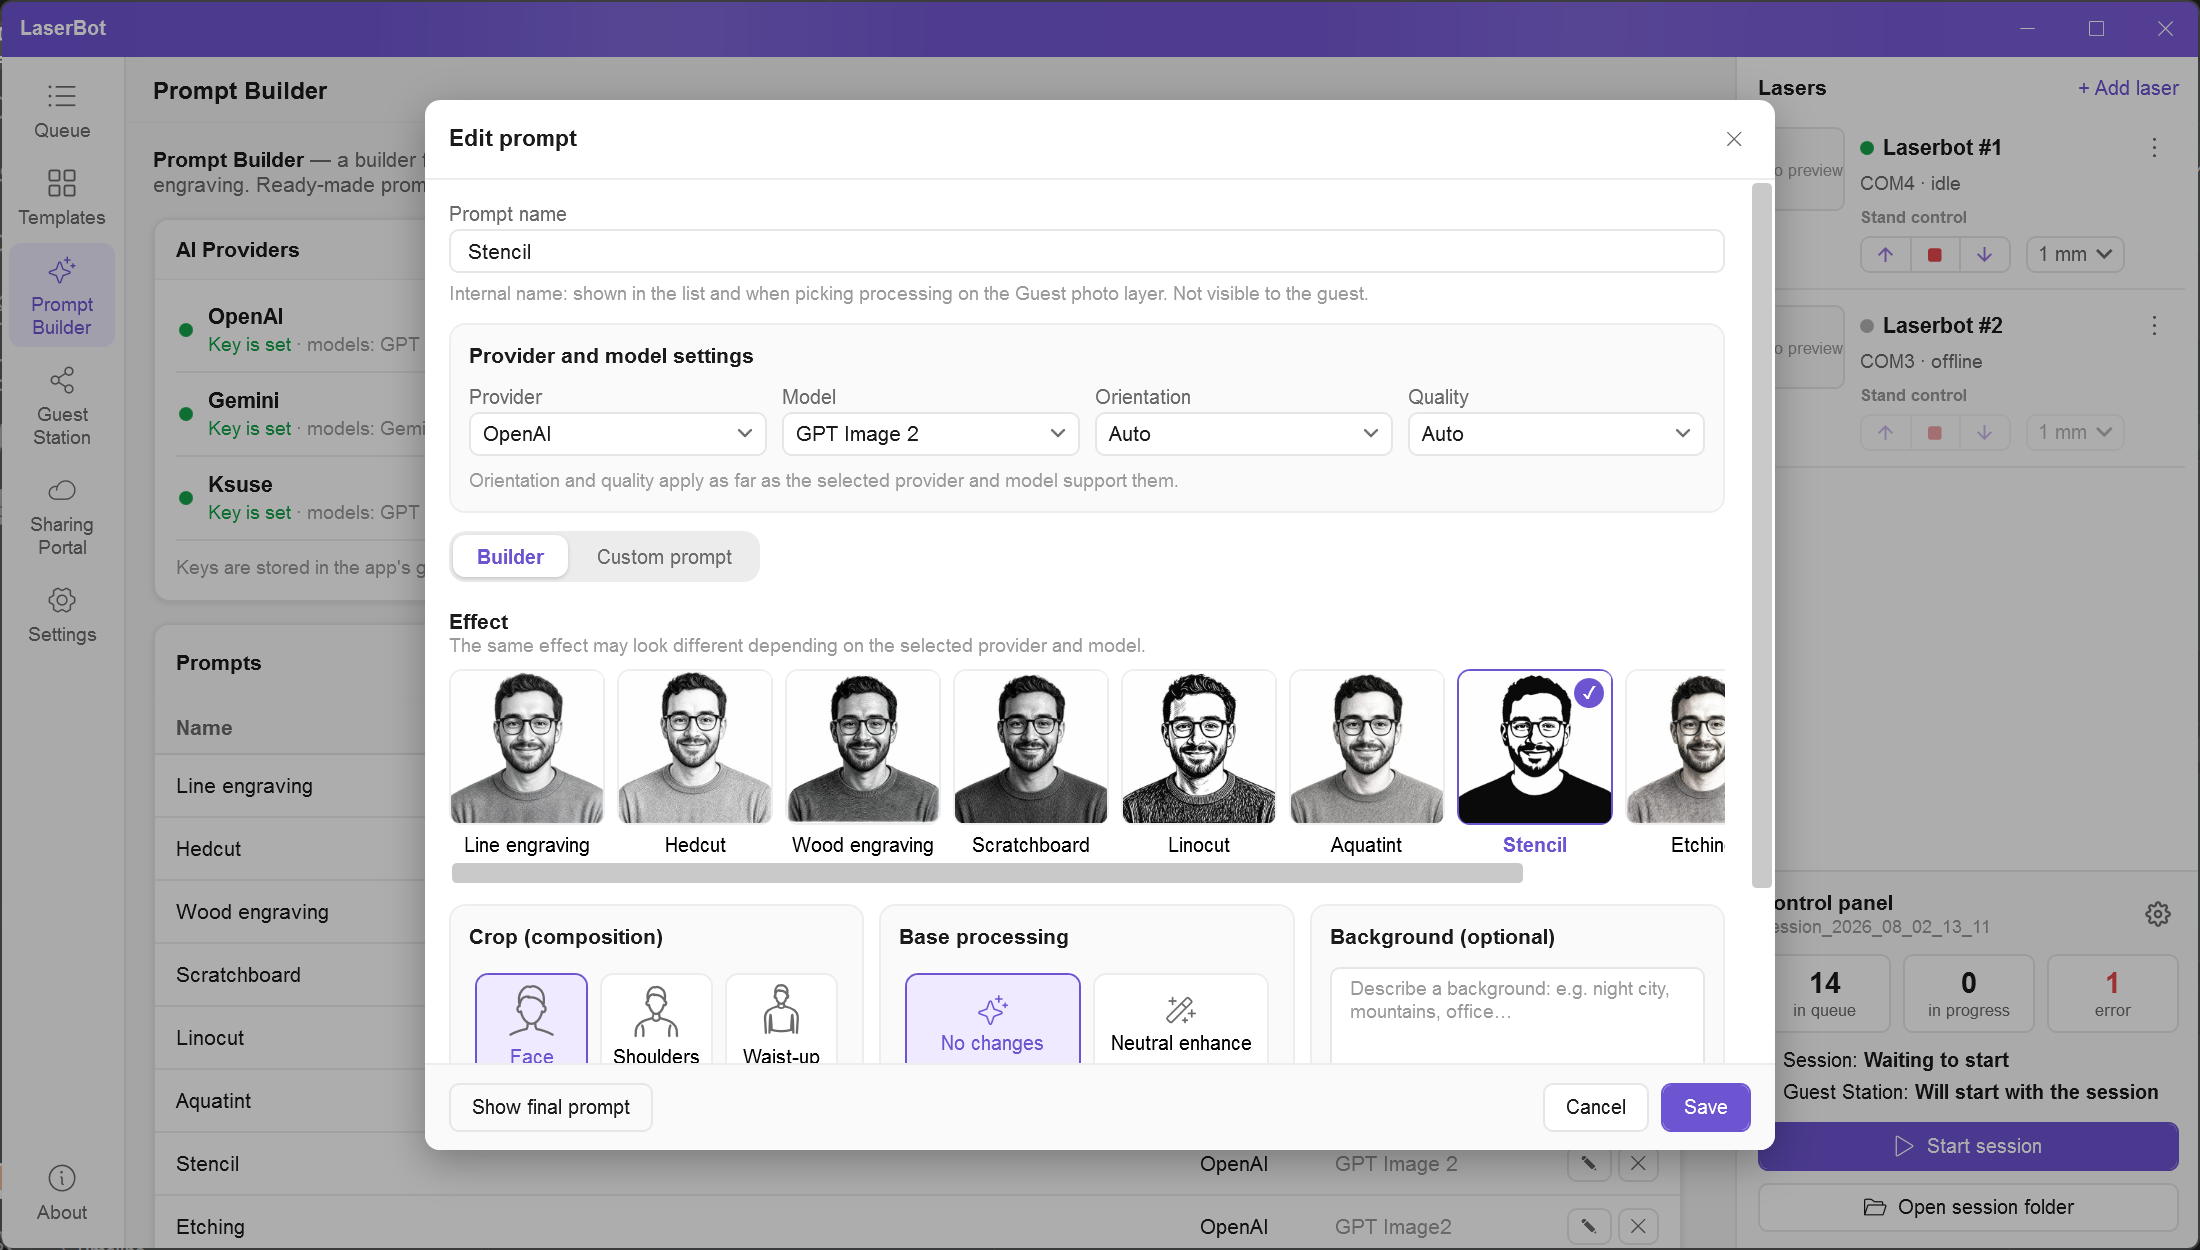
- Prompt name — internal name, not visible to guests.
- Provider, Model, Orientation, Quality — higher quality means slower and more expensive processing.
- Builder: pick an Effect (cards with examples), Crop (composition) (Face / Shoulders / Waist-up), Base processing, and optionally Background (optional) and Refinement (optional) (up to 1000 characters). Show final prompt — view the assembled text.
- Custom prompt — write the whole request text yourself.
A ready prompt is selected in a template on the Guest photo layer. The same style may look different with different providers and models — test on sample photos before the event.
8. Job queue and engraving
Filters and sorting
The tabs All, In processing queue, In engraving queue, Done, Errors show the number of jobs. If there are errors, the tab is highlighted in red. The button to the right of the tabs toggles the order: newest or oldest first.
Statuses
Each job has two independent statuses — Processing (image preparation) and Engraving:
| Status | Meaning |
|---|---|
| in queue | Waiting for its turn. |
| in progress | Processing or engraving is running (a timer is shown). |
| processed / done | The stage completed successfully. |
| failed | The stage ended with an error — see Details. |
| cancelled | The stage was cancelled by the operator or by stopping the session. |
Creating a job manually
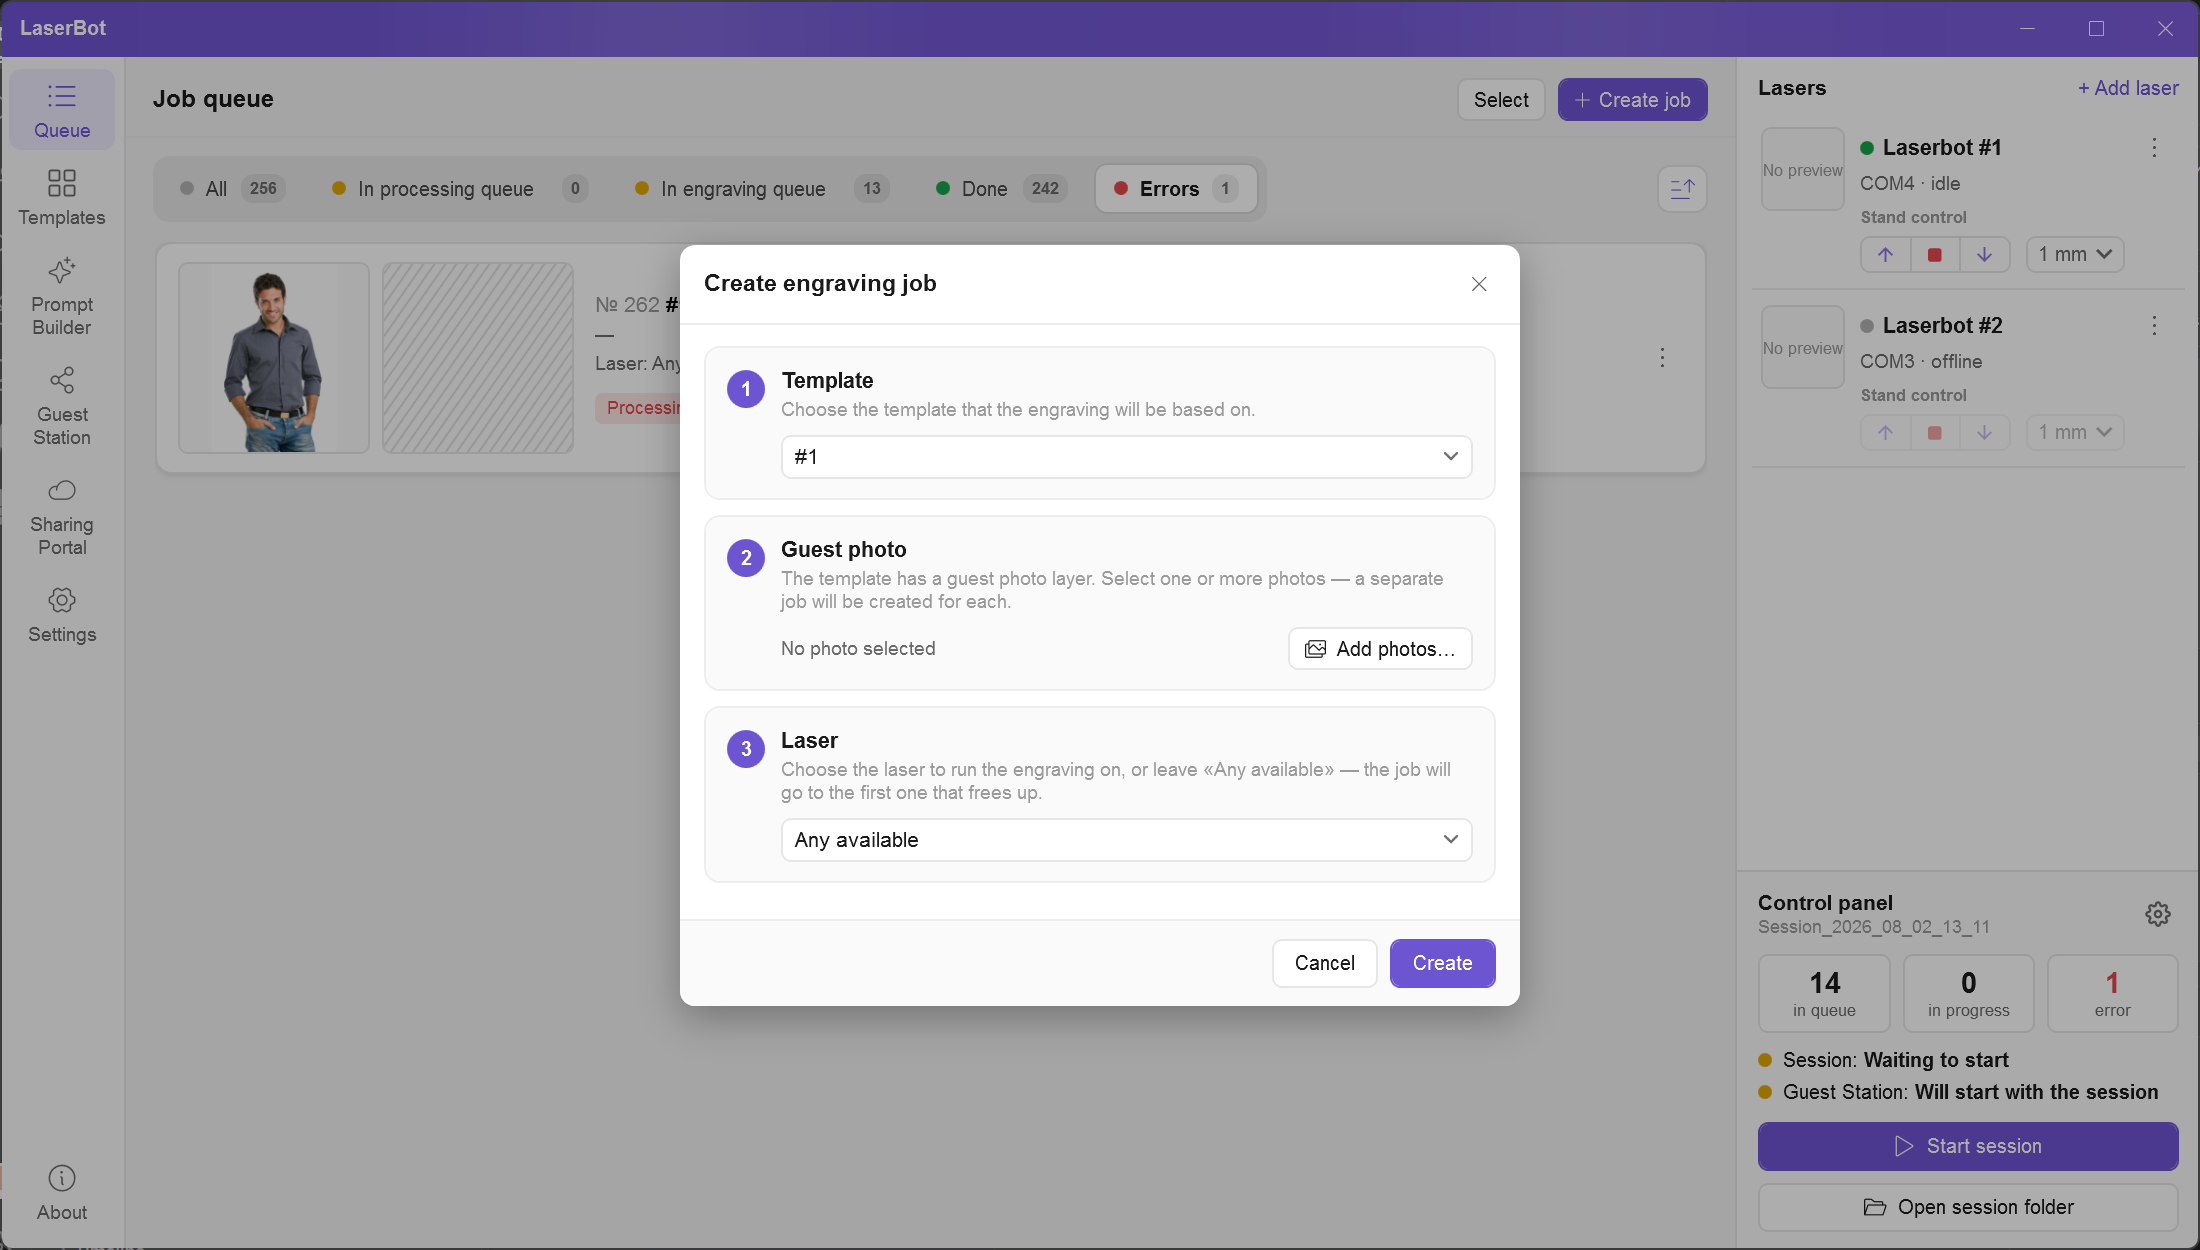
- Template — choose the design.
- Guest photo — Add photos…. You can select several files: a separate job is created for each photo.
- Field data — if the template has dynamic fields (marked ones are required).
- Laser — a specific one or "Any available".
- Click Create.
Starting engraving
- When the job shows "Processing: processed", click Start engraving (the session must be running).
- In the "Confirm the engraving job" window, check the preview, guest data, engraving zone and layer parameters. Select a laser.
- Place the blank and click Show engraving area — the laser highlights the outline. Adjust the item position.
- Click Engraving.
If the laser is busy, the job goes into its queue. When the laser frees up, the job shows the Item placed — start button. The operator confirms each next engraving manually — this guarantees the blank is in place.
While engraving, the job has an Abort button. It works immediately, without confirmation.
Job actions
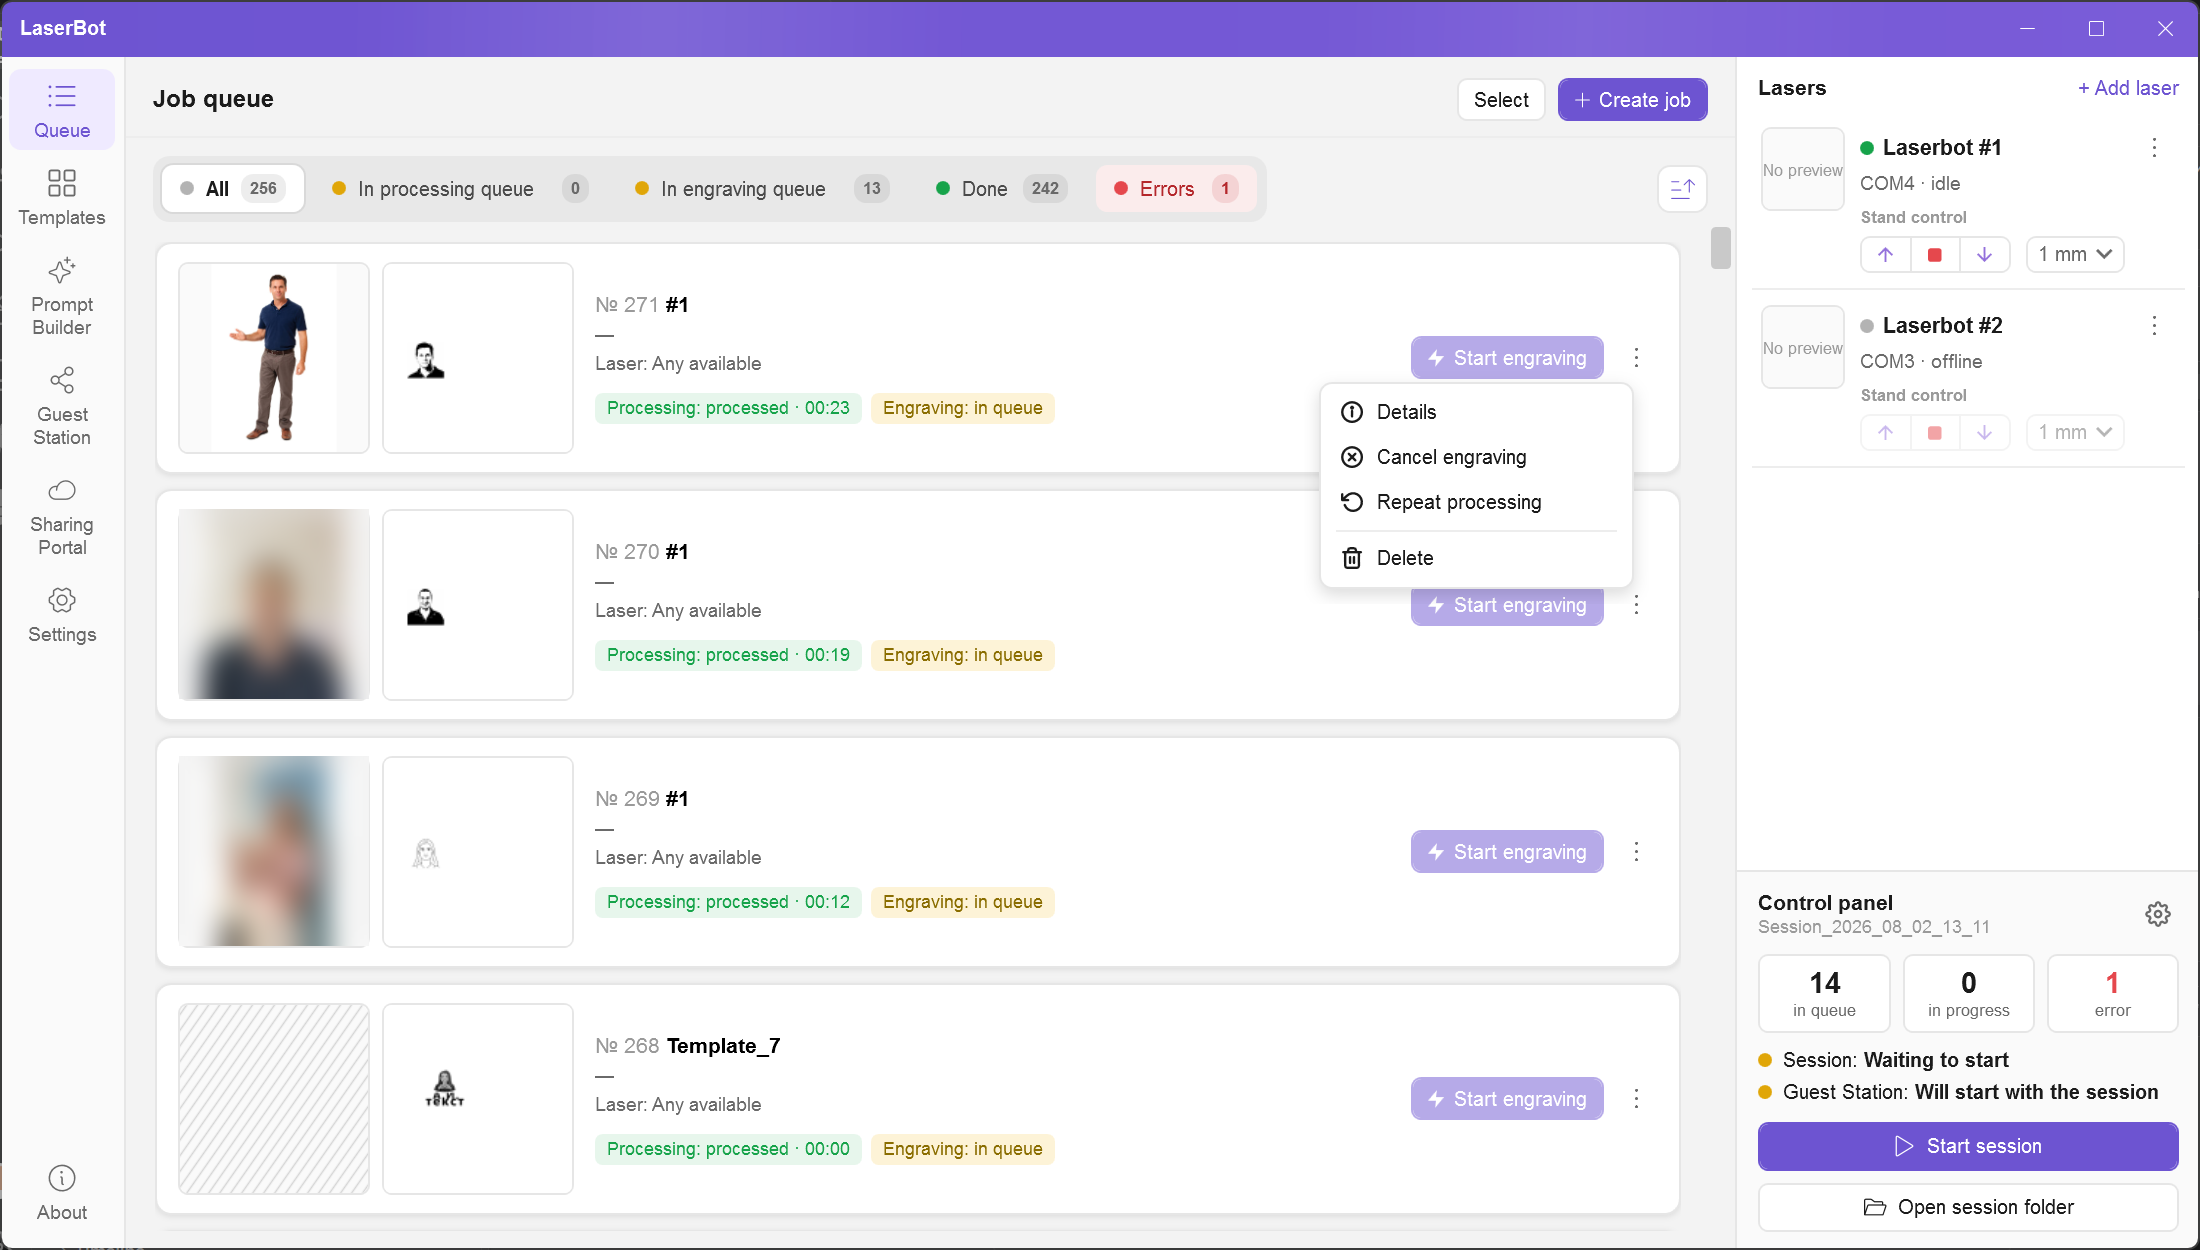
- Details — the Job information window.
- Cancel processing / Cancel engraving — remove the job from the corresponding stage.
- Repeat processing — process the photo again with the current template settings (e.g., after an AI error or a style change).
- Repeat engraving — return the job to the engraving queue without regenerating the image.
- Delete — remove the job from the list without engraving.
Job information
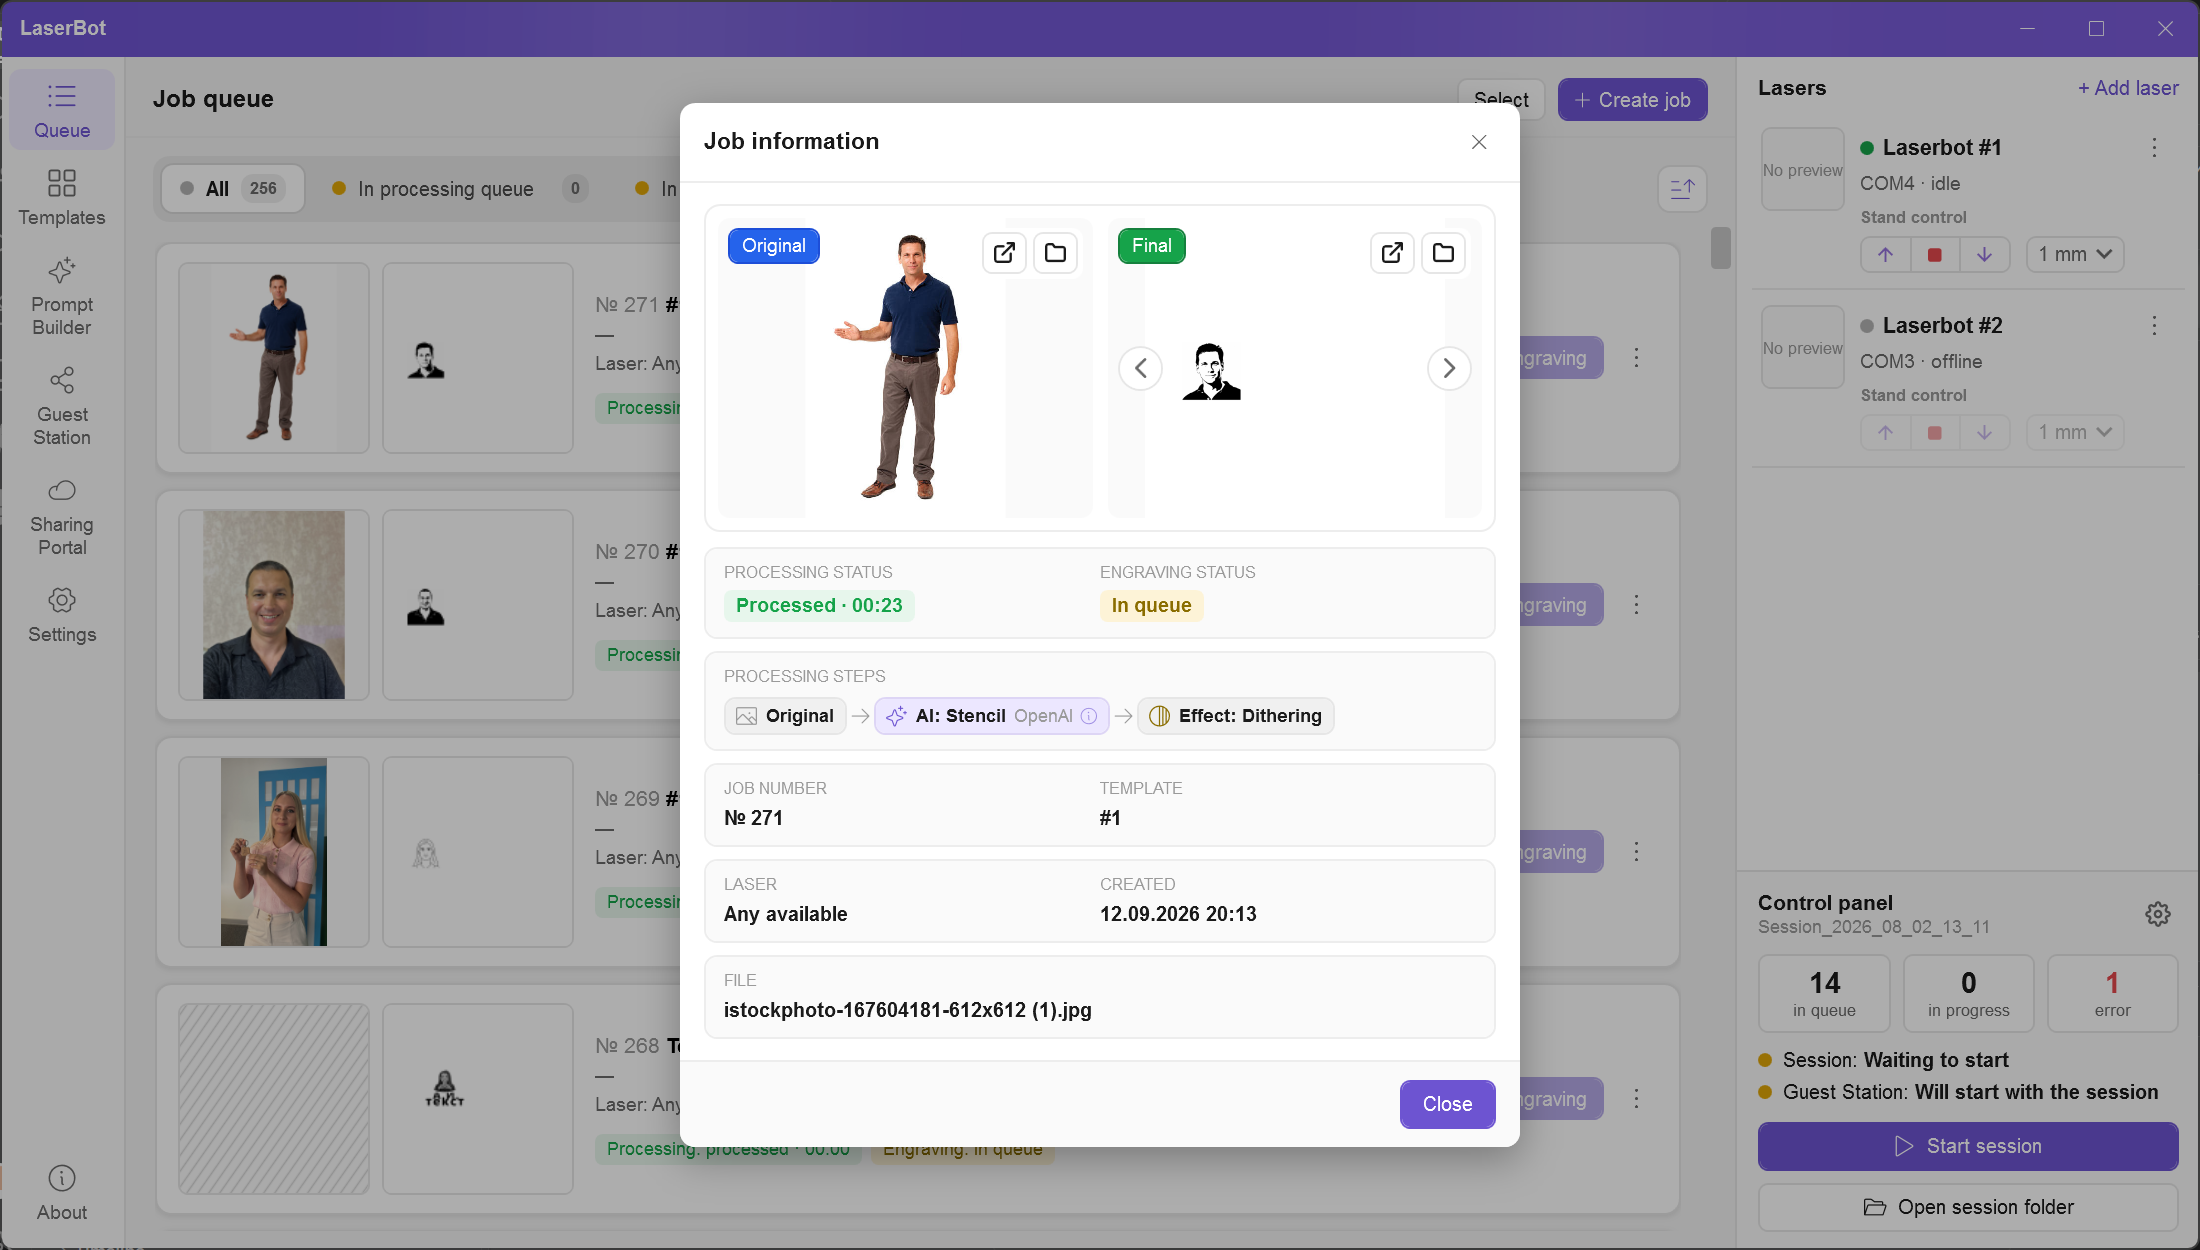
The PROCESSING STEPS block shows the chain: original → cropping → AI (style and provider) → effect. The buttons above the images open the file or show it in Explorer. Dynamic field values can be corrected with Edit — for example, a typo in a name before engraving.
Handling errors
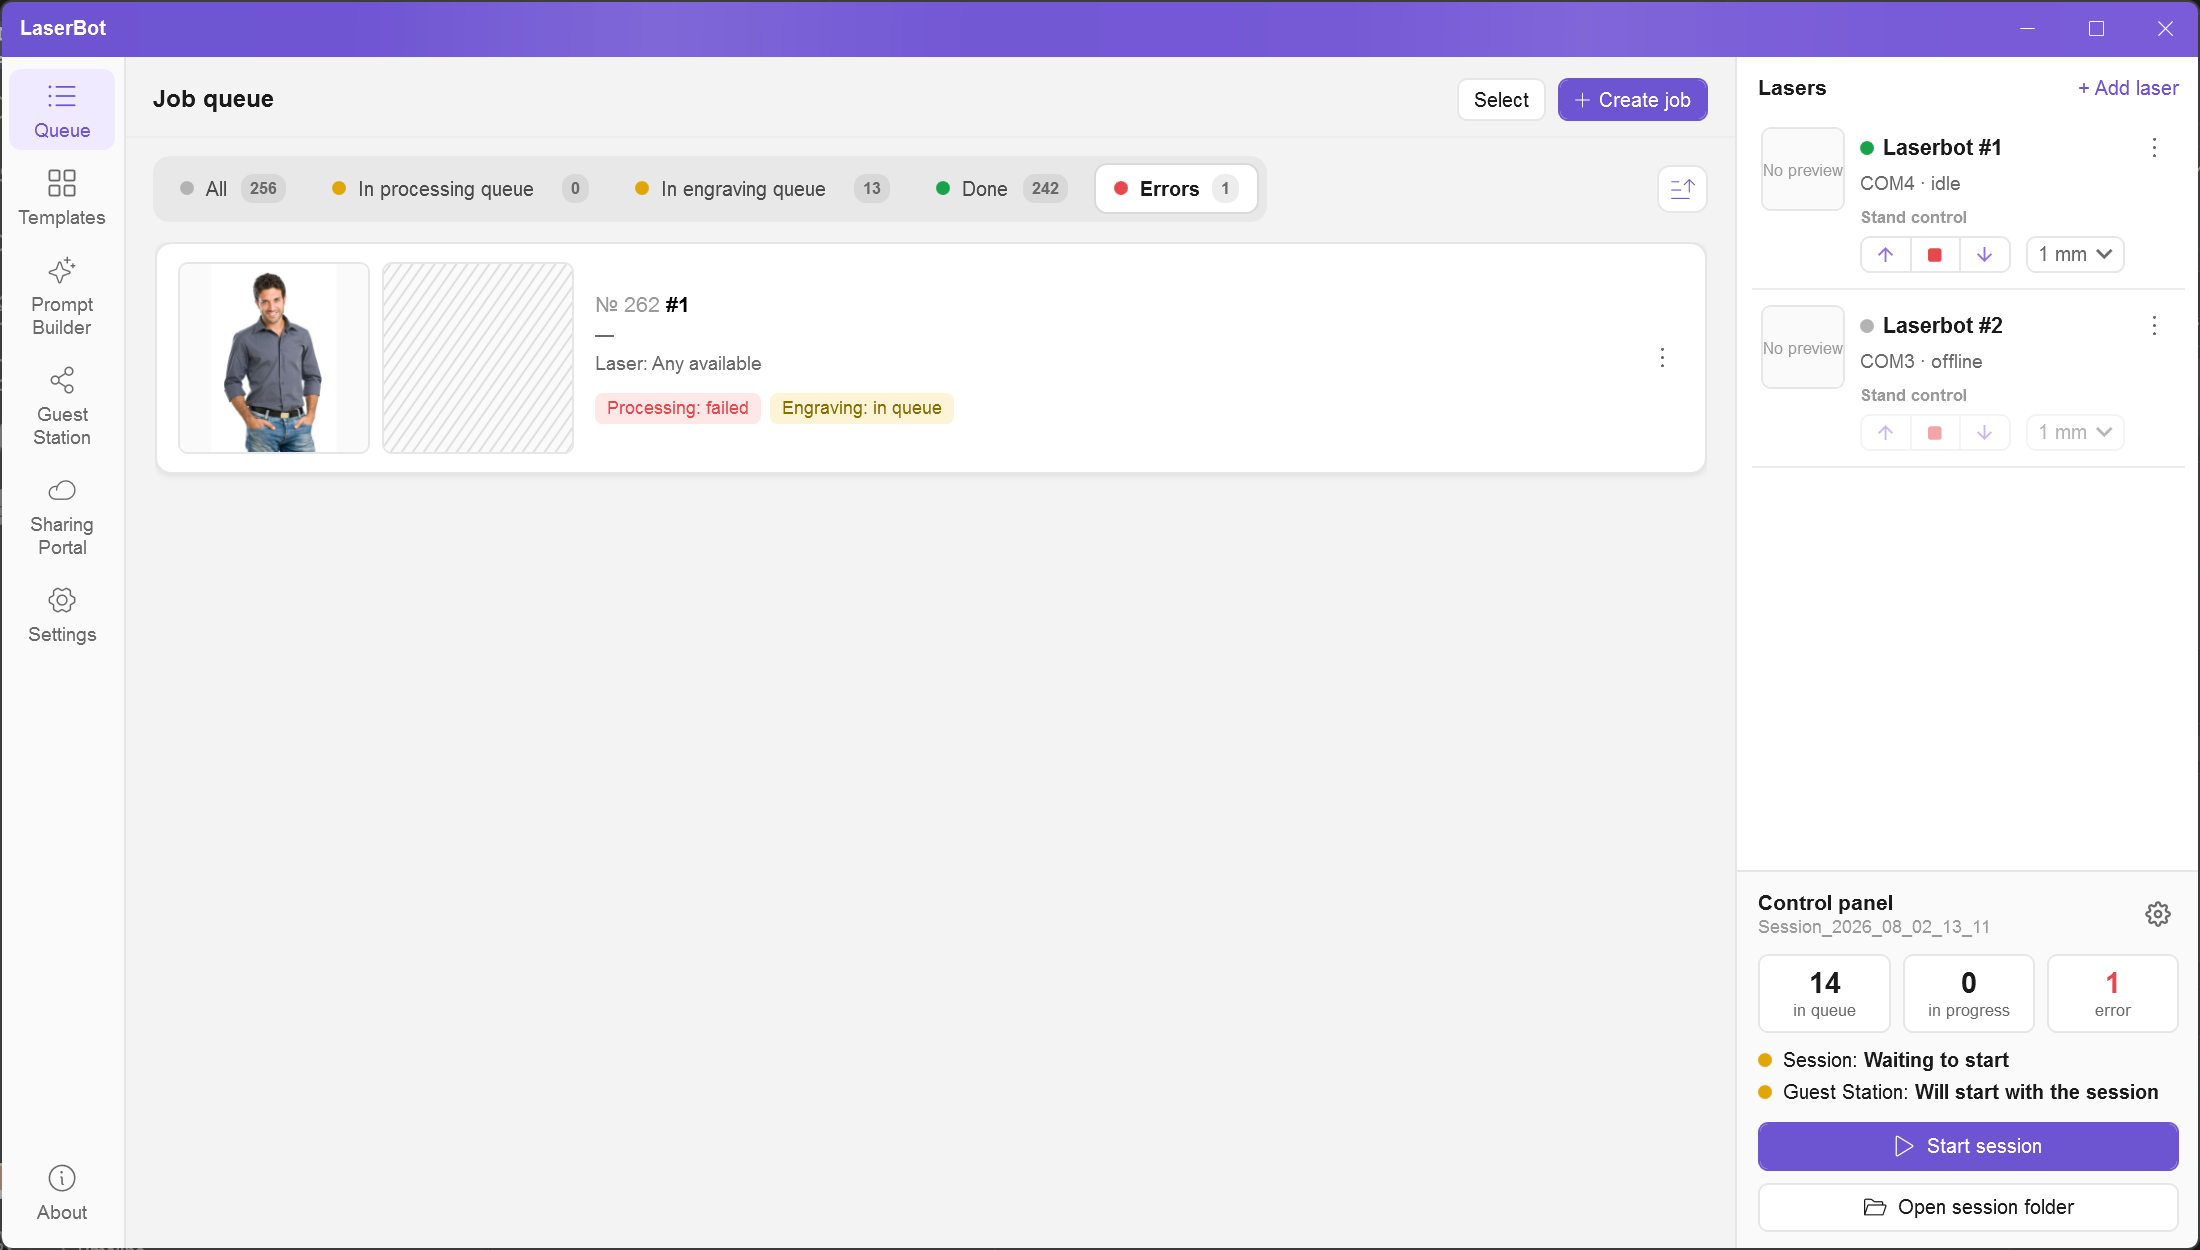
Open Details, read the error text, fix the cause (see Troubleshooting) and choose Repeat processing or Repeat engraving.
Bulk actions
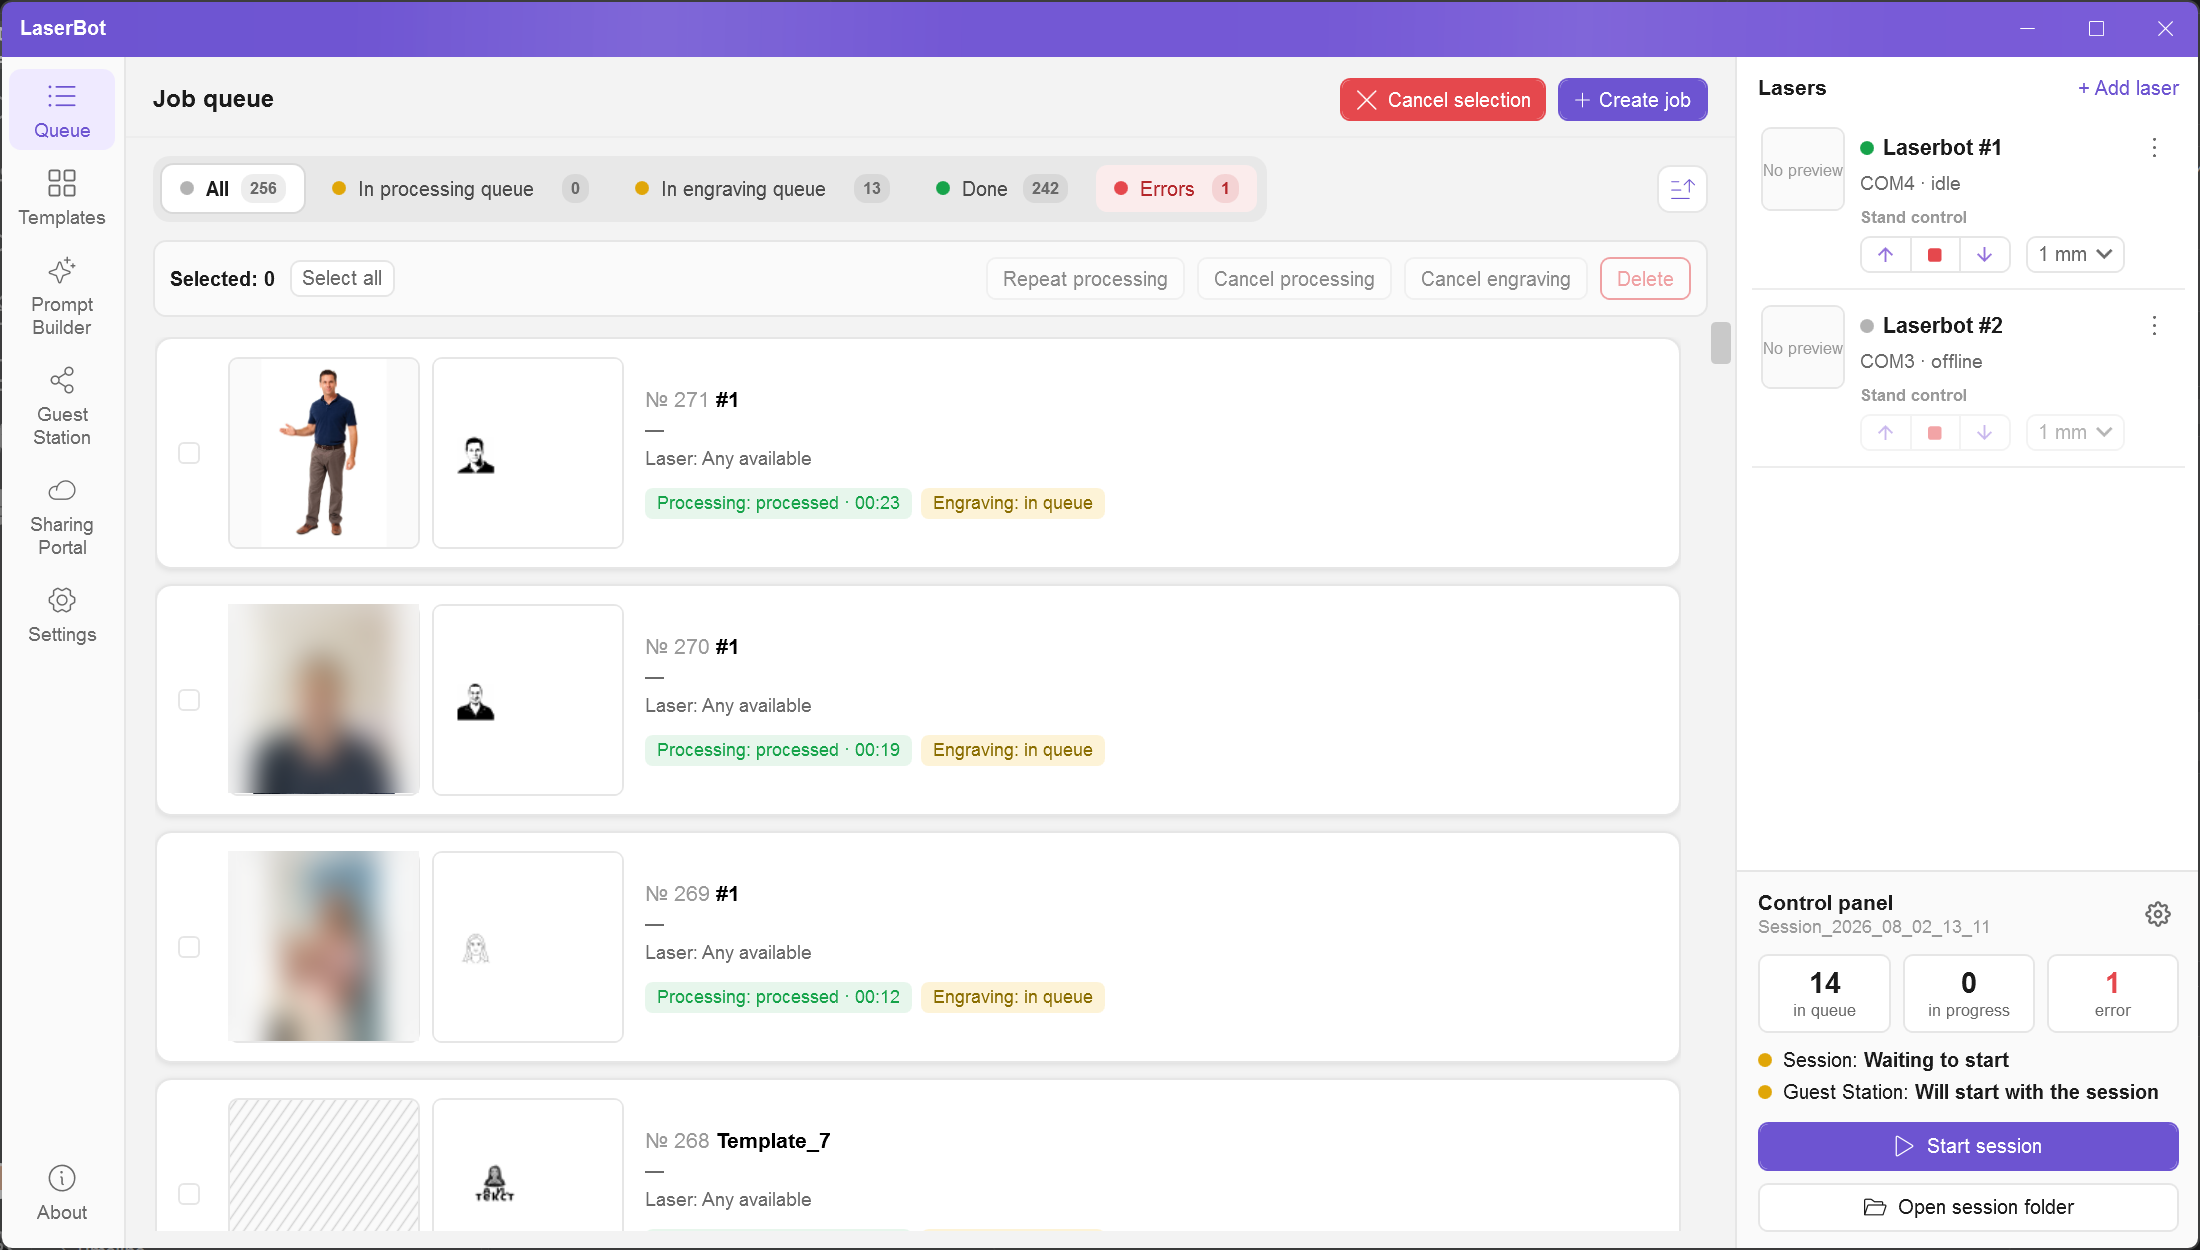
Check jobs (or Select all on the current tab) and apply: Repeat processing, Cancel processing, Cancel engraving, Delete. Deletion is permanent; running engravings are aborted. To exit the mode — Cancel selection.
9. Guest Station and operator page
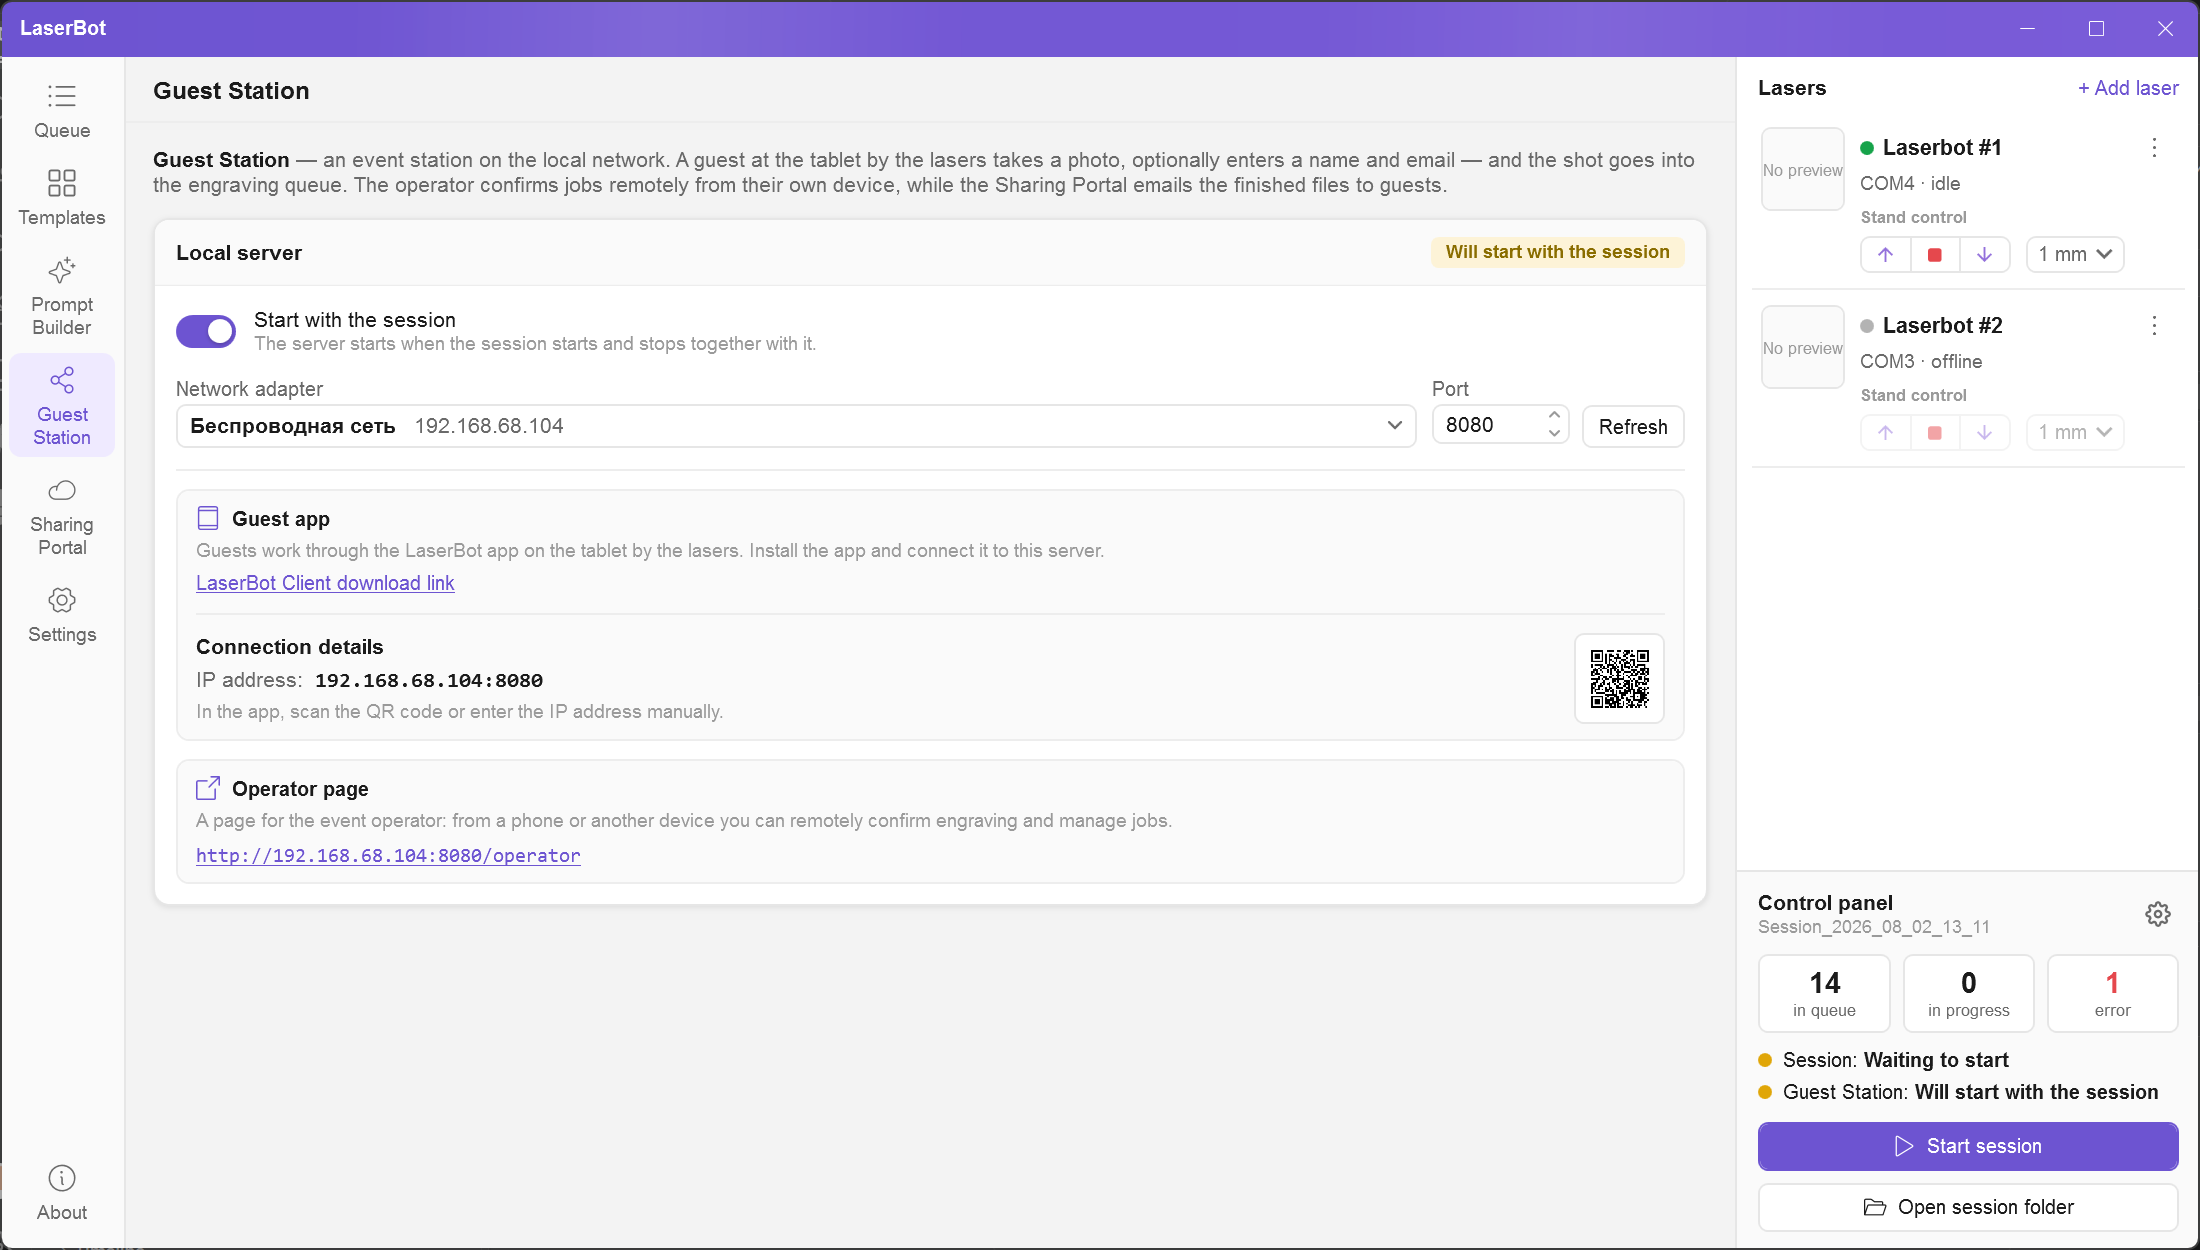
Guest Station is a built-in server on the local network. The guest app on the tablet and the operator page in a phone browser work through it.
Recommended local network: Windows Mobile hotspot
The most reliable option is not to depend on the venue's Wi-Fi, but to share your own network directly from the Laserbot computer. This way the tablet, the operator's phone and the computer are guaranteed to be on the same network without restrictions.
- Press Win + I — Settings opens.
- Go to Network & internet → Mobile hotspot.
- Under Share my Internet connection from, choose which connection to share (Ethernet, Wi-Fi or cellular).
- Set the network name (SSID) and password.
- Turn on the Mobile hotspot toggle.
- Connect the tablet with the guest app and the operator's phone to this network by entering the password.
192.168.137.1.A dedicated router with only the station's devices connected also works well.
Setup
- Connect the computer, the tablet and the operator's phone to the same network — preferably the computer's hotspot or your own router.
- Select the Network adapter — the one the computer uses for that network. The default Port is 8080. The adapter and port can be changed only while the server is stopped.
- Keep Start with the session on — the server starts and stops together with the session.
- Install the Laserbot Client app on the tablet (Laserbot Client download link).
- In the app, scan the QR code from Connection details or enter the IP address with the port manually.
If the app reports a connection error, see The guest app cannot connect.
What the guest sees
The tablet shows templates with "Show in the guest interface" turned on. The guest picks a design, takes a photo, fills in the fields and submits the job. The software shows the notification "Guest Station: new job", and the guest receives the job number and the number of jobs ahead. If the session is stopped, the app reports that jobs are not being accepted.
Operator page
Open the Operator page link http://<IP>:<port>/operator in a phone browser (or scan its QR code from the link menu). The page contains:
- a session status indicator and the Run template and Stop all buttons;
- a laser strip with stand control;
- the queue with the same tabs, search by job number and paging (updates automatically);
- on a job card — the main button for the situation (Start engraving, Item placed — start, Abort, Redo processing, Engrave again), Details and Reject;
- an engraving confirmation window with laser selection and area highlight — as in the app.
Run template — queue a template without a guest photo (for a batch of identical items). Stop all — abort all current engravings.
If the app does not respond for more than 15 seconds, the page shows "No connection to the app". Check that Laserbot is open and the session is running, then click Reload page.
10. Sharing Portal
In Laserbot, the interatouch.app cloud service is used only for guest photo uploads: a guest can send their own photo from their phone instead of taking a selfie on the tablet. No other sharing features are available in Laserbot.
If you don't need guest photo uploads, you can skip this section.
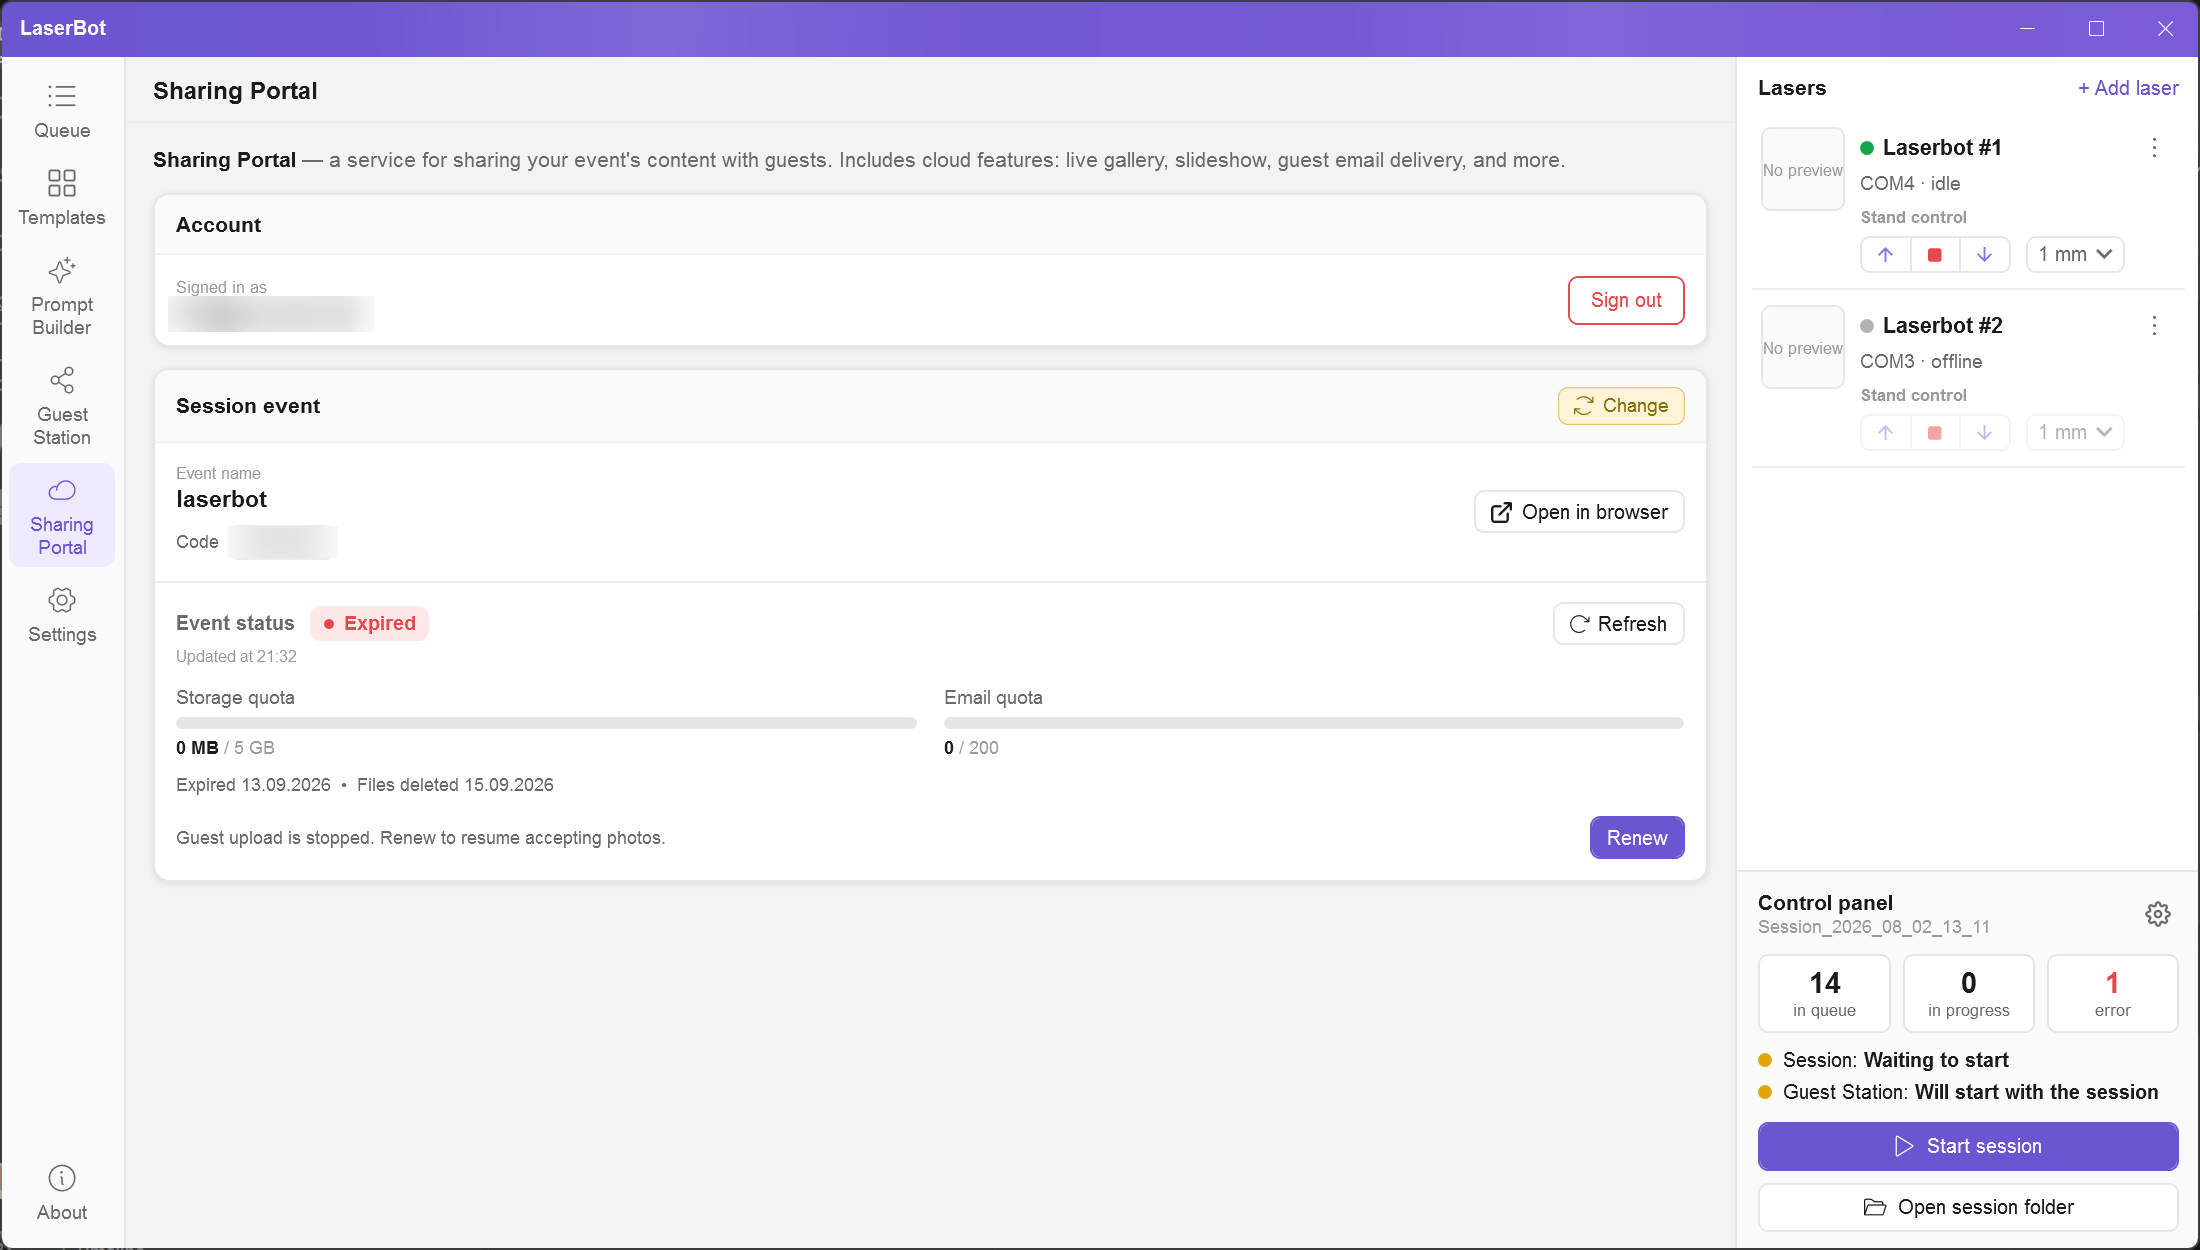
- Connect interatouch.app account — a sign-in page opens in the browser. Sign in and pick an event: the software receives the data automatically.
- In the Session event block, check the name and code. Change — pick another event.
- Check the Event status. If it is "Expired", guest upload is stopped — click Renew.
- In the template, on the Guest photo layer, turn on Allow guest to upload a photo.
The account is shared across all sessions, while the event is bound to each session separately. Sign out disconnects the account and resets the event of the current session.
11. Receipt printing
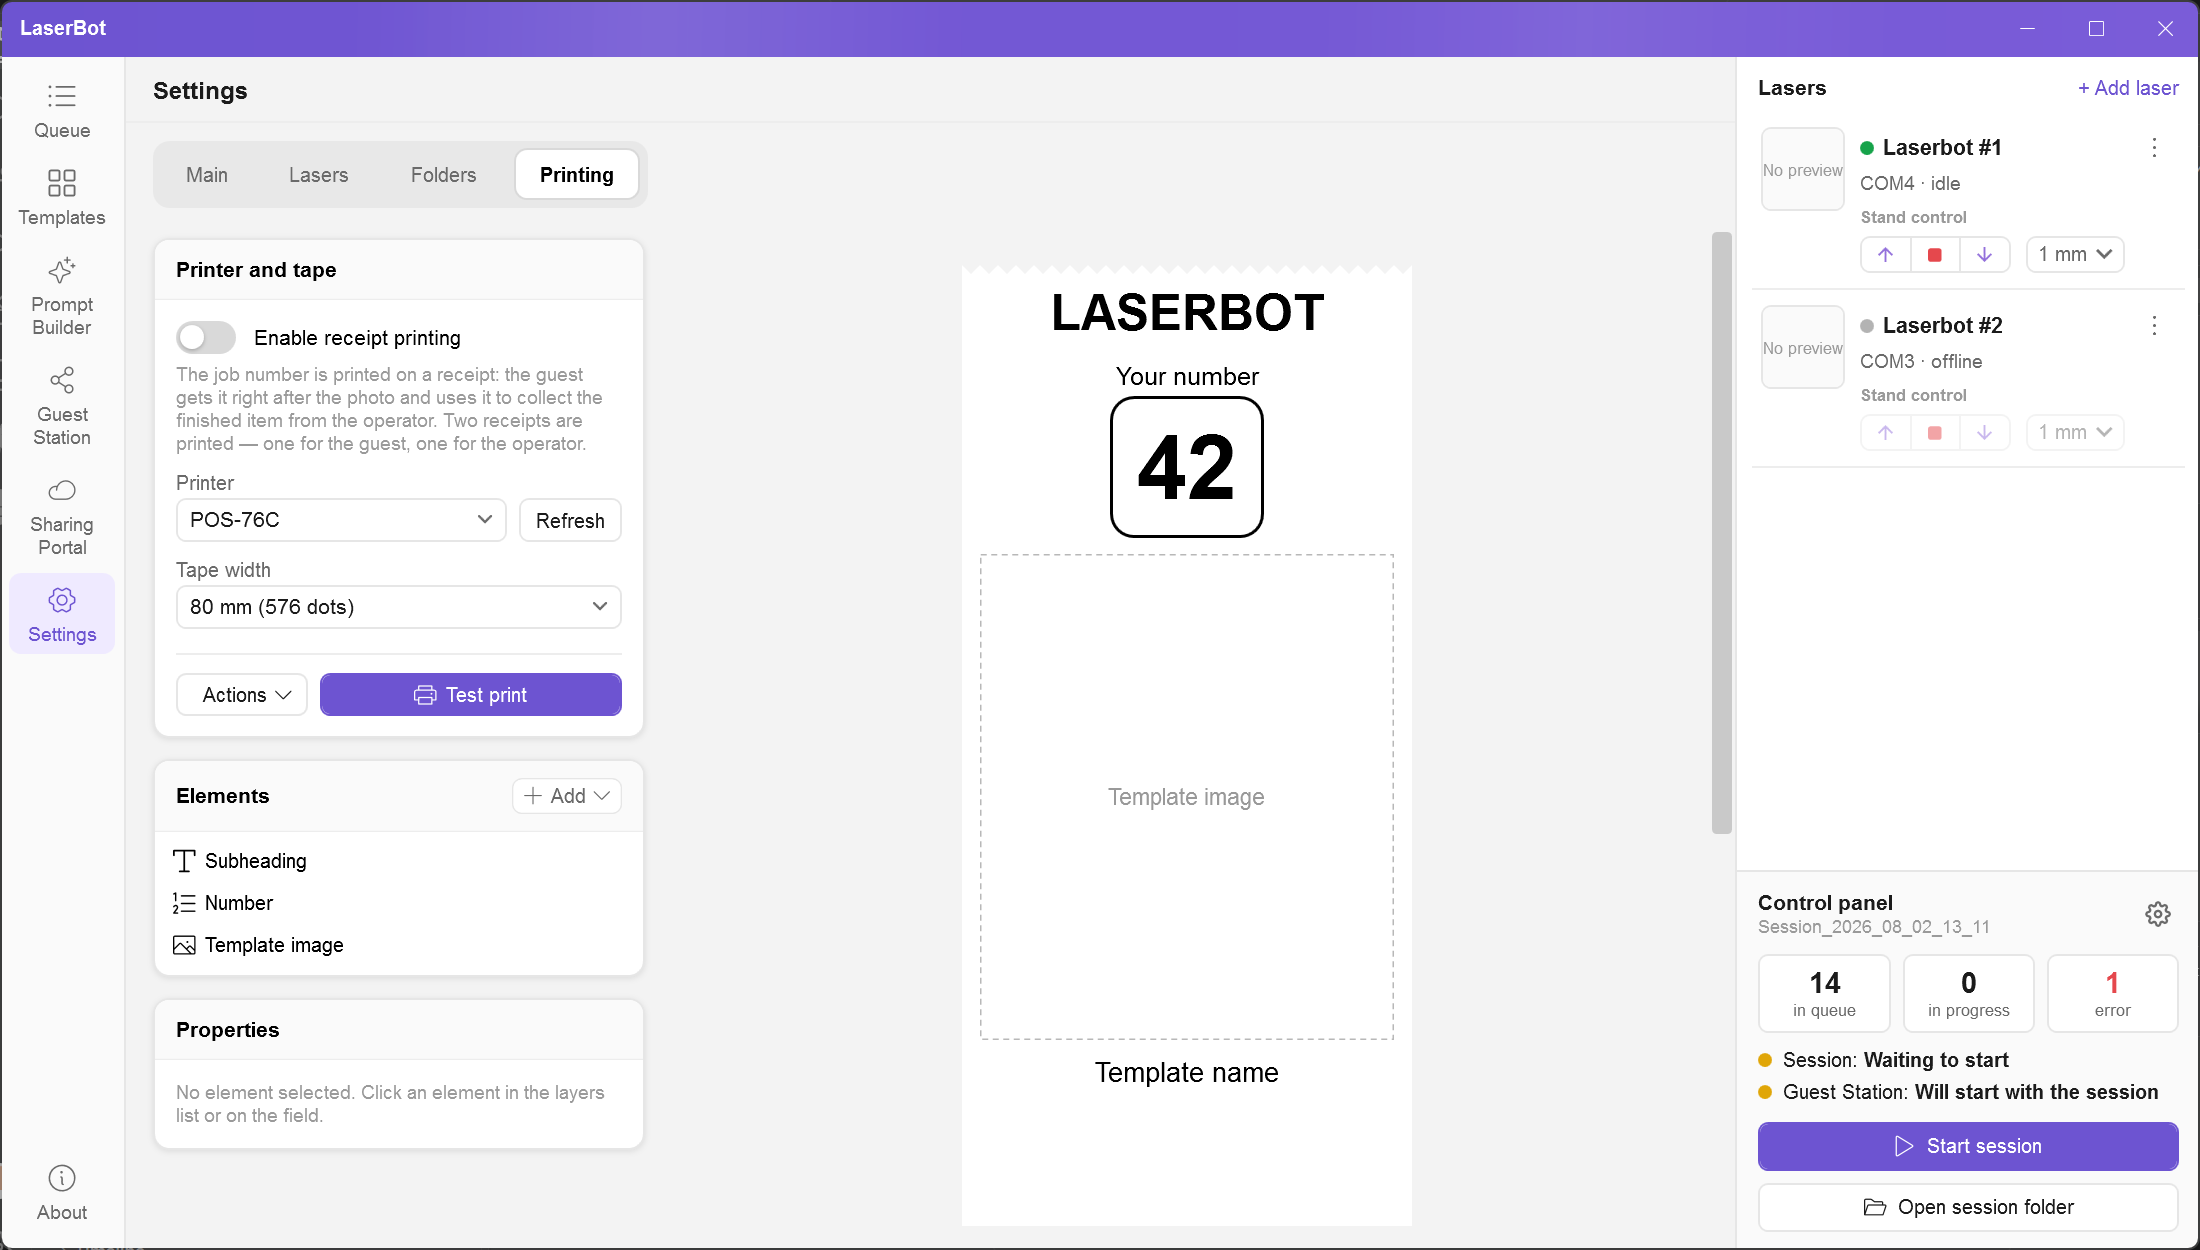
The job number is printed on a receipt: the guest gets it right after the photo and uses it to collect the item. Two receipts are printed for each new job — one for the guest and one for the operator.
Setup
- Connect the receipt printer and install it in Windows.
- Turn on Enable receipt printing and select the Printer (Refresh if it is not in the list).
- Set the Tape width: 80 mm (576 dots), 58 mm (384 dots) or a Custom width in dots — if the print is shifted or cut off.
- Test print — check the result.
Layout
The receipt base: the "LASERBOT" logo, a subheading (default "Your number"), the number in a frame, the template preview and its name. The Add button in the Elements block adds your own text or picture to the guest receipt. They can be dragged and resized directly on the preview. Turn on dithering for photos and turn it off for line-art logos.
Actions menu
- Print preview — how the receipt will look on paper.
- Edit numbering — set the starting number and reset the counter (existing jobs are unchanged).
- Reprint — print a receipt by job number, 1–20 copies.
- Reset template — remove the added elements.
12. Settings
Main
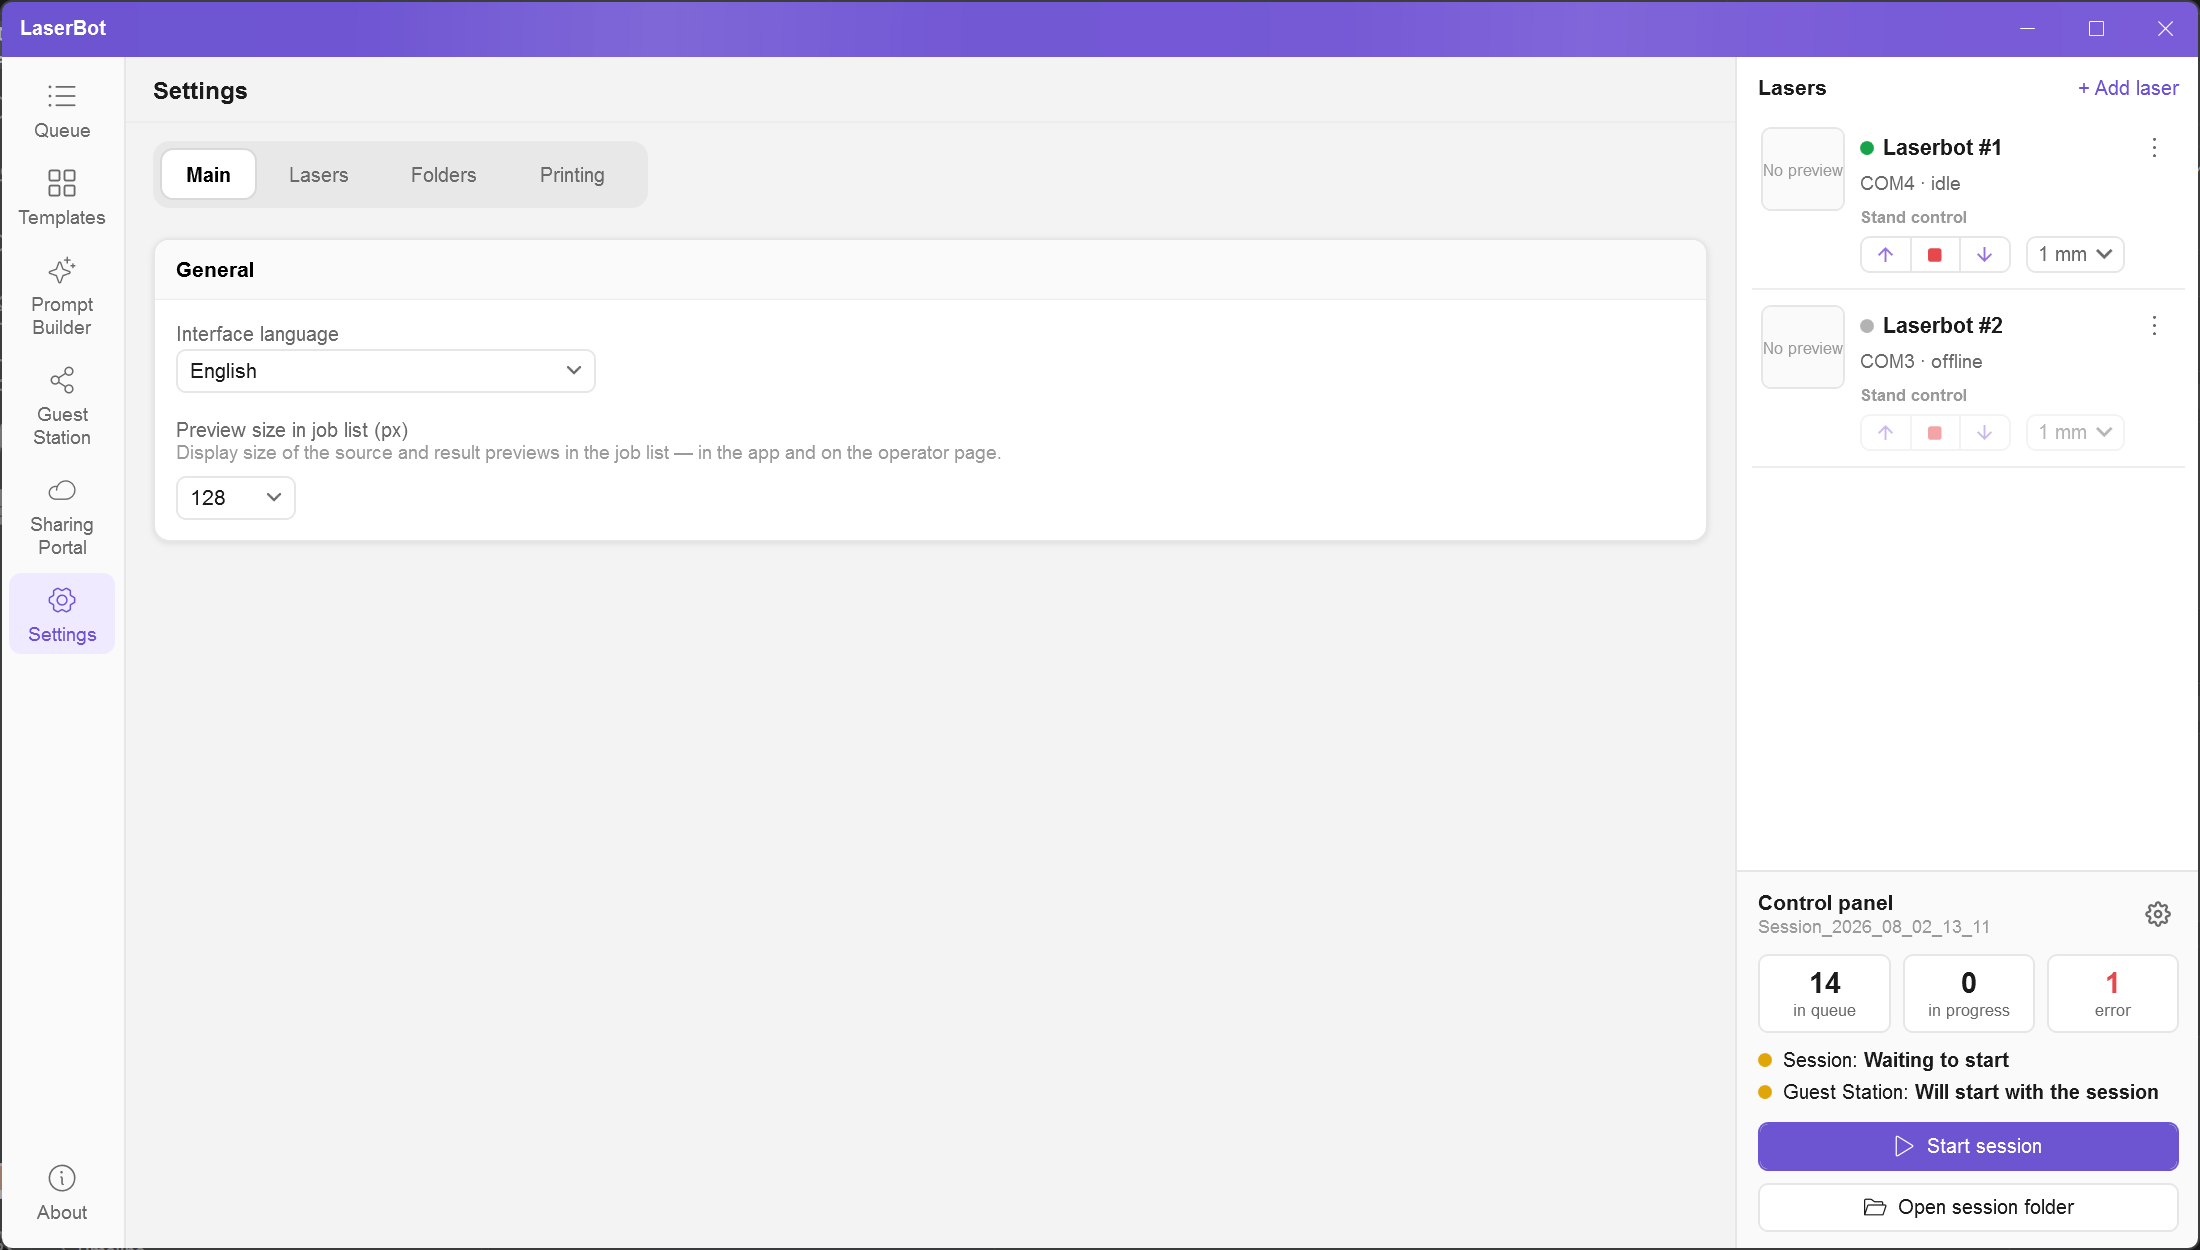
- Interface language — Russian, English, Spanish, Portuguese. Changes immediately, no restart required.
- Preview size in job list (px) — thumbnail size in the app and on the operator page.
Lasers
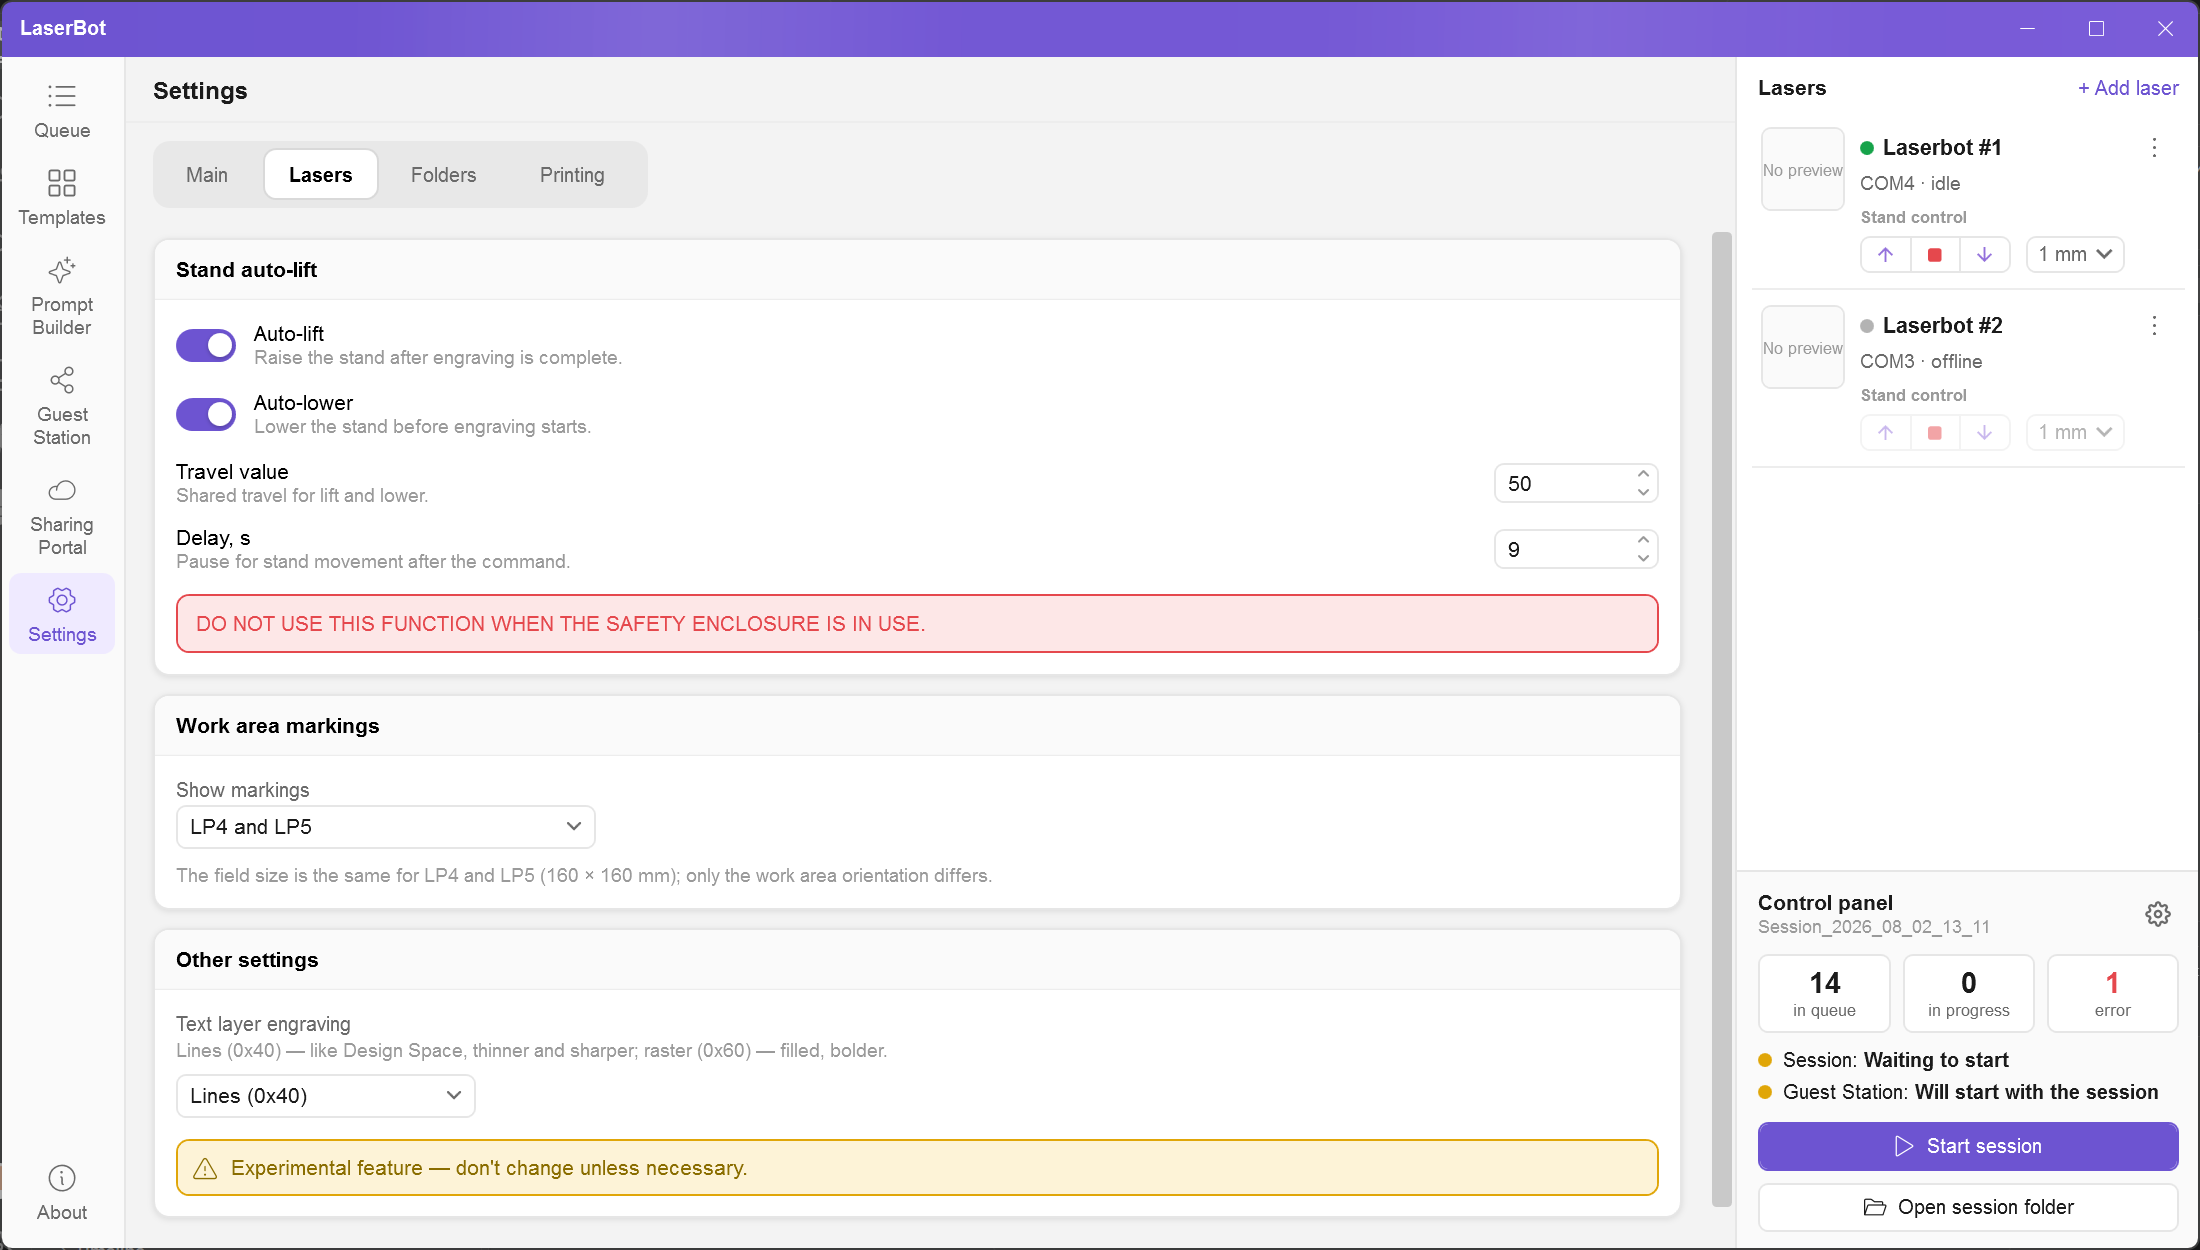
- Auto-lift — raise the stand after a successful engraving.
- Auto-lower — lower the stand before engraving. You must confirm a warning when enabling it.
- Travel value — how far the stand rises and lowers; Delay, s — pause for stand movement.
- Show markings — LP4/LP5 work area frames on the template canvas.
- Text layer engraving — "Lines (0x40)": thinner and sharper; "Raster (0x60)": filled, bolder. Experimental feature — change only if necessary.
Folders
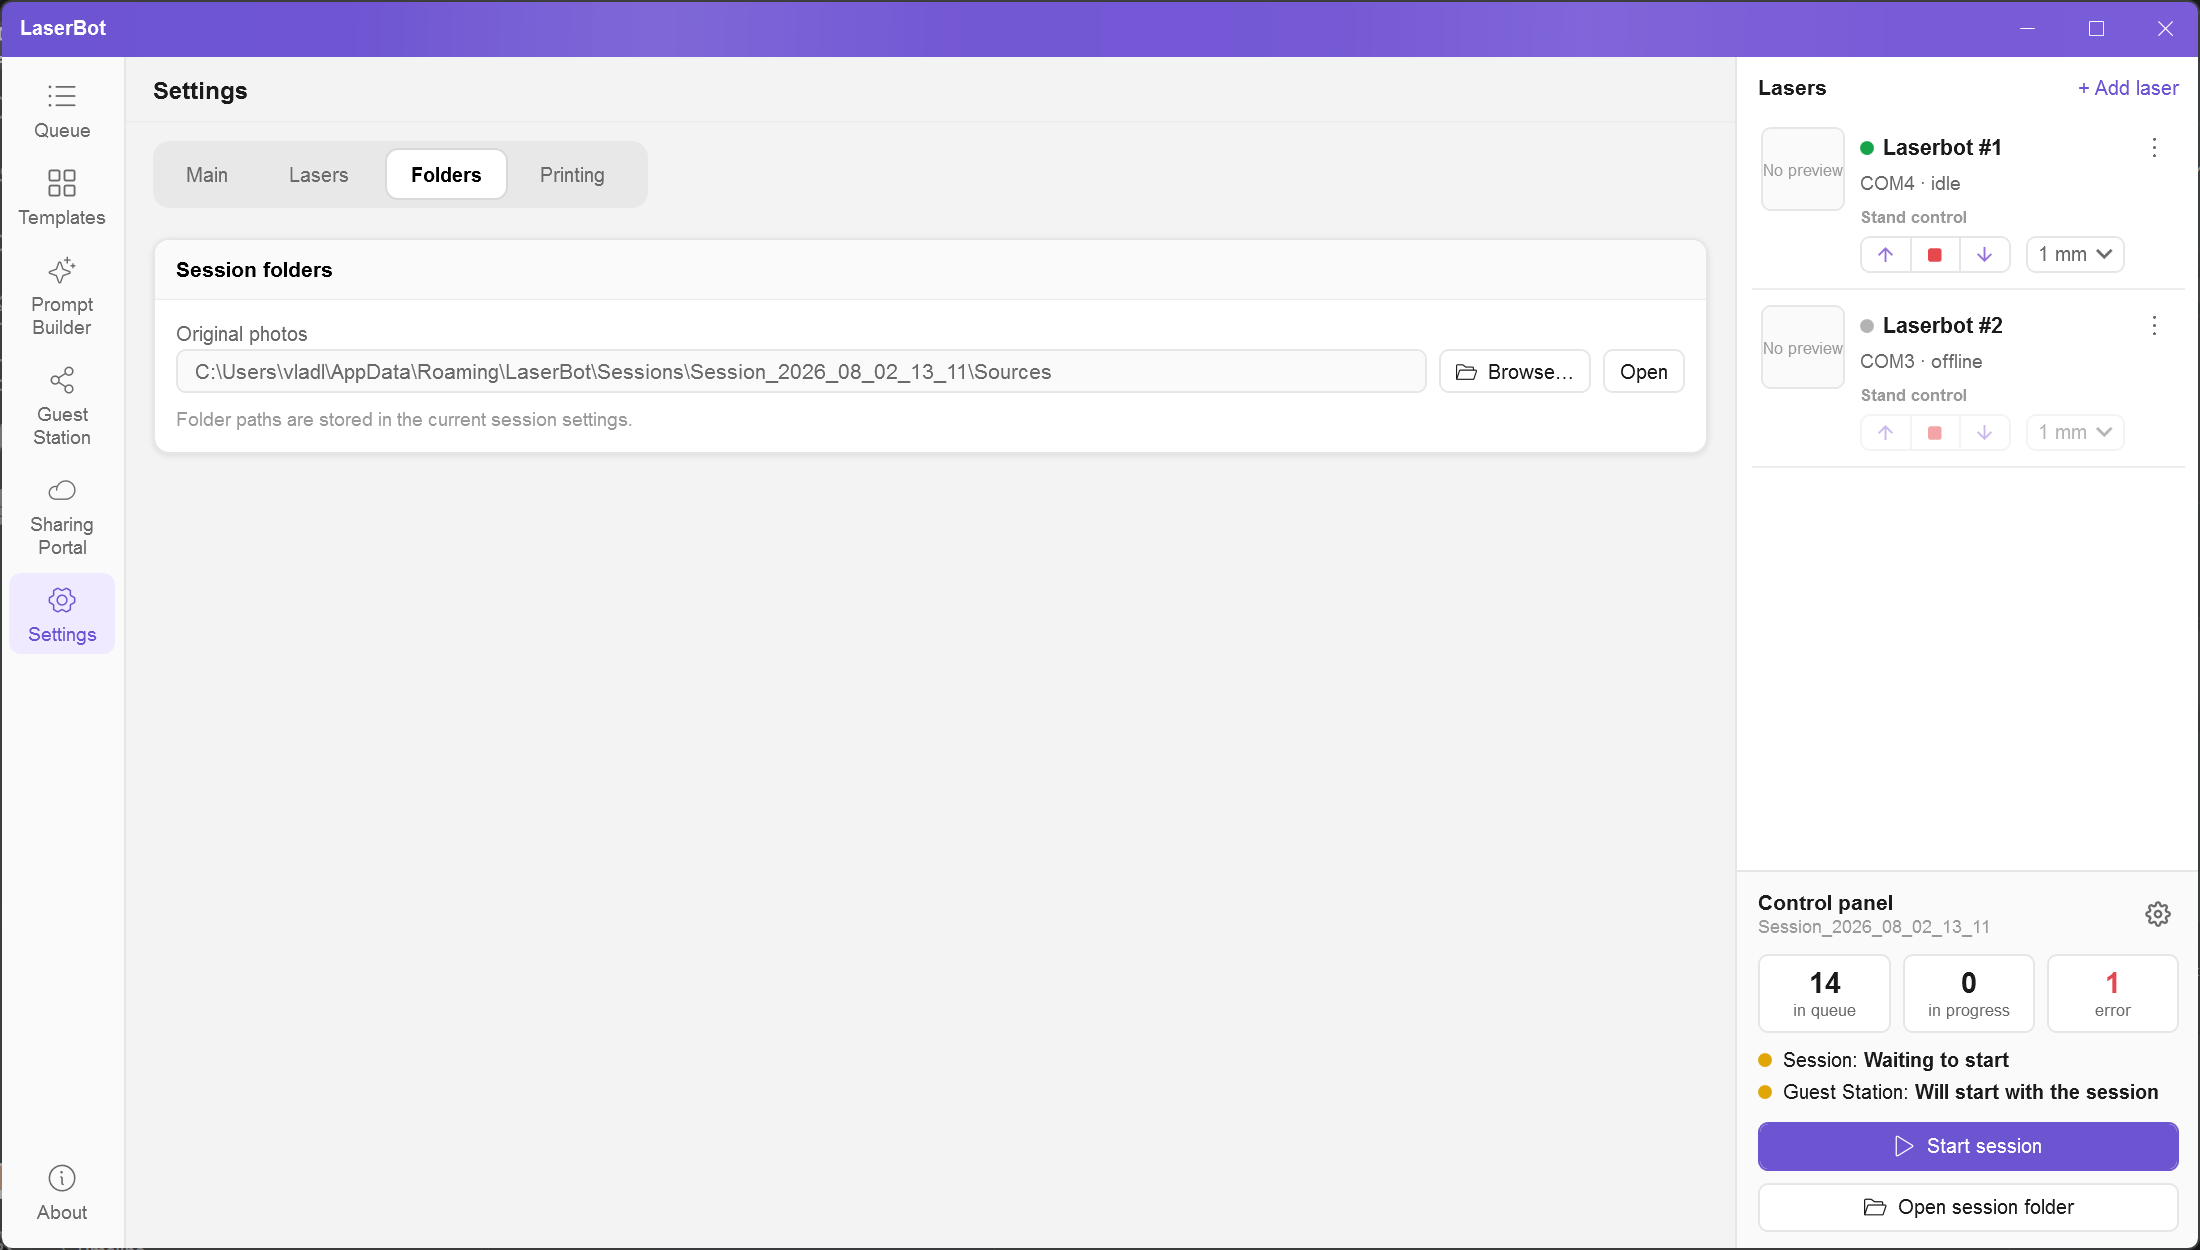
To save originals to, for example, a separate drive, click Browse…. The path is stored in the current session settings.
Printing
See Receipt printing.
13. License and updates
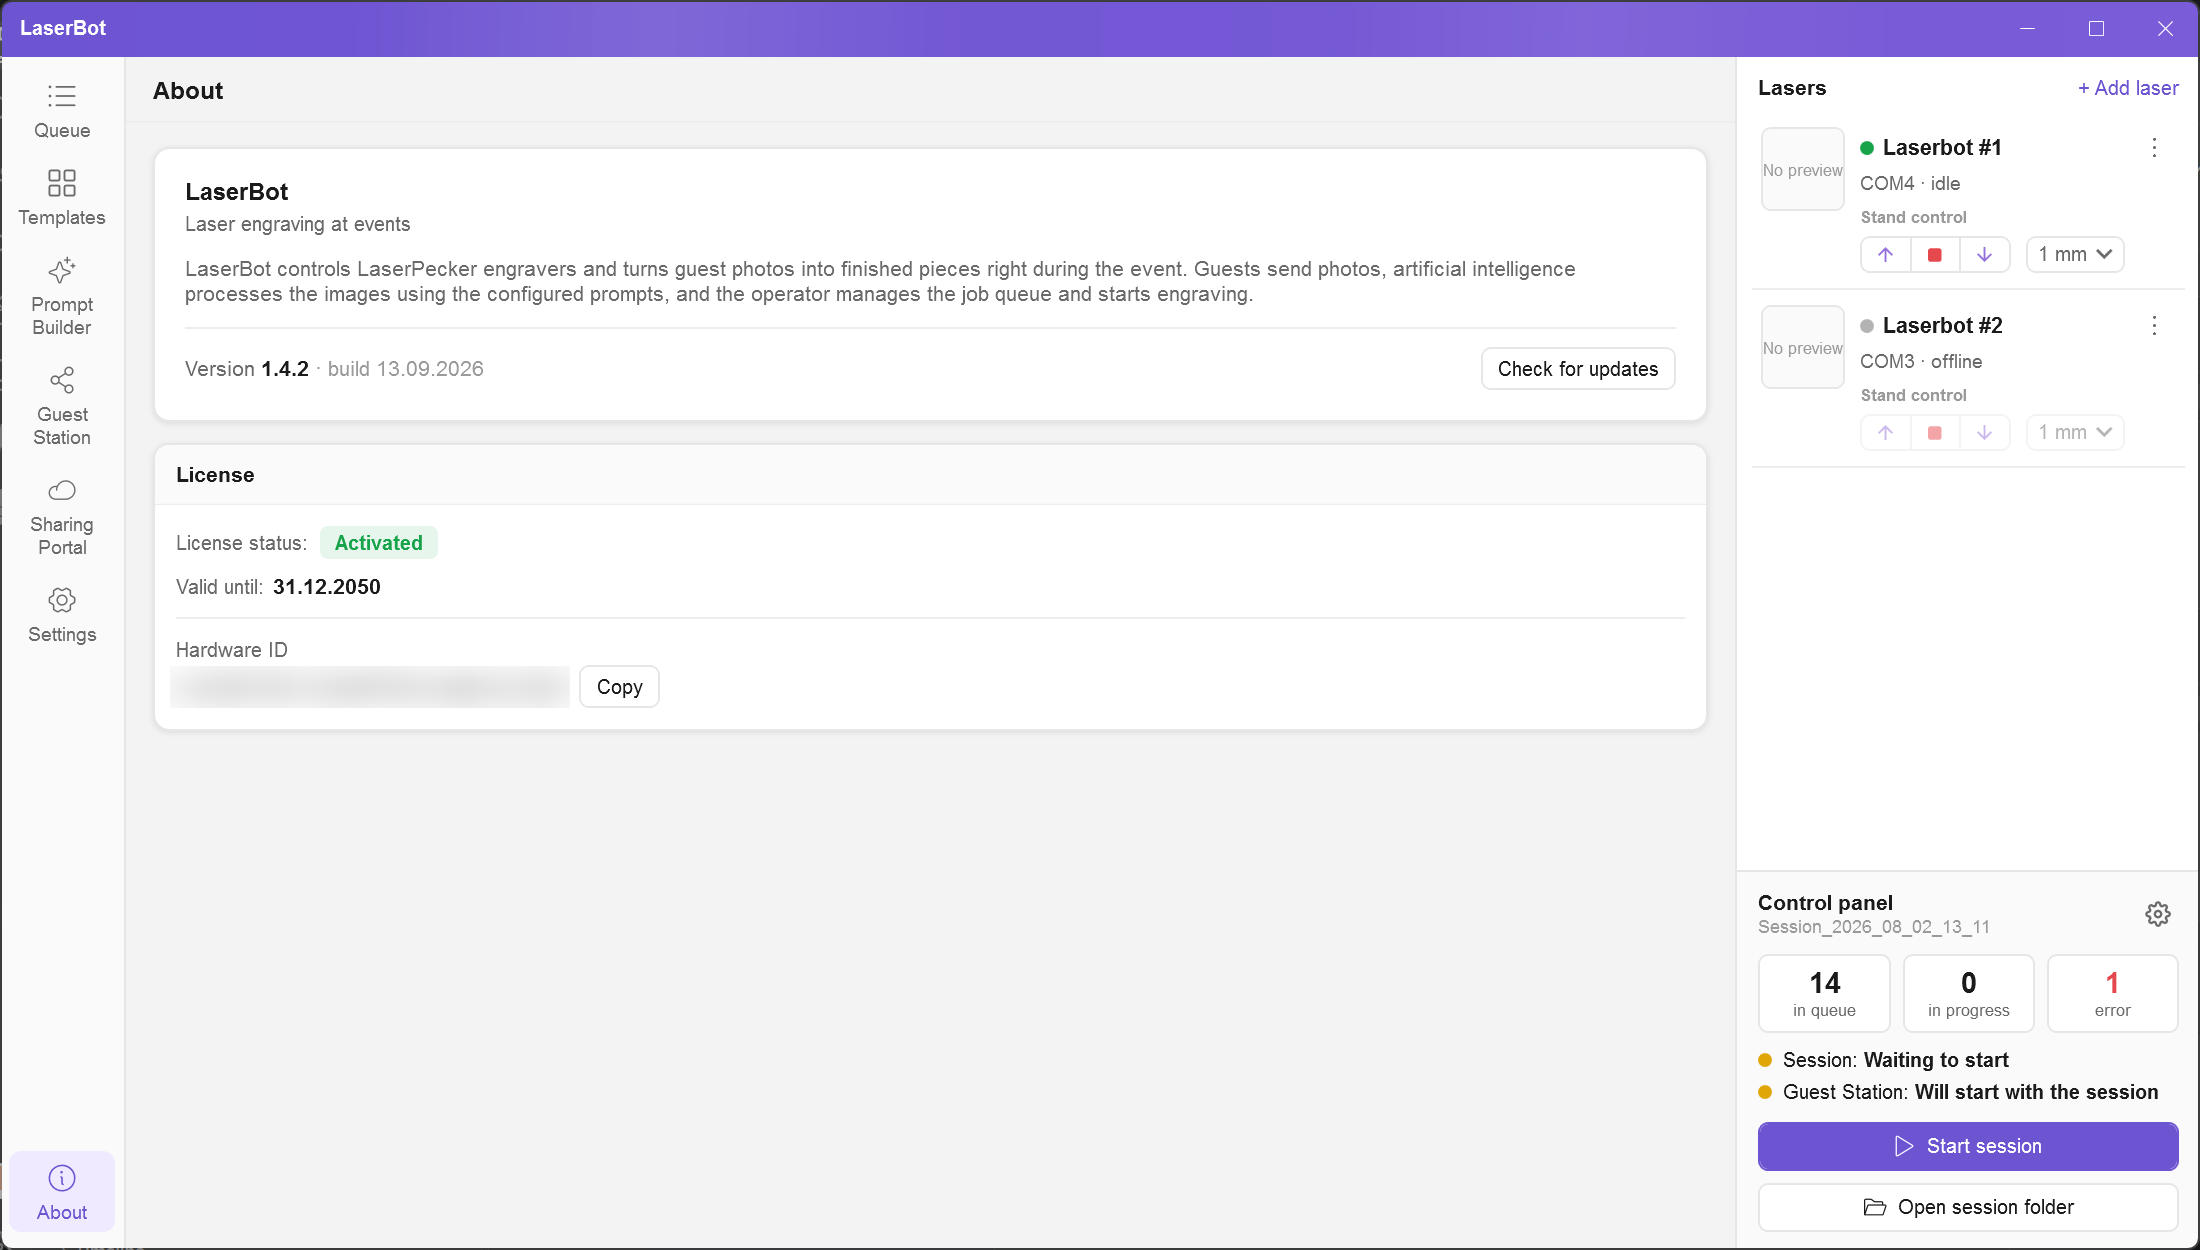
Activation
On first launch the activation window opens:
- Sign up or Sign in at interatouch.app and confirm your email.
- Get a license in your account (Open account — the Hardware ID is filled in automatically).
- Enter the key (32 characters; hyphens, spaces and letter case don't matter) and click Activate.
| Message at startup | What to do |
|---|---|
| Your copy of Laserbot is not activated yet | Complete the activation steps above. |
| Hardware changed | The Hardware ID has changed (hardware replacement, BIOS update). Click Transfer license and activate with the new key. |
| A license for this device was found, but it isn't linked to your interatouch.app account yet | Open linking page, finish linking on the site, then click Check. |
| Update required | The version is out of date — click Update. |
| No connection | Connect to the internet and click Restart. |
Updates
The software reports a new version at startup; to check manually — Check for updates. The update window shows the changelog and size. Click Download, then Install: the software closes, updates and starts again (administrator rights may be required). If the download is slow, choose another Download server.
14. Safety
- Never leave a working laser unattended. If a flame appears, the software shows an alarm, but you must extinguish it immediately and stop the device with the physical emergency stop button. "Abort" and "Stop all" are software commands.
- Before each engraving, check the area with the highlight and make sure the right material is on the selected laser.
- Stand auto-lower is dangerous if the stand was lowered manually and is incompatible with the safety enclosure.
- Stopping a session immediately aborts all running engravings.
- Deleting a session permanently erases its data, including original photos in the default folder.
- The station network must be closed: the operator page is not password-protected.
- API keys give access to paid services. Do not show the provider window to outsiders and do not share settings files.
- Guest photos are personal data. After the event, export what you need and delete the session if you don't need to keep the photos.
15. Troubleshooting
Photo processing
| Message | Solution |
|---|---|
| No API key set for provider… | Prompt Builder → Configure → enter the key. |
| The provider rejected the API key | The key is wrong, revoked or out of funds — check your provider account. |
| No connection to the AI provider | Check the internet and repeat processing. |
| The provider returned an error (code N) / did not return an image | Try again later or switch the model in the prompt. Sometimes the provider rejects specific photos — try another one. |
| The selected AI processing was not found | The prompt was deleted — pick the style again on the Guest photo layer. |
| The job template was not found | The template was deleted or renamed — restore the old name or create the job again. |
| No guest source photo | The original file was deleted or the folder is unavailable. |
| No suitable laser for template… | The template surface type doesn't match the laser: "Cylinder" needs the rotary, "Flat" needs it turned off. |
Laser and engraving
| Message | Solution |
|---|---|
| Failed to open port | The port is used by another program (e.g., LaserPecker Design Space) or the cable is disconnected. Close other programs and reconnect USB. |
| The laser did not respond / stopped responding during engraving | Check the cable and power, wait for the "idle" status and repeat engraving. |
| The laser did not start engraving | Make sure the lid is closed and the device is ready. |
| LP5 security key not inserted | Insert the security key into the device. |
| Protective cover removed / lid or door not closed | Install the enclosure correctly and close all lids. |
| Emergency stop triggered | Release it on the device and try again. |
| Fire detected / fire alarm | Extinguish immediately, inspect the item and the device. |
| Laser error (code N) | Check the indicator on the device and the LaserPecker manual. |
| "Start engraving" button is inactive | Start the session and wait until processing finishes. |
The guest app cannot connect
If the tablet app shows a connection error after you enter the IP address, check in order:
- The session is running in Laserbot, and Guest Station has the adapter of the network the tablet is connected to.
- Same network. The computer and the tablet must be on the same Wi-Fi. A common mistake: the venue has several networks with similar names.
- Wi-Fi connection is not lost. The tablet or the computer may have dropped off the network or reconnected to another one (e.g., cellular data).
- Network profile is "Private". If Windows marks the network as Public, incoming connections are blocked. Open Settings → Network & internet → Wi-Fi (or Ethernet) → connection properties and choose Private network.
- App permissions on the tablet. In the tablet settings, Laserbot Client must have all permissions allowed, including network / local network access (and camera).
- VPN is off. With a VPN turned on on the computer or the tablet, the app cannot connect to the local network.
- Network address. If the computer's IP address starts not with
192.168.but with, for example,172.,10.or another range, it is most likely a corporate or guest network of the venue with restrictions where devices cannot see each other.
Network and operator page
| Problem | Solution |
|---|---|
| Guest Station: could not bind ports | The port is used by another program — set a different one (e.g., 8081) and reconnect the guest app. |
| The template is not shown to the guest | Turn on "Show in the guest interface" in the template. |
| "No connection to the app" on the operator page | Check that the software is open and the session is running, then reload the page. |
Receipts
If a receipt does not print, check that printing is enabled, a printer is selected and it is visible in Windows. If the print is shifted or cut off, set a custom tape width in dots (some 80 mm printers print 512 dots).